The Palisades
Palisades Trip Reports
The Crystal Range
Crystal Range Trip Reports
John Muir Wilderness
John Muir Wilderness Trip Reports
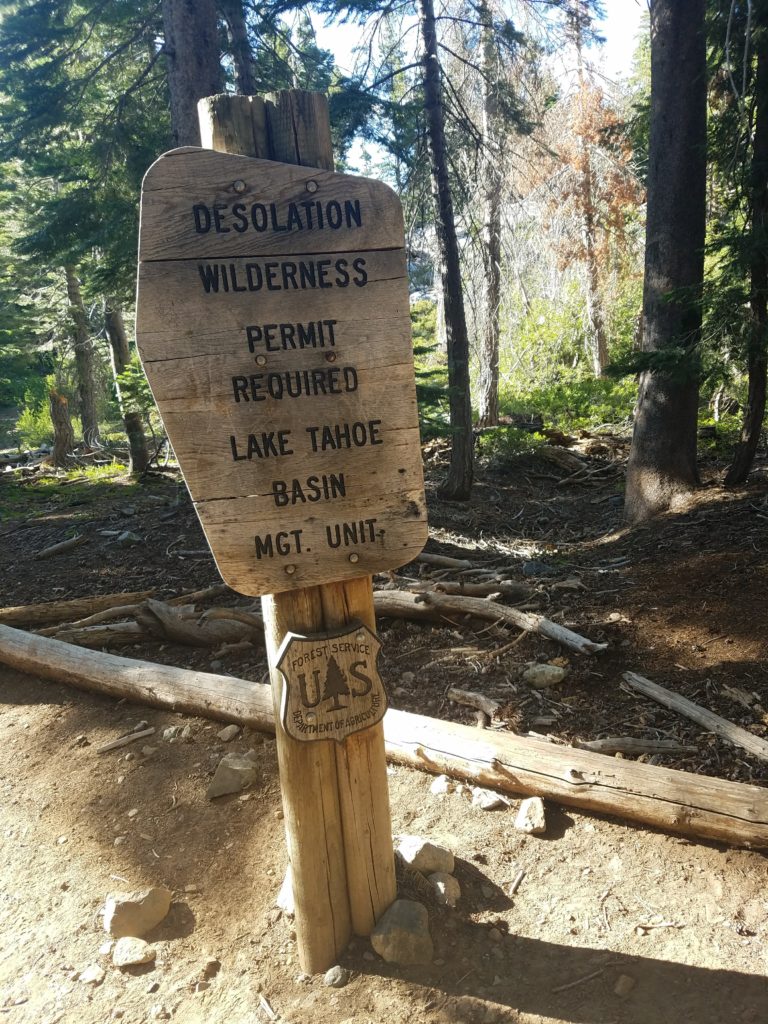
Desolation Wilderness
Desolation Wilderness Trip Reports
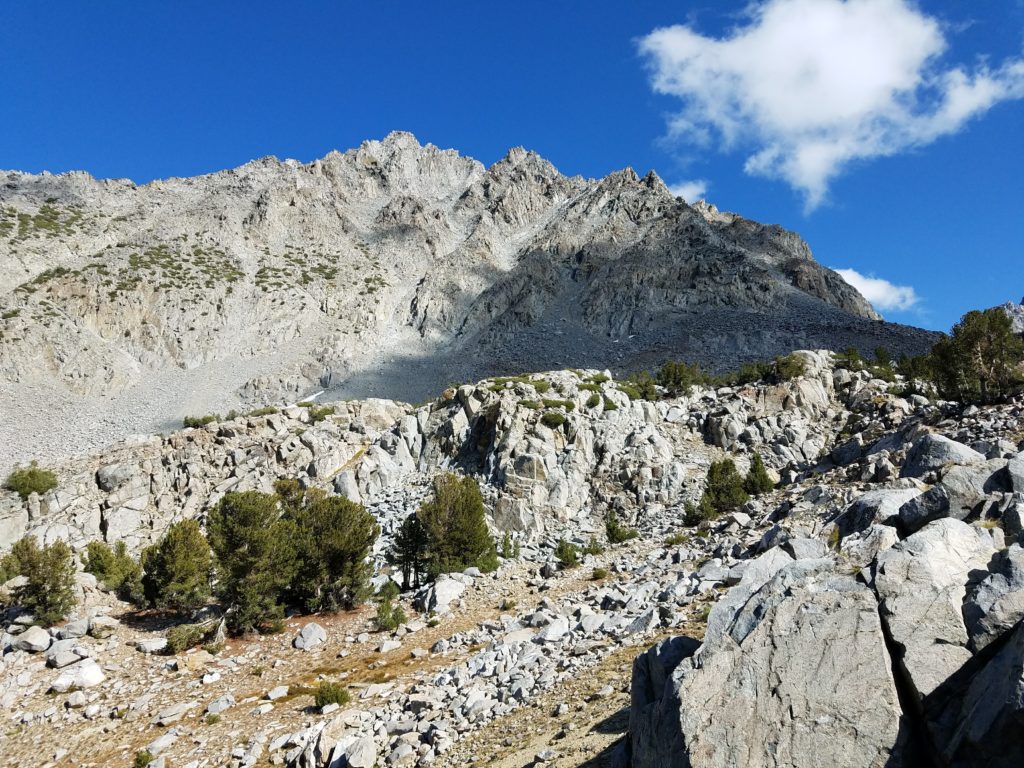
Hiking Dick’s Peak and Jack’s Peak

Result: Summited Dick’s Peak and Jack’s Peak
Class: 2
The Plan
On Tuesday, I hoped to climb Dick’s Peak and Jack’s Peak. If all went well, I planned on climbing down Jack’s Peak to Desolation Valley and venturing to Jabu Lake, too. More on this later, but any such plan should reverse the order: Jabu to Desolation Valley then up to Jack’s Peak and across to Dick’s Peak.
These peaks would bring me closer to climbing the 7 tallest Crystal Range and Desolation Wilderness peaks over the course of 2 long day-hikes and 1 afternoon jaunt to Mt. Tallac. High hopes for my week vacation at Fallen Leaf Lake.
I would fall two peaks short – I cut Pyramid Peak and Mt. Ralston from my plans – but hit 5 of the tallest 7 (besides these two, Mt. Tallac, Mt. Price, and Mt. Agassiz) and 3 subsidiary peaks (Echo Peak, Angora Peak, and Indian Rock) as well. (Okay, technically 2 minor peaks and 1 subordinate peak of Angora.)
Glen Alpine Trail
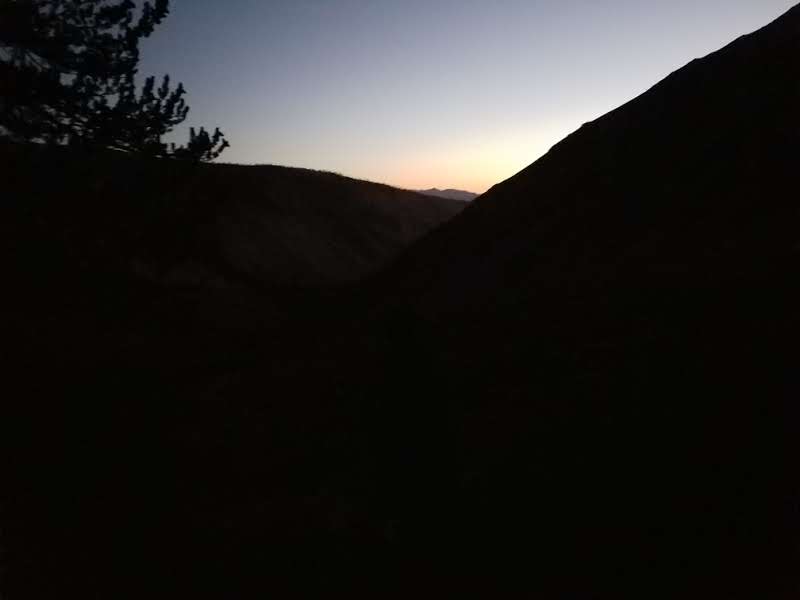
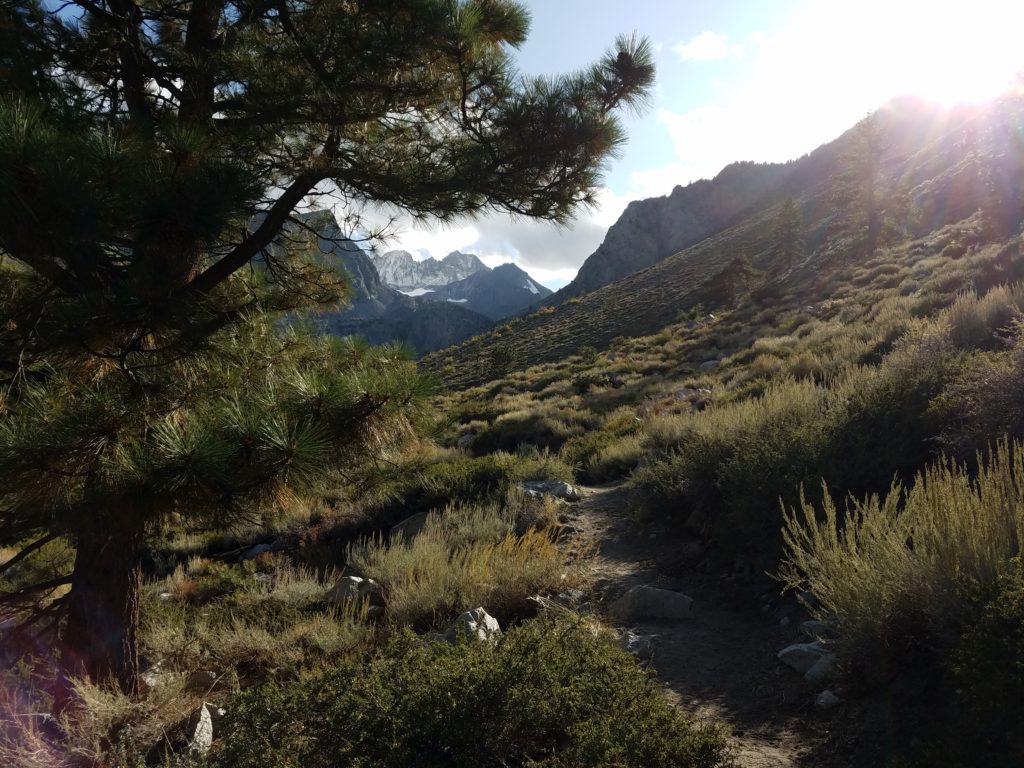
It’s very easy to reach Dick’s Pass. Starting between 8:45 and 9, I took the Glen Alpine Trailhead at Lily Lake (walking there from Fallen Leaf). As I’ve written elsewhere, Glen Alpine is an incredibly easy trail that meanders along the Glen Alpine creek, which feeds Fallen Leaf Lake from the backcountry snow melt, and slowly gains elevation.
I’ve been there too many times to find it scenic, and thus always rush along the trail. After a few miles, the trail splits to Gilmore Lake on the right, and to the PCT and Dick’s Pass on the left. It takes 3-4 miles to reach this point with only 2,000 feet of elevation gain. I got here in a little more than an hour.
Junction with the PCT
Naturally enough, take the PCT to Dick’s Pass. Reluctantly, I declined to take the brief detour to Gilmore Lake. Gilmore is one of the most beautiful lakes in Desolation Wilderness, in my opinion bested only by Lake of the Woods.
I paused just after the junction to eat a snack. A few minutes before I had passed two folks backpacking from the Echo Lakes to Truckee. Their packs looked heavy and they accordingly moved slowly, but were enjoying each others’ companies. I’ve always wondered whether I would have enough conversation to sustain multiple days of hiking with someone.
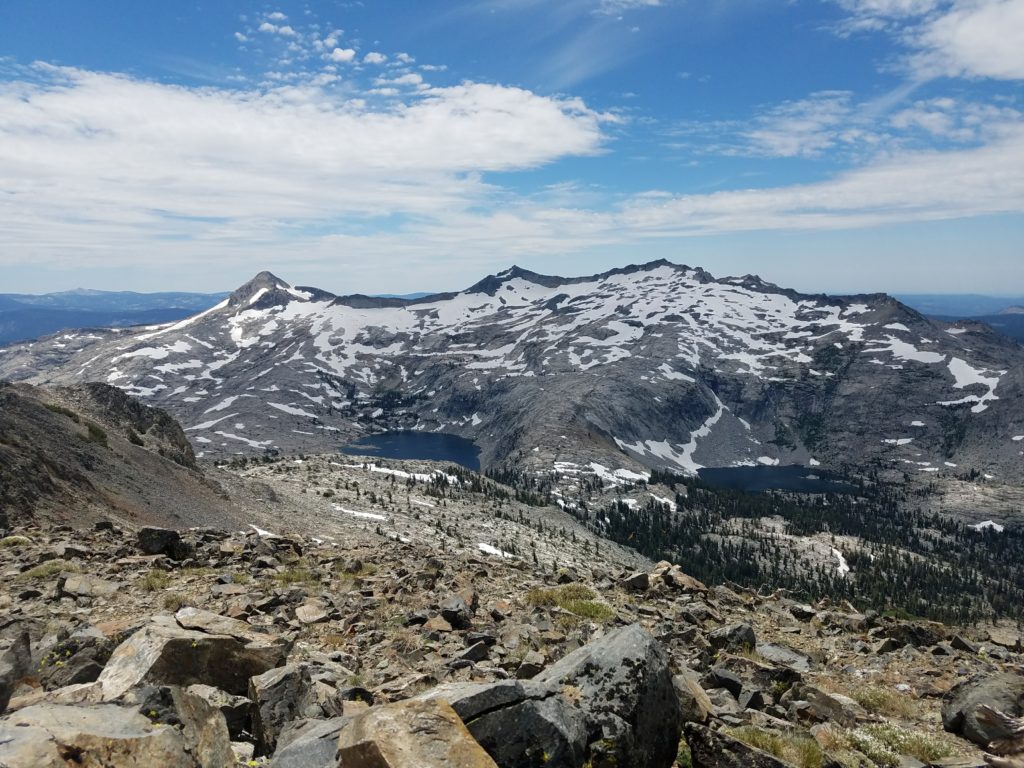
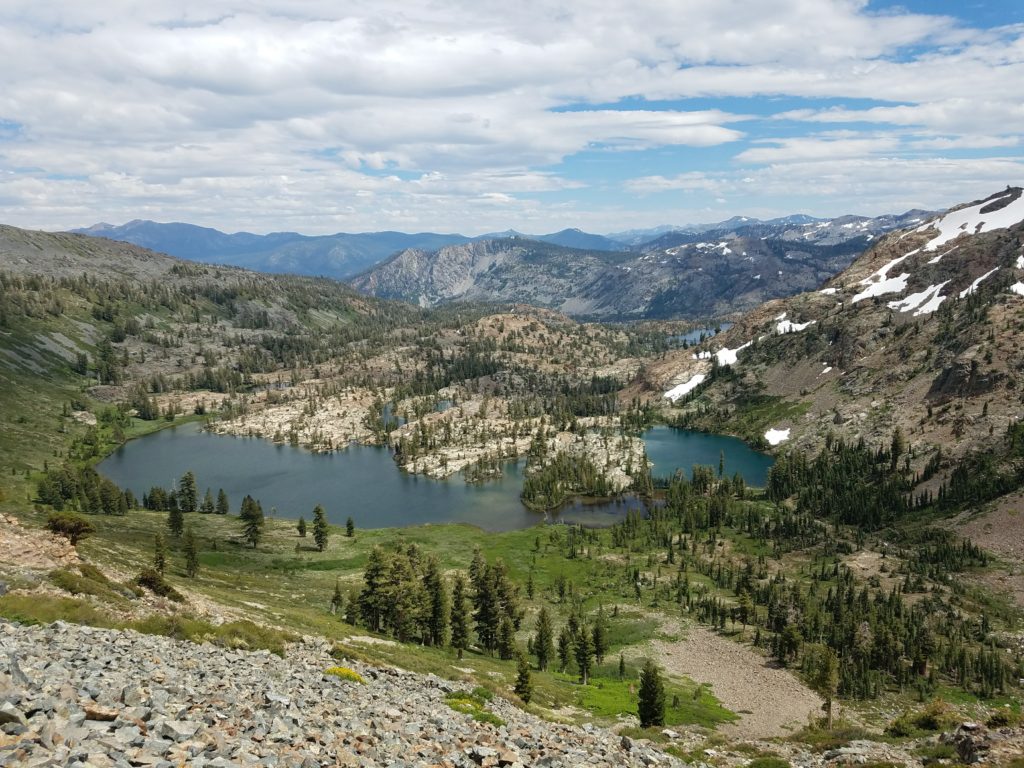
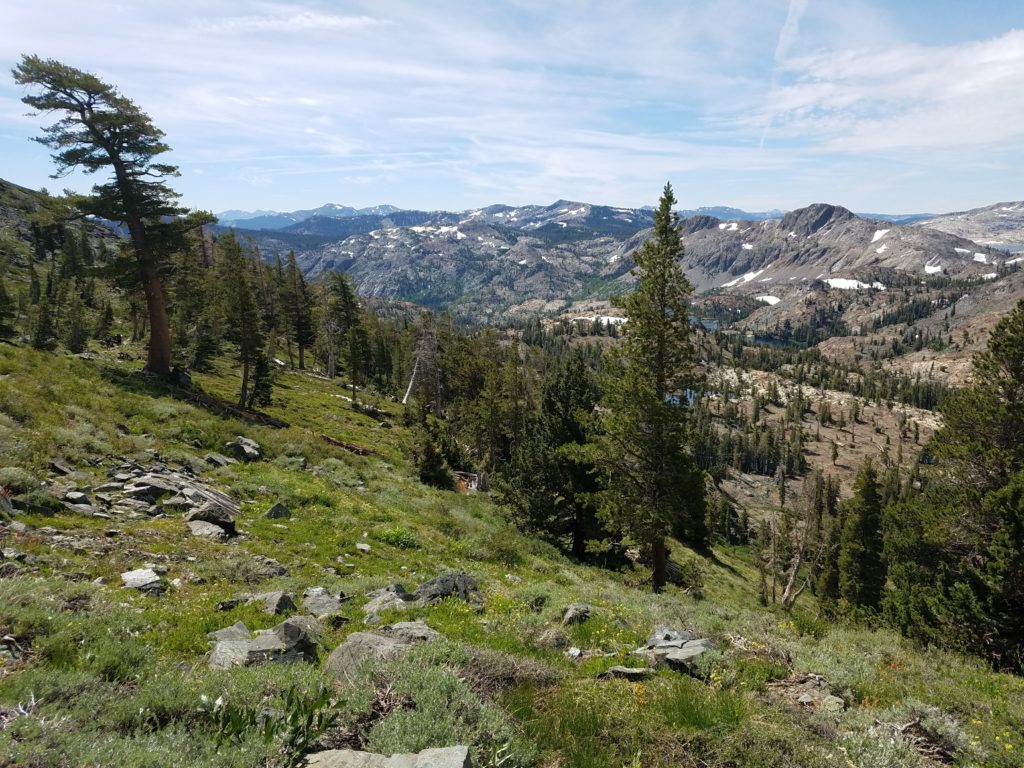
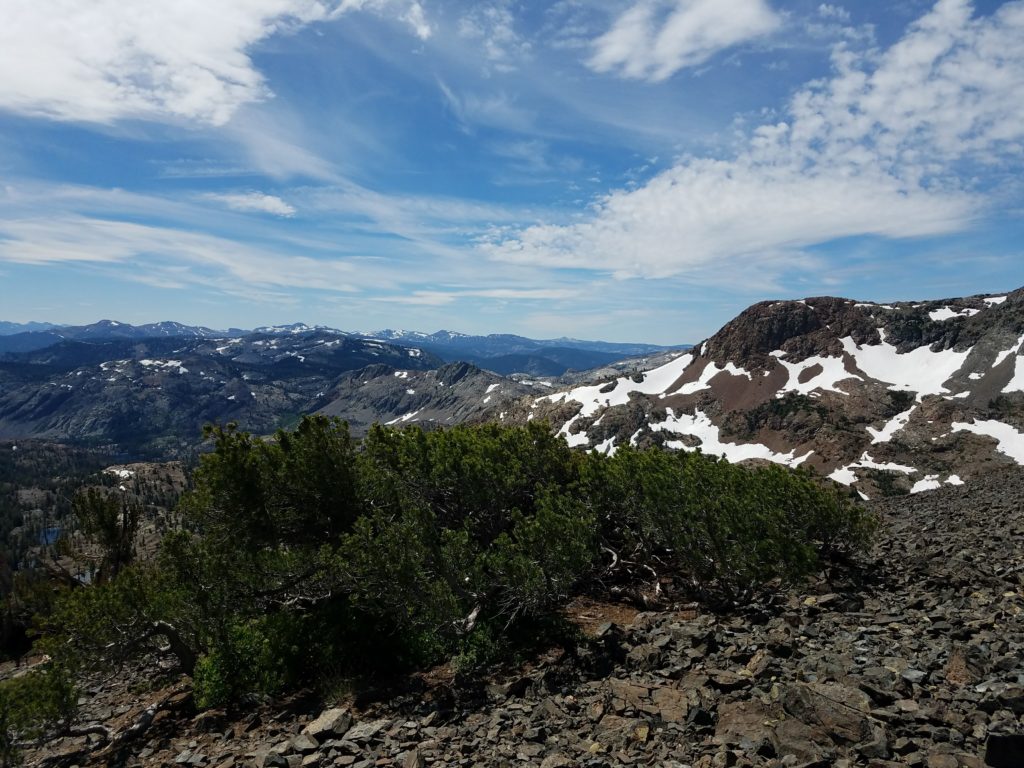
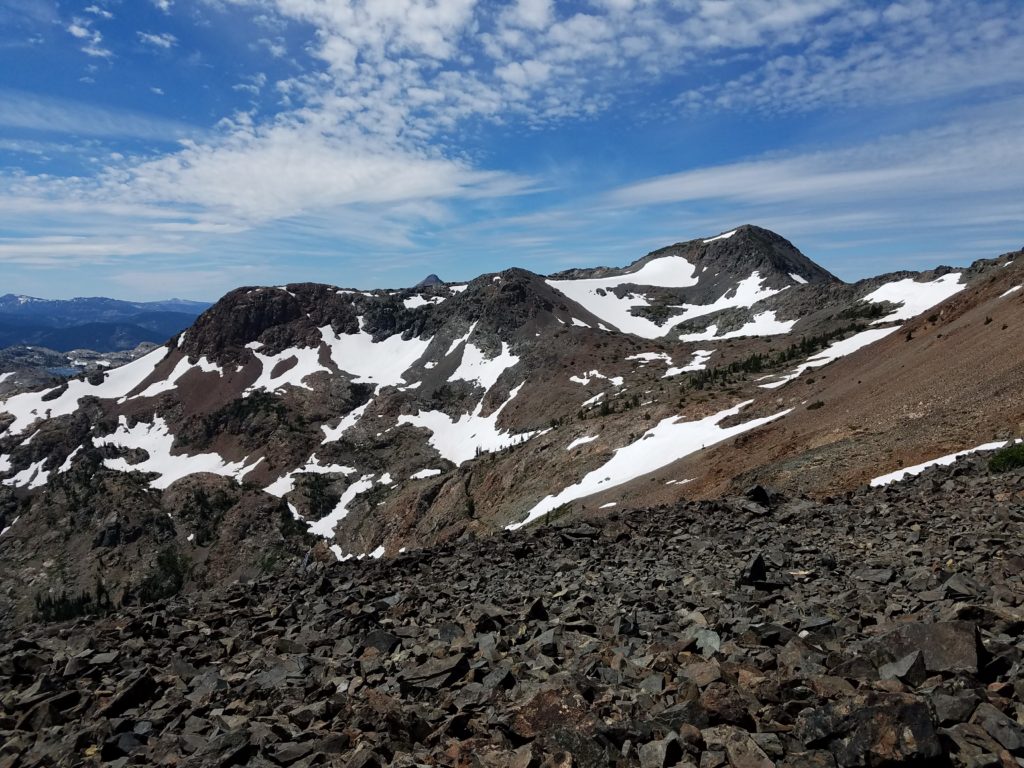
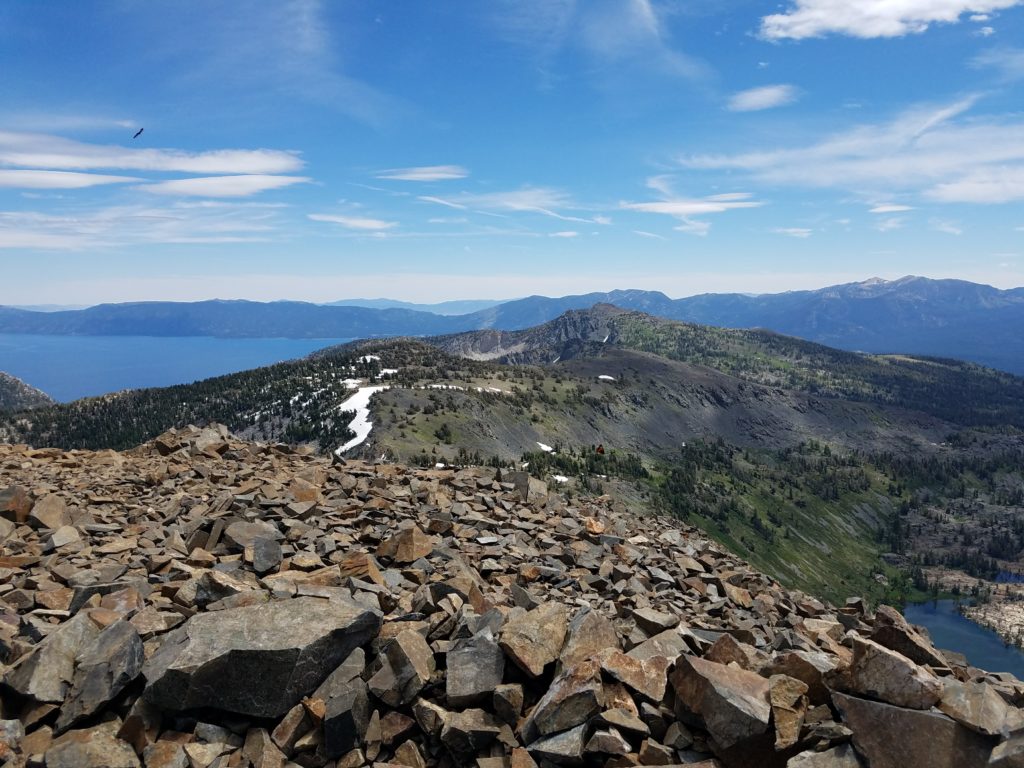
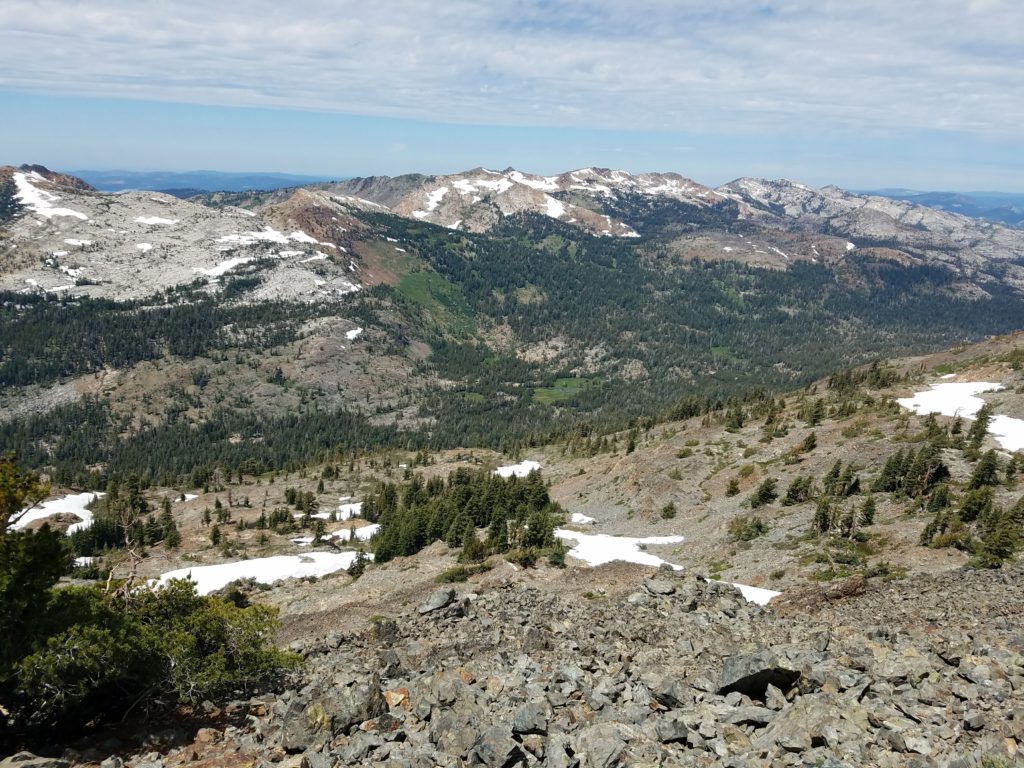
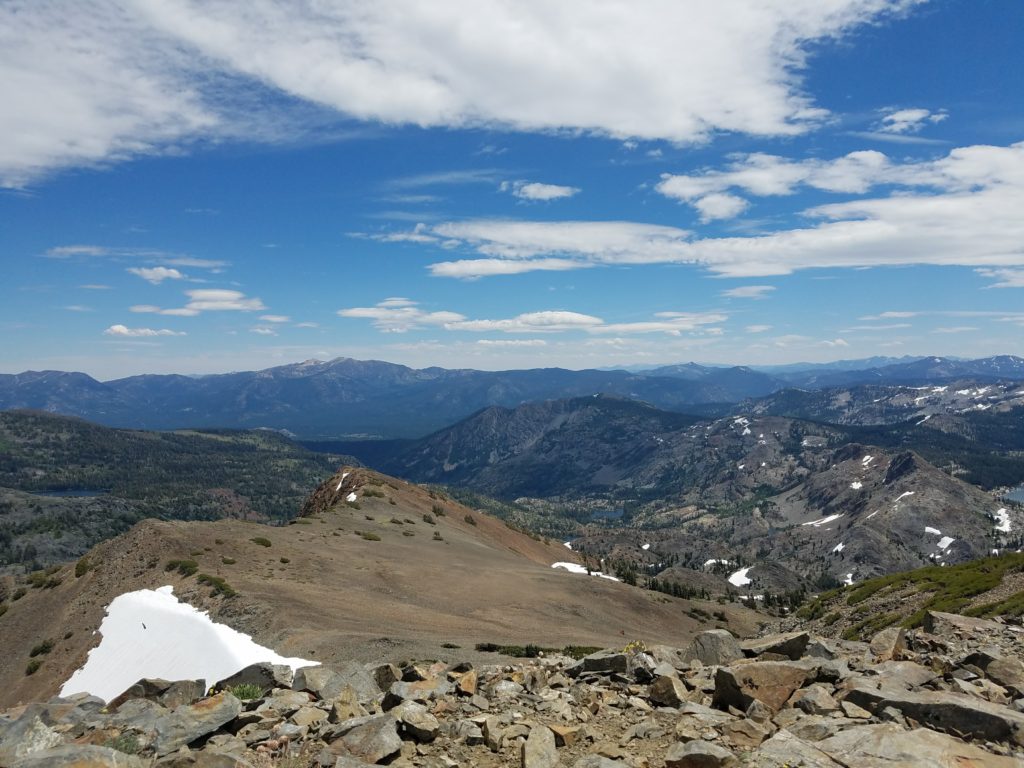
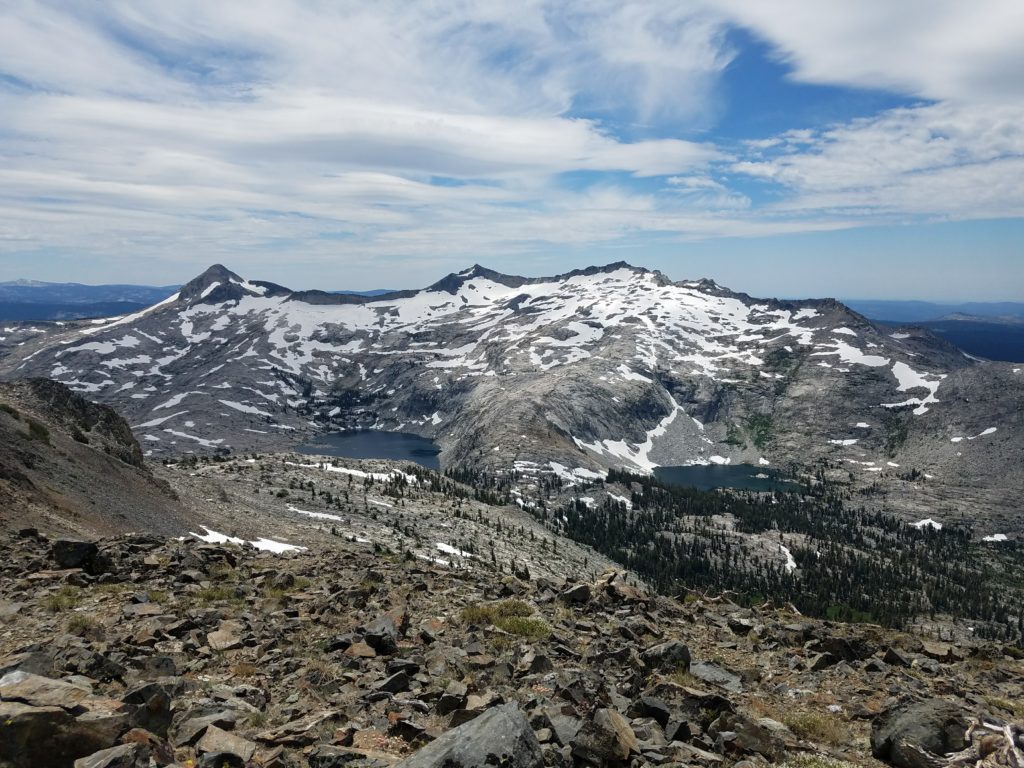
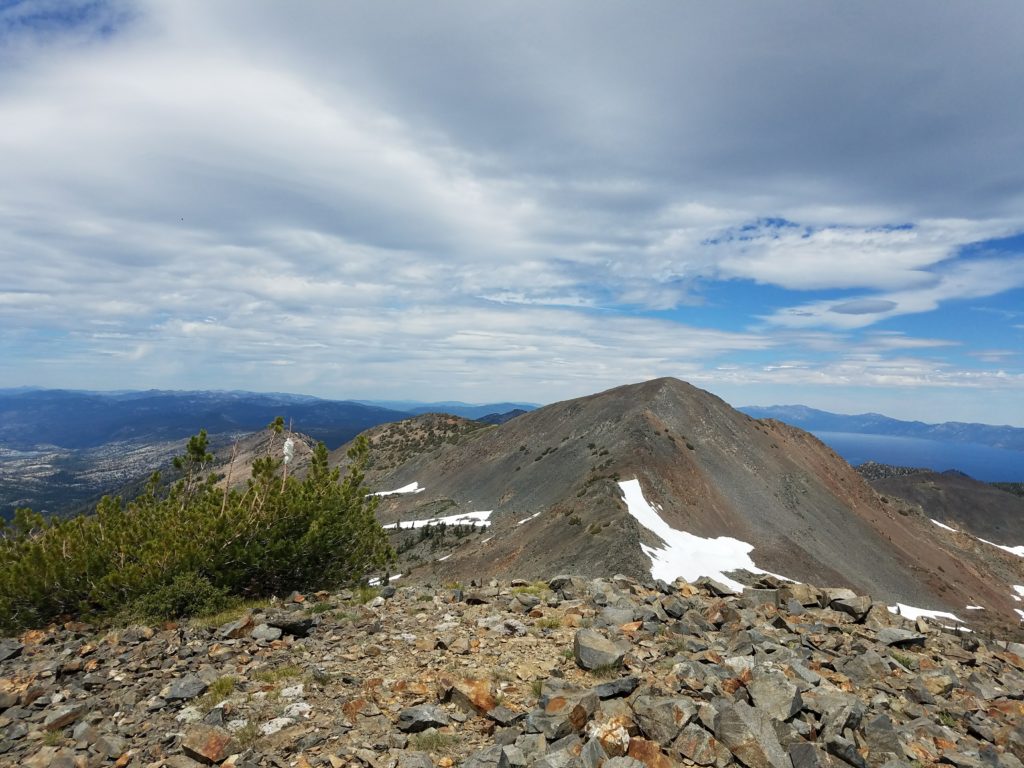
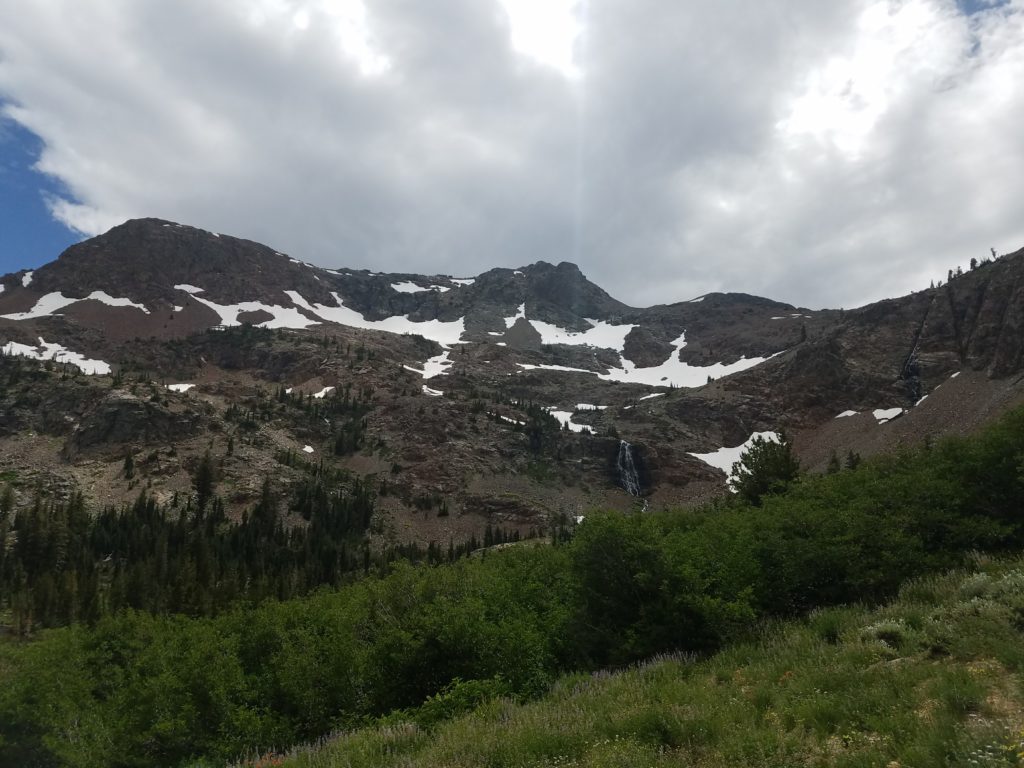
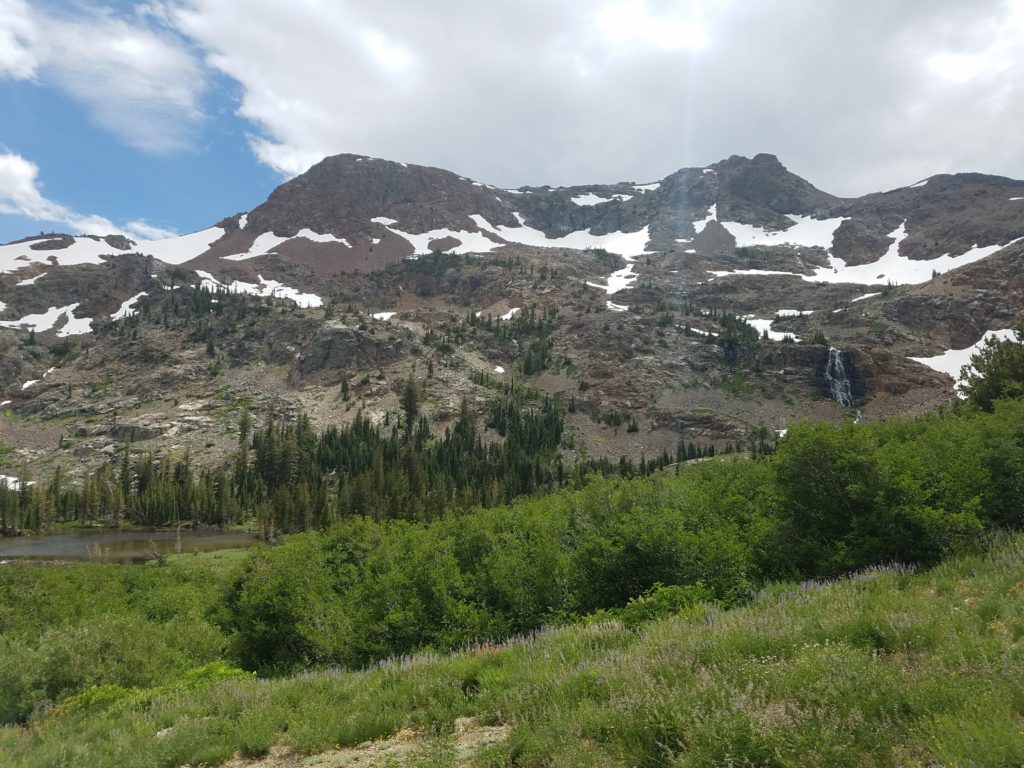
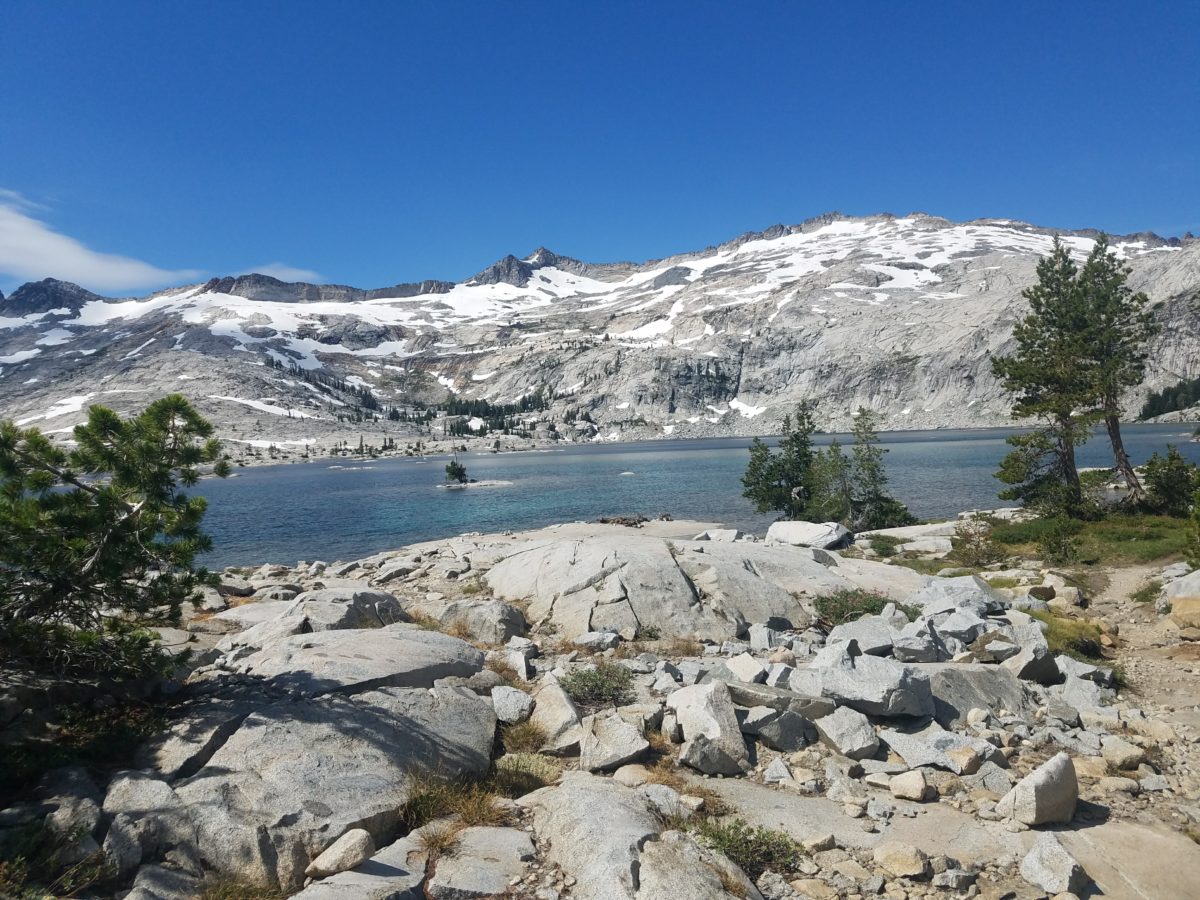
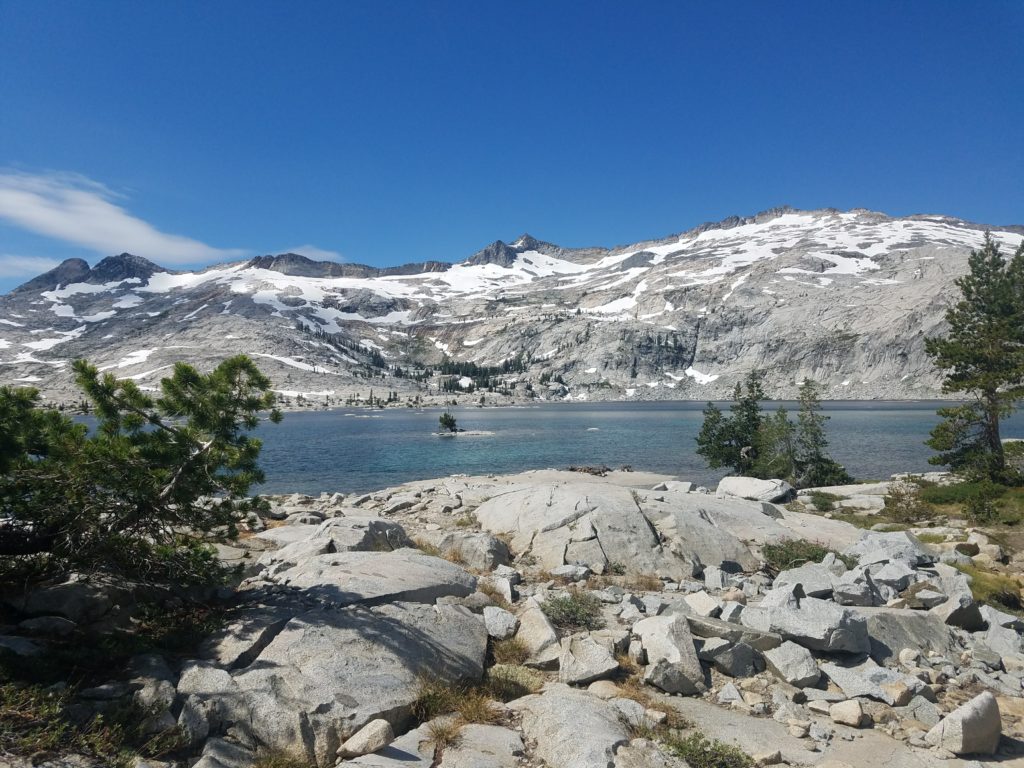
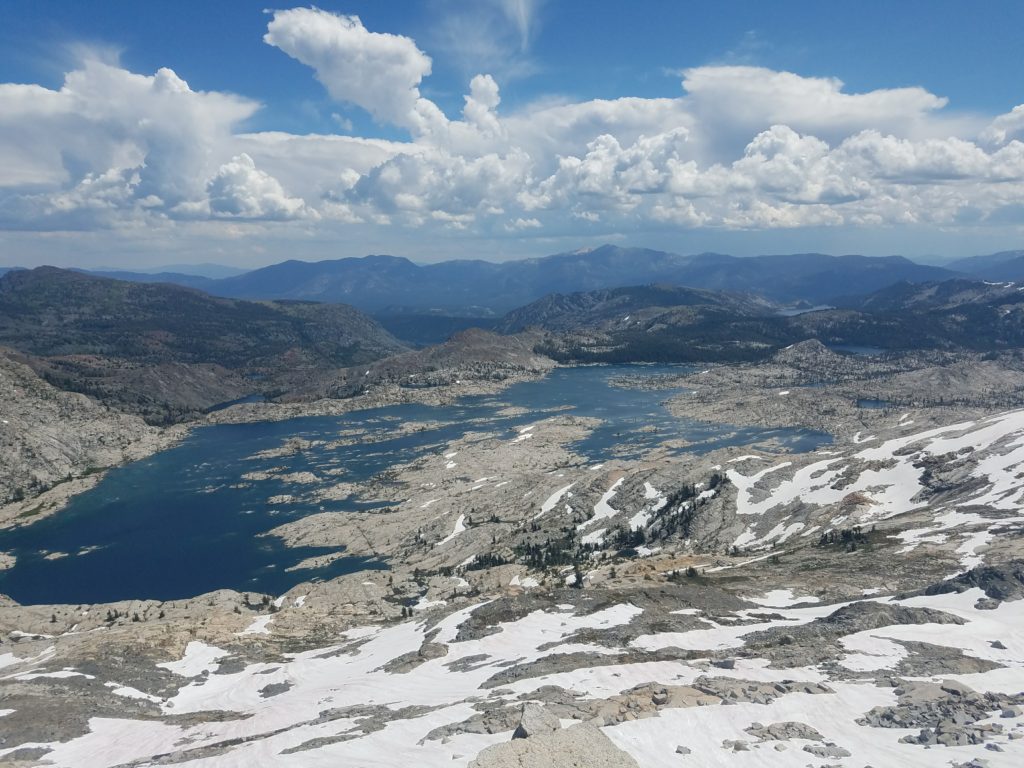
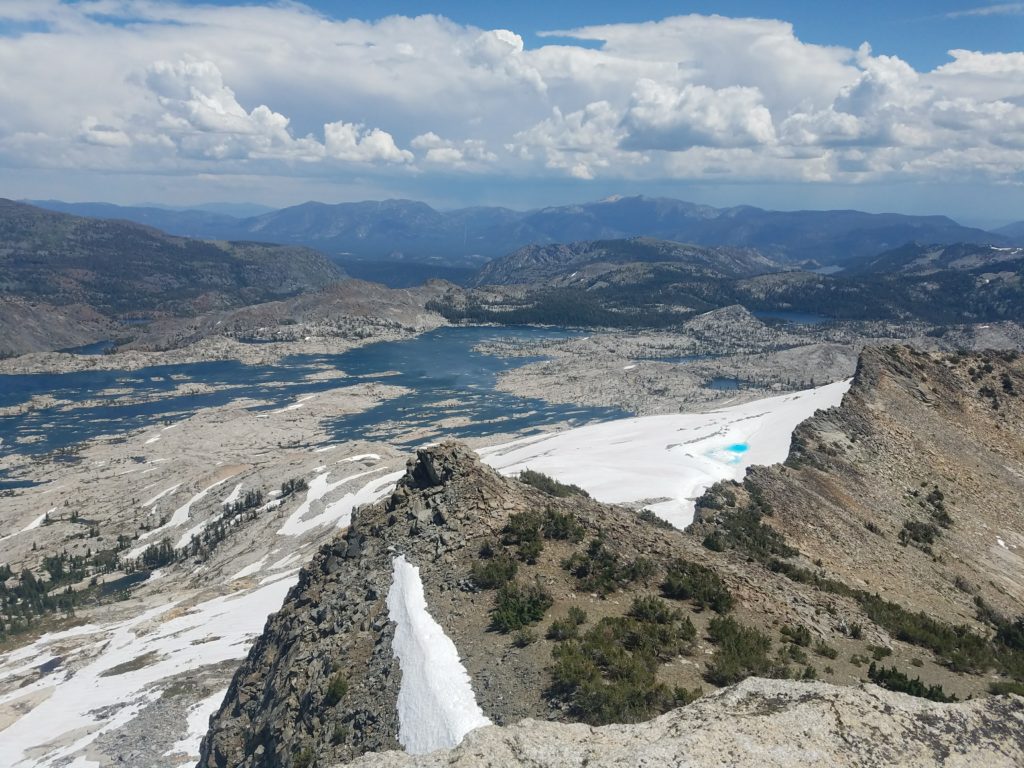
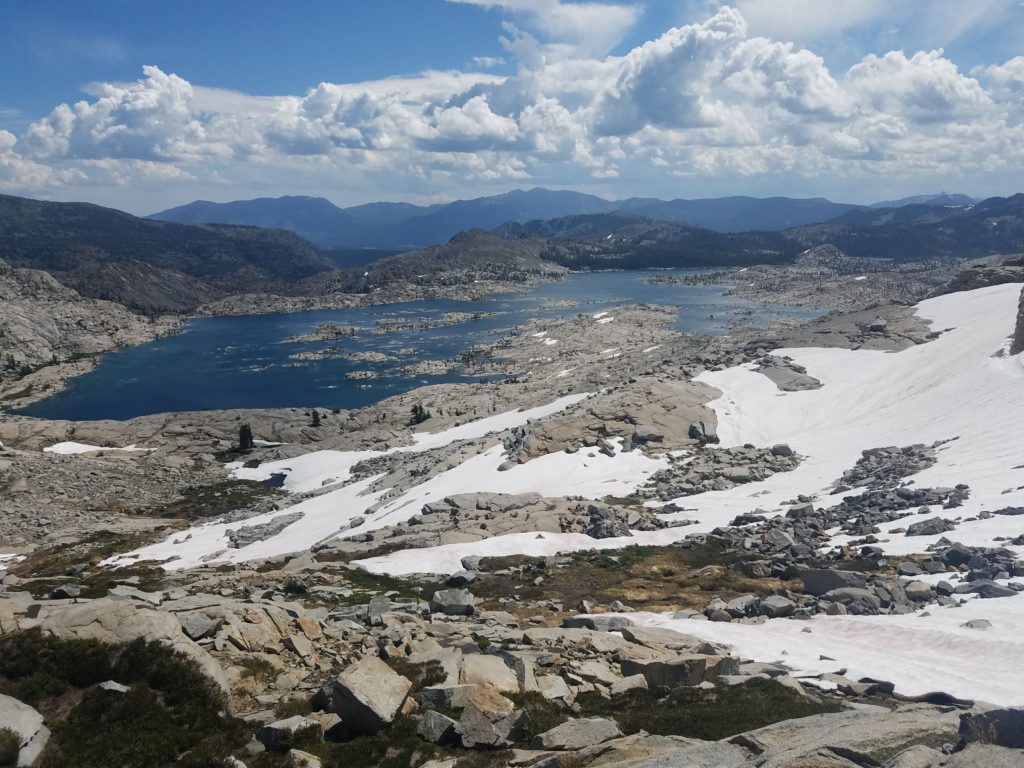
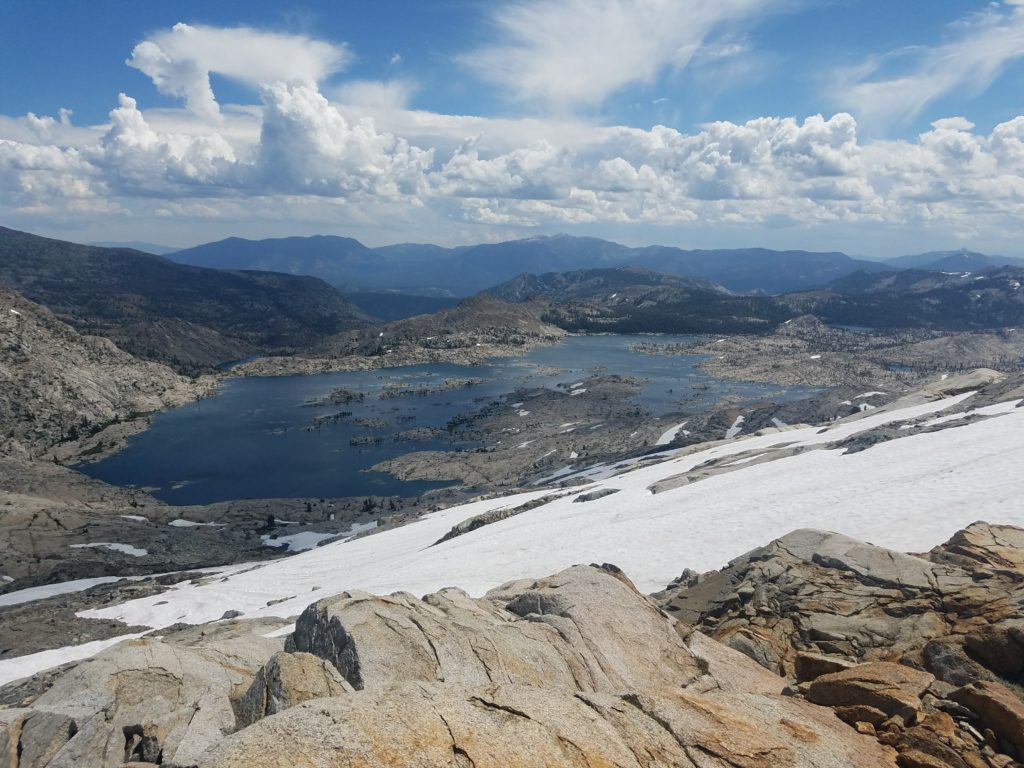
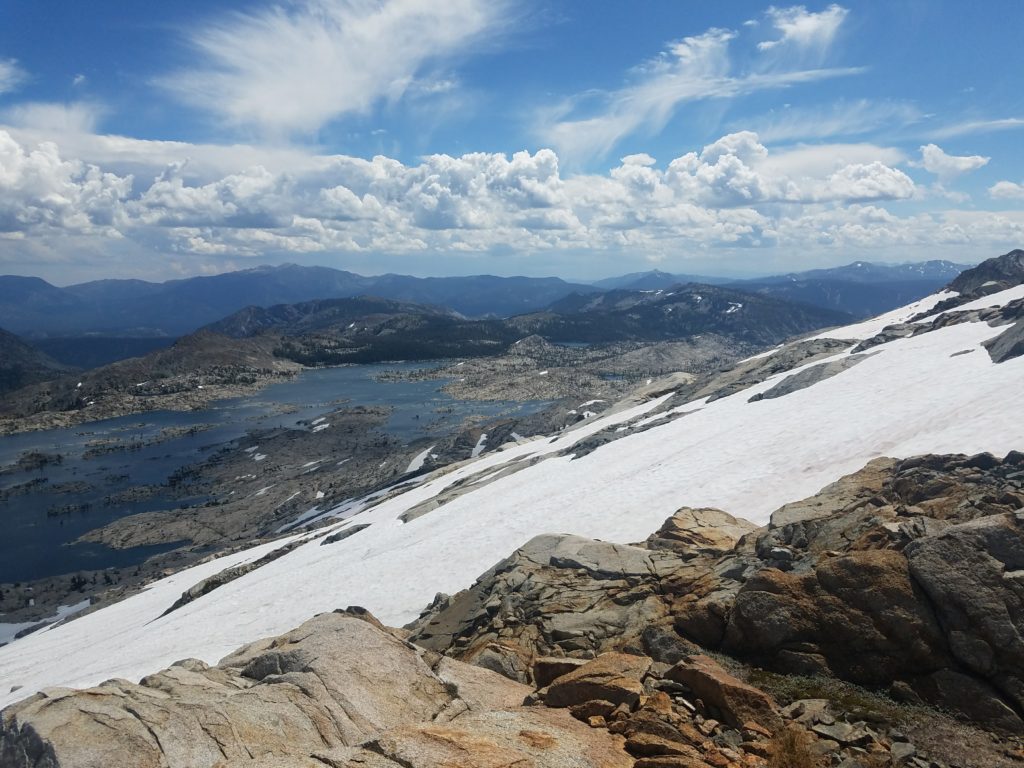
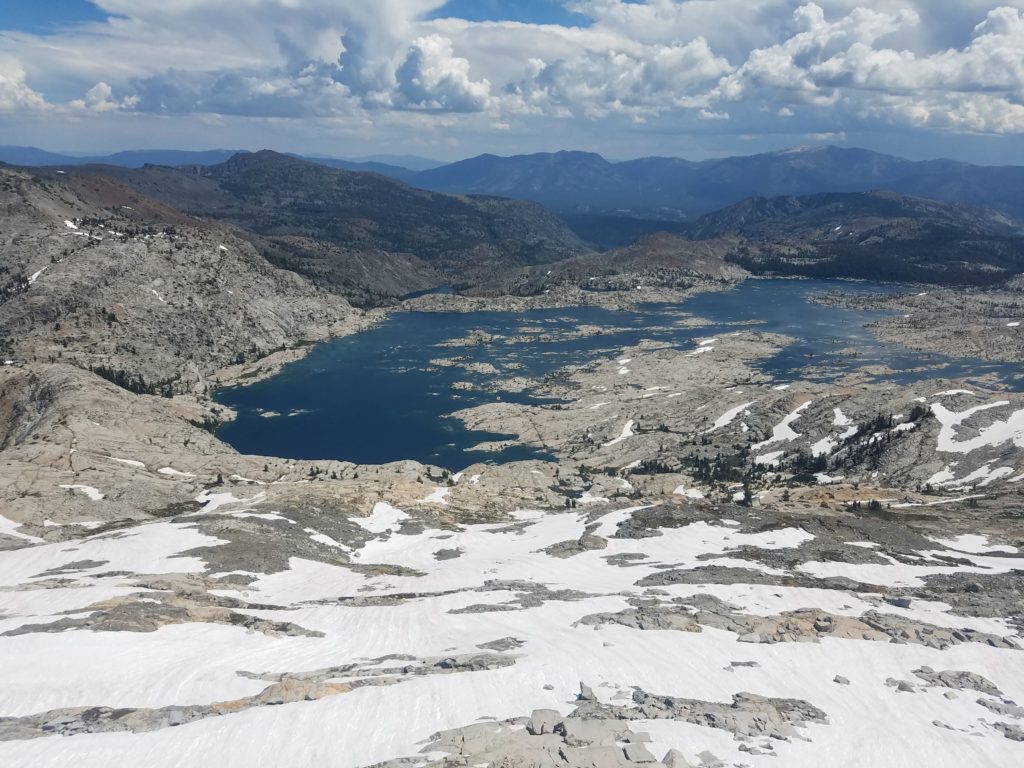
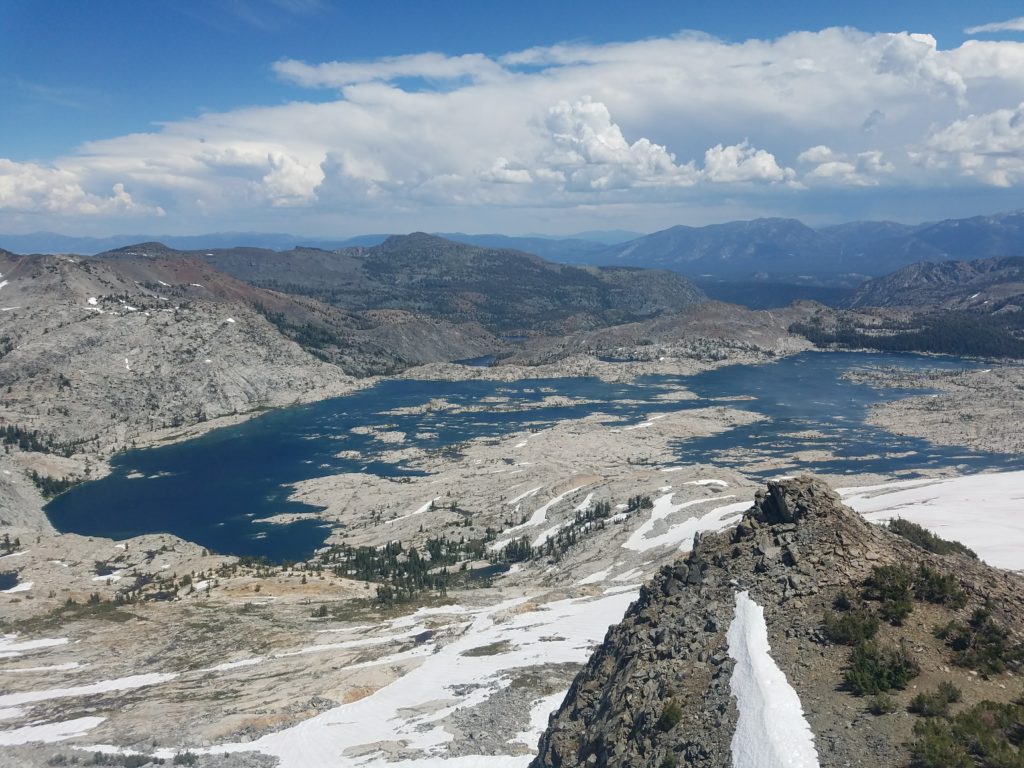
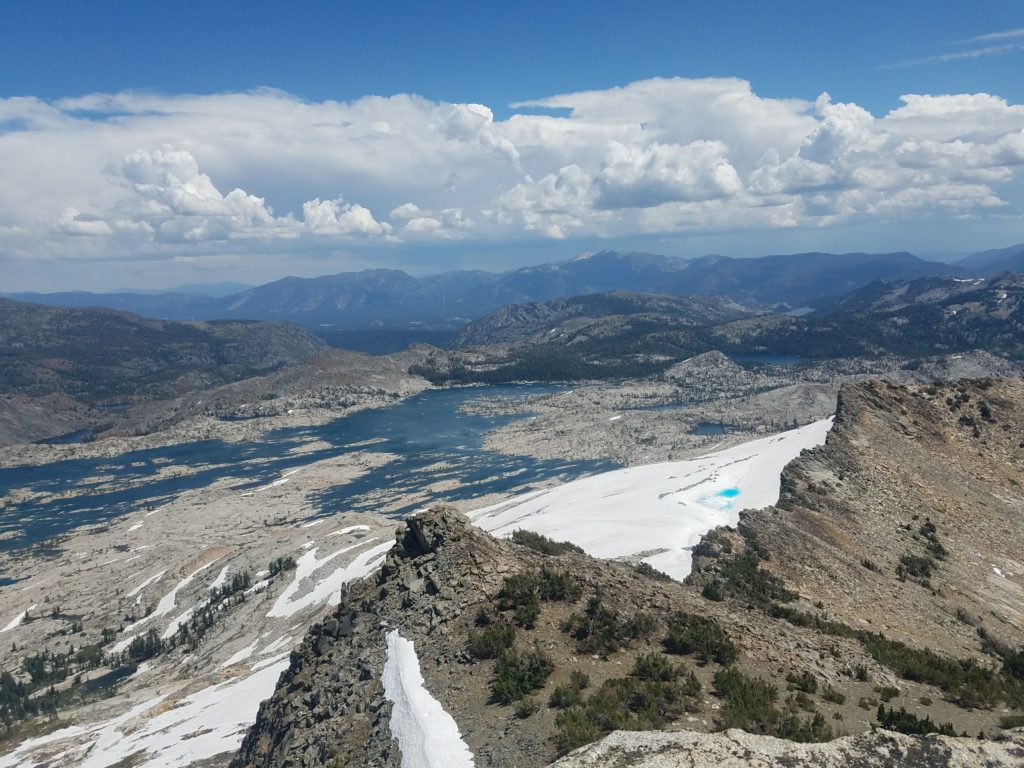
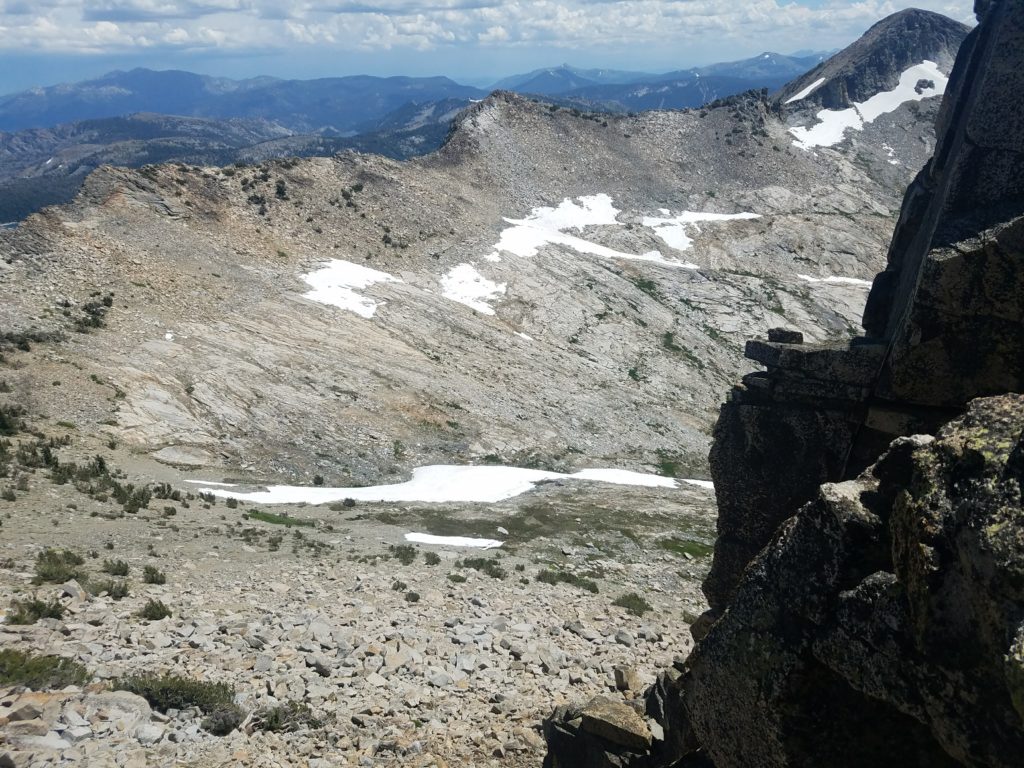
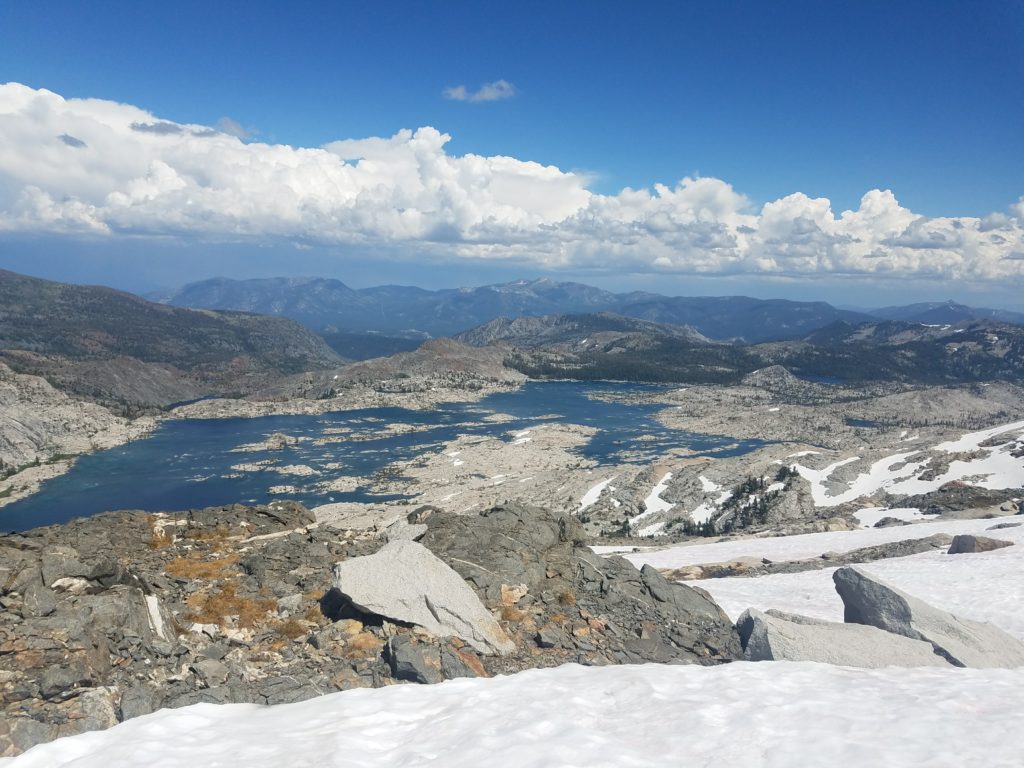
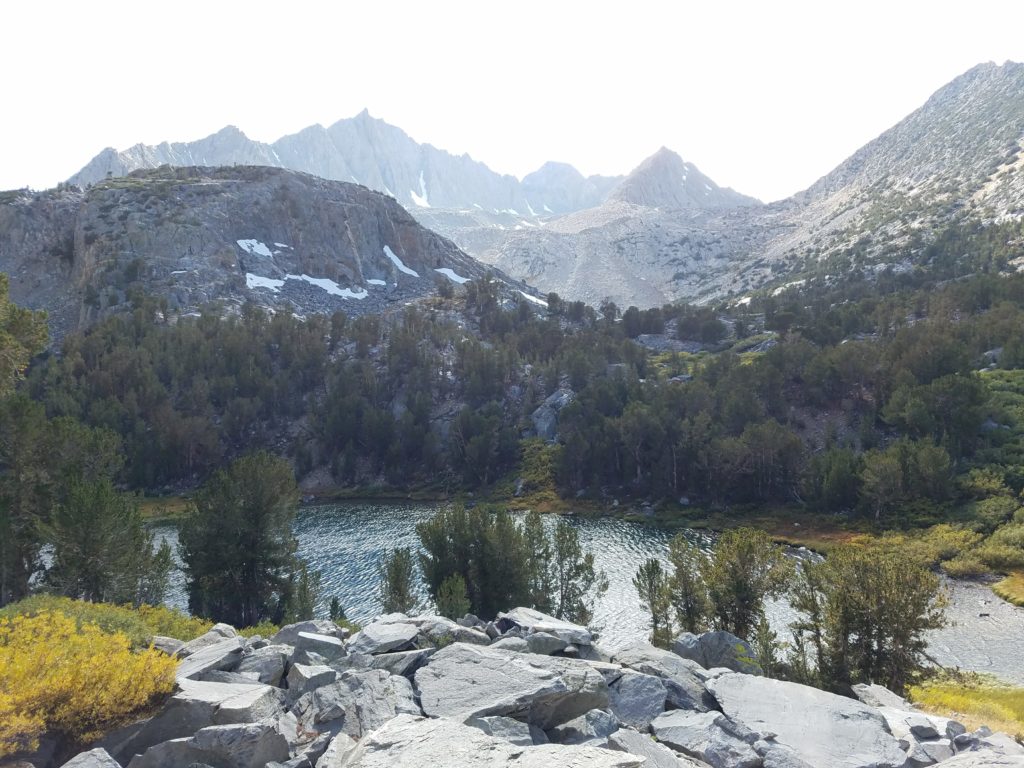
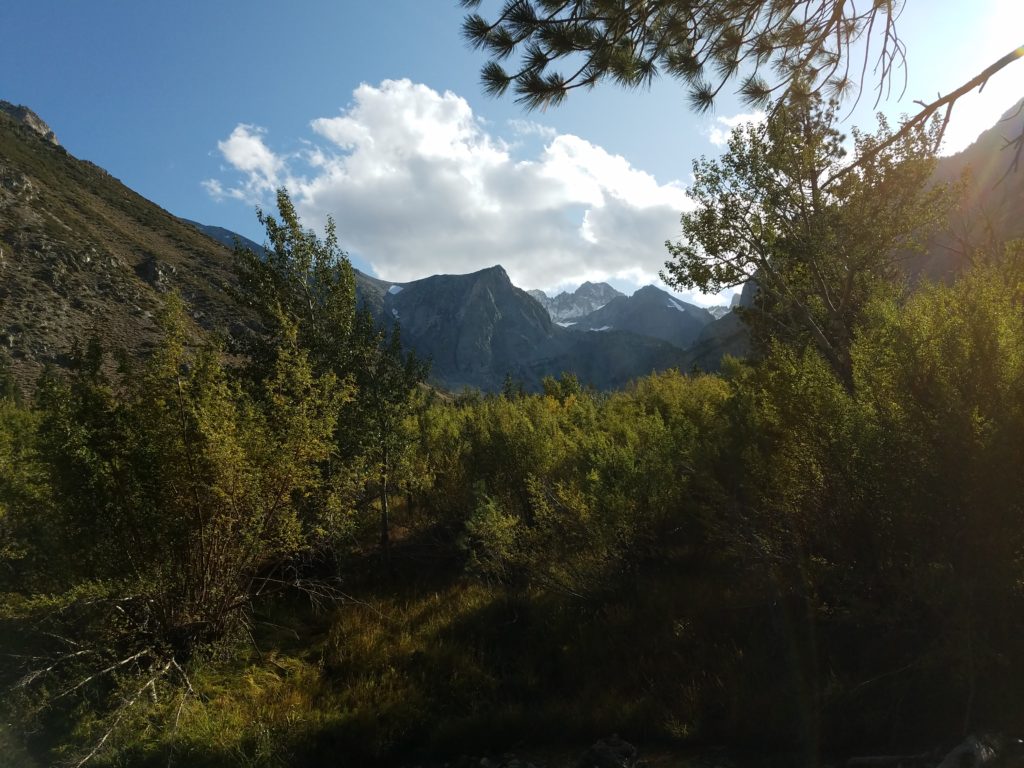
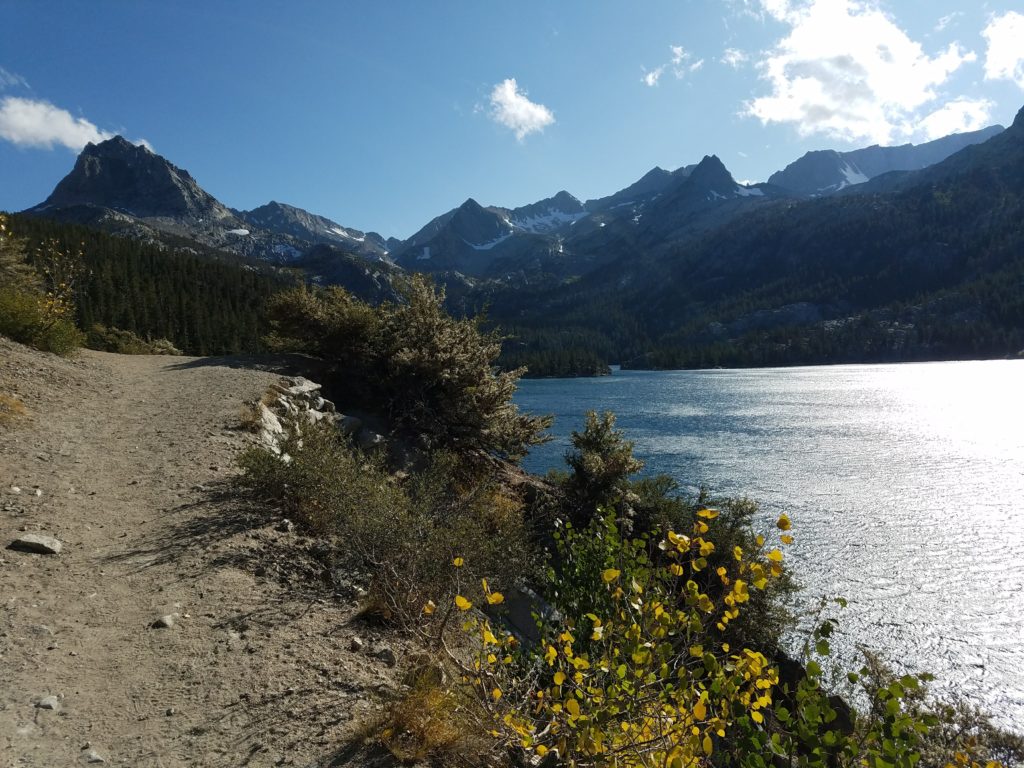
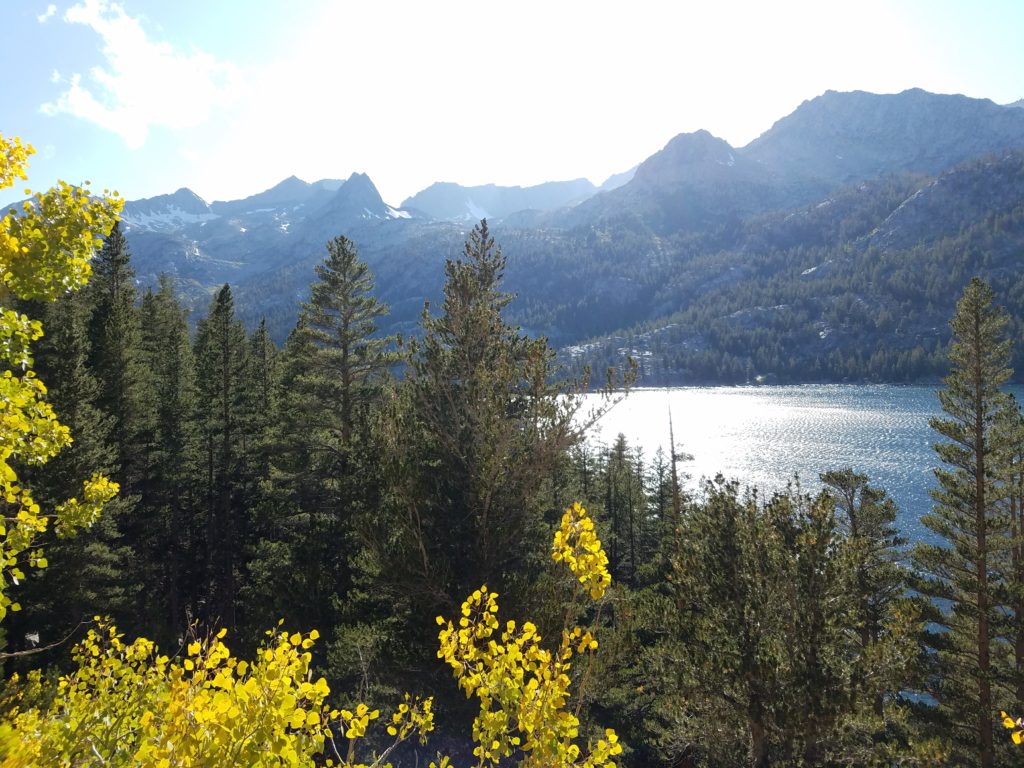
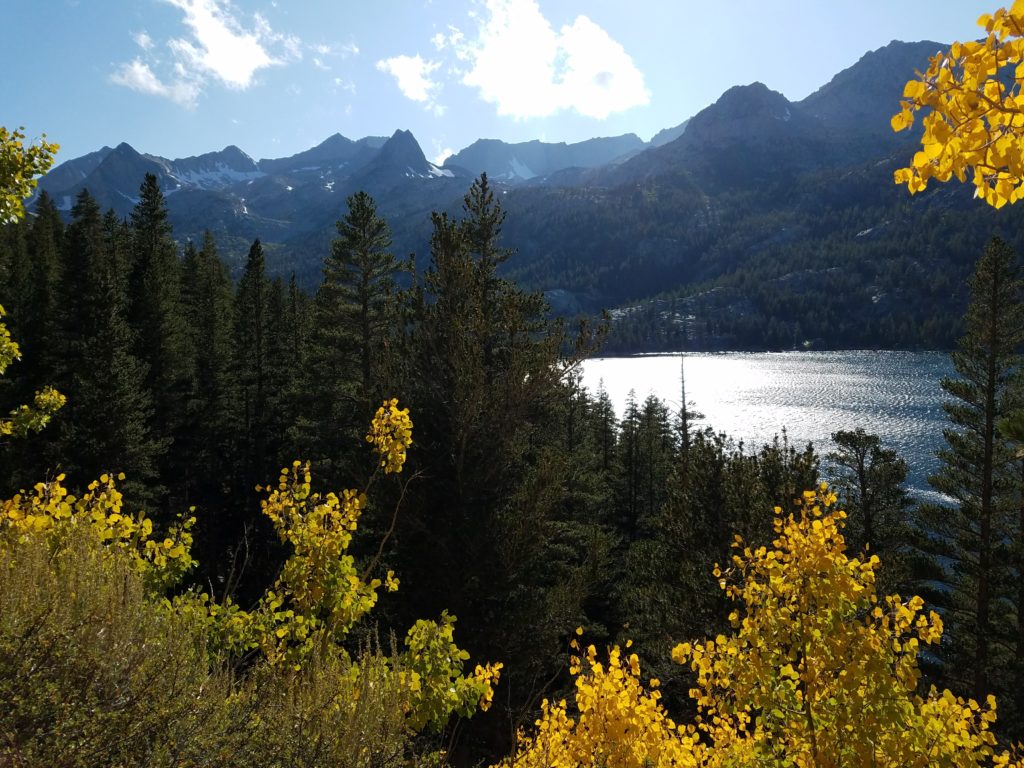
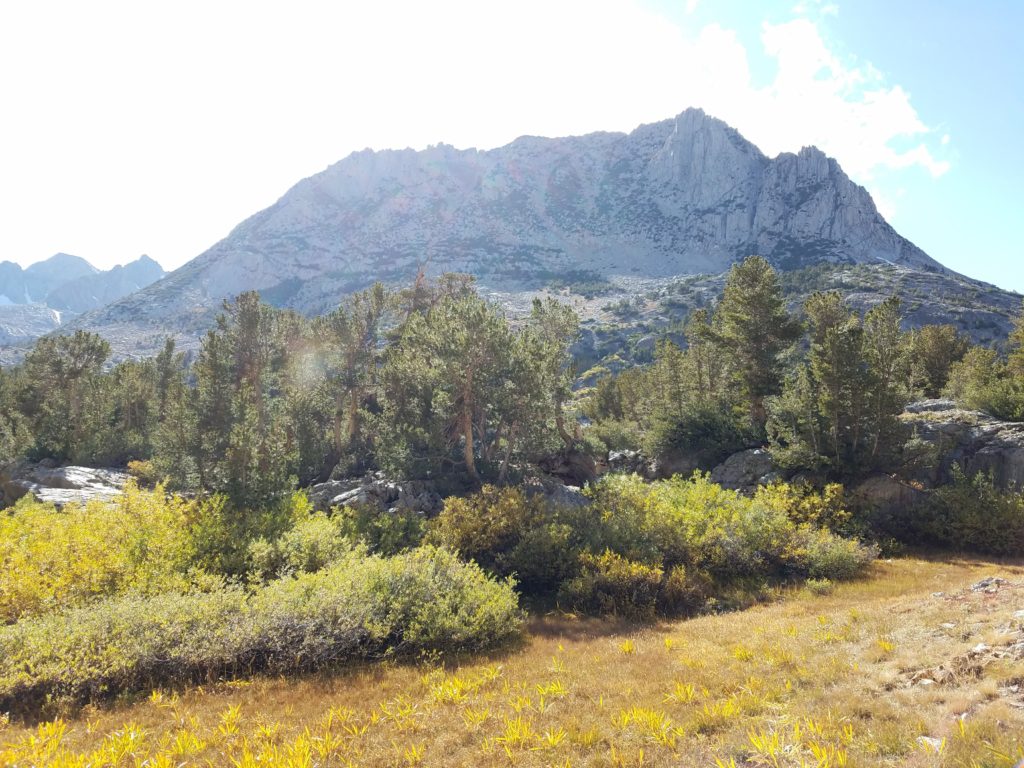
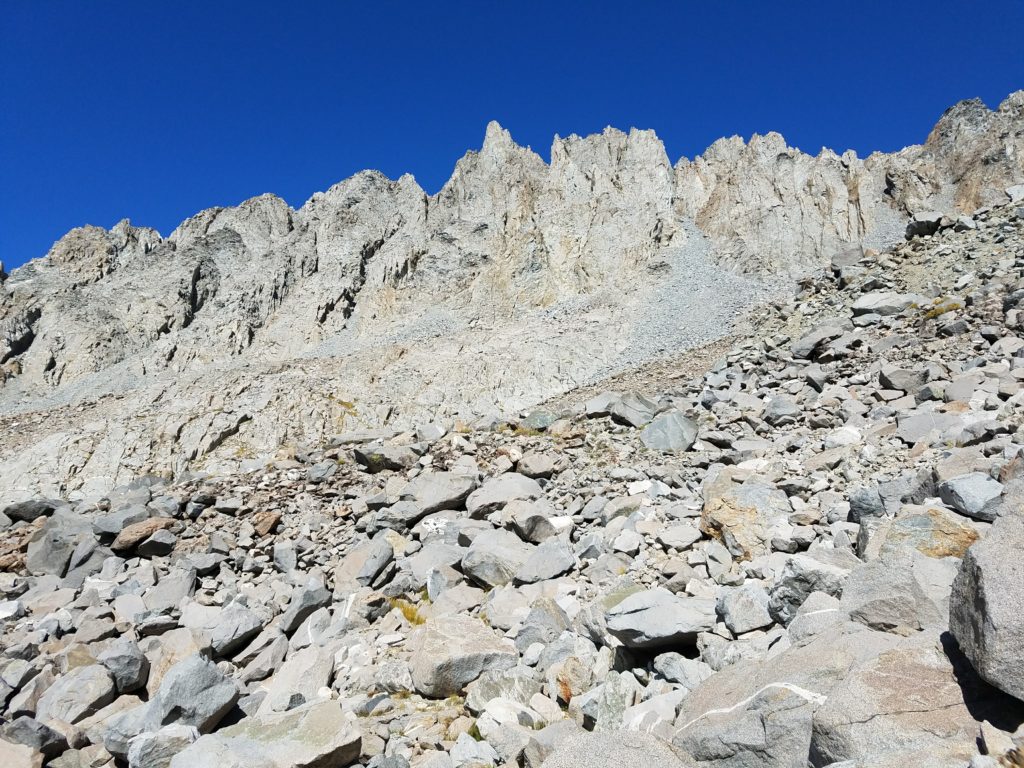
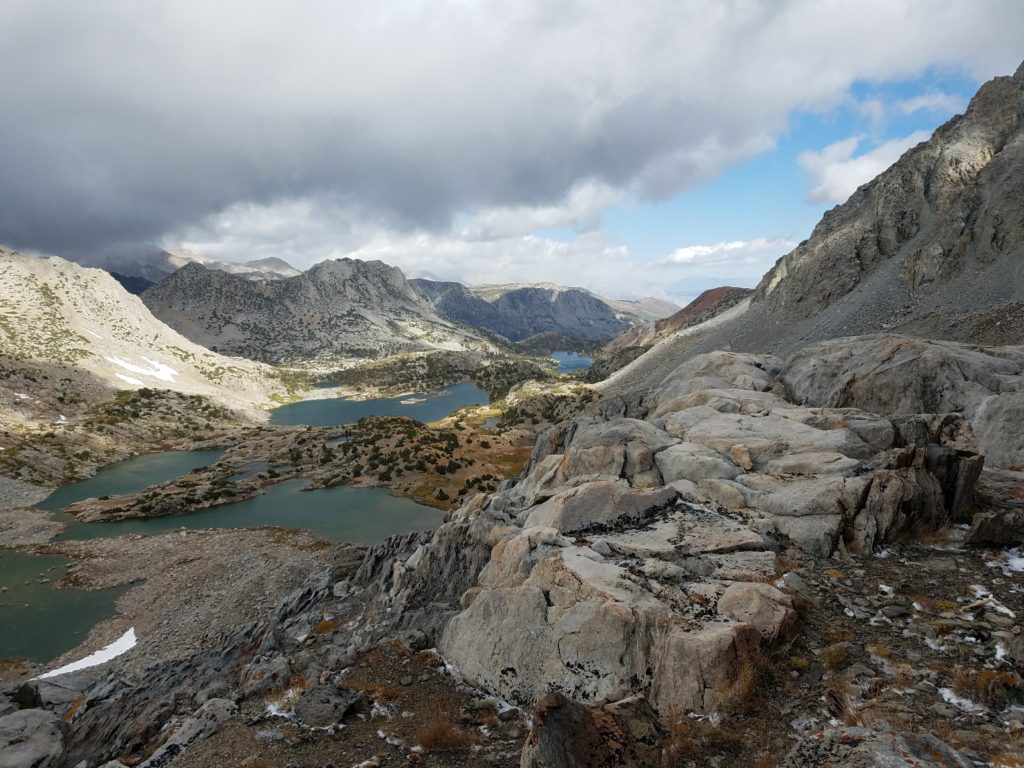
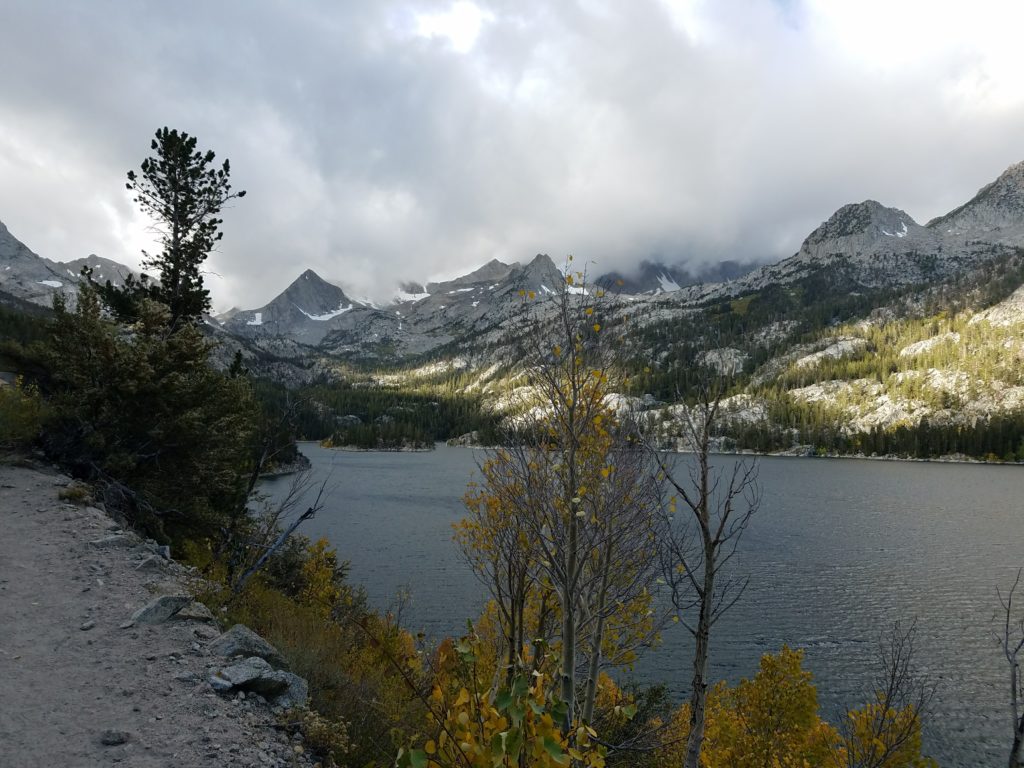
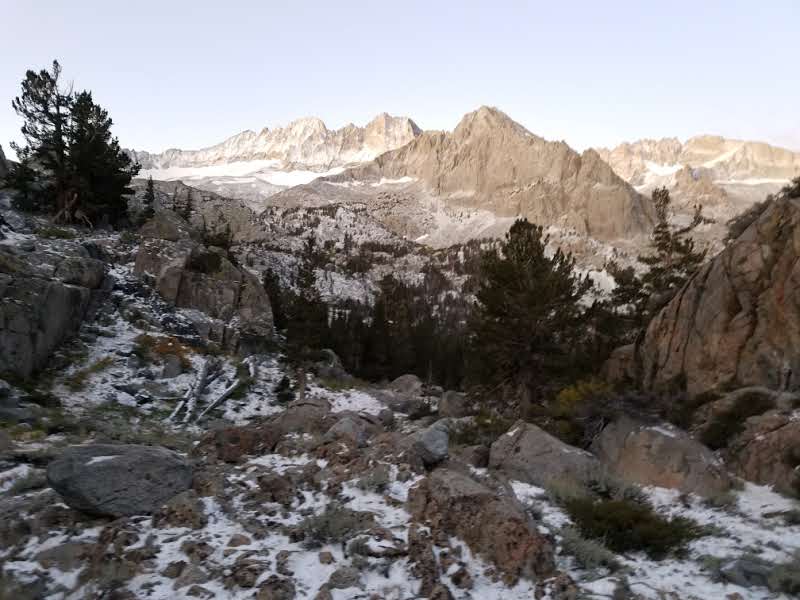
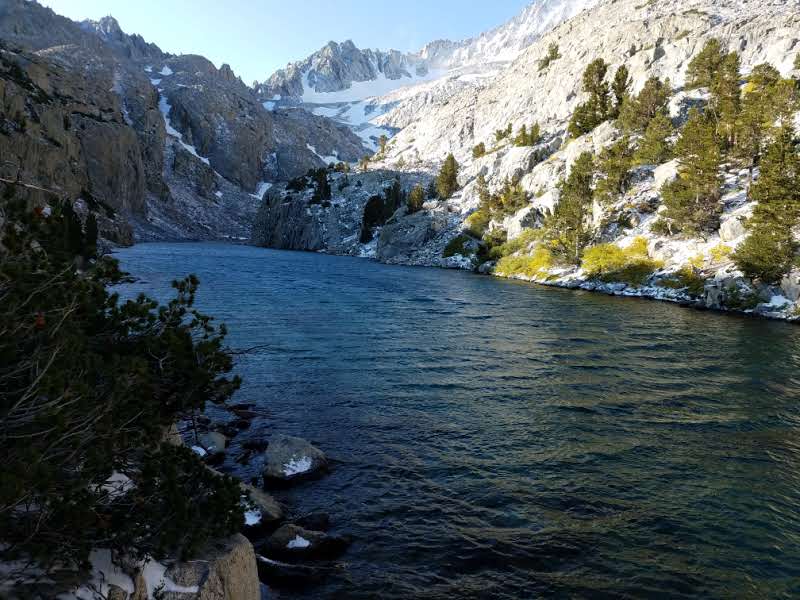
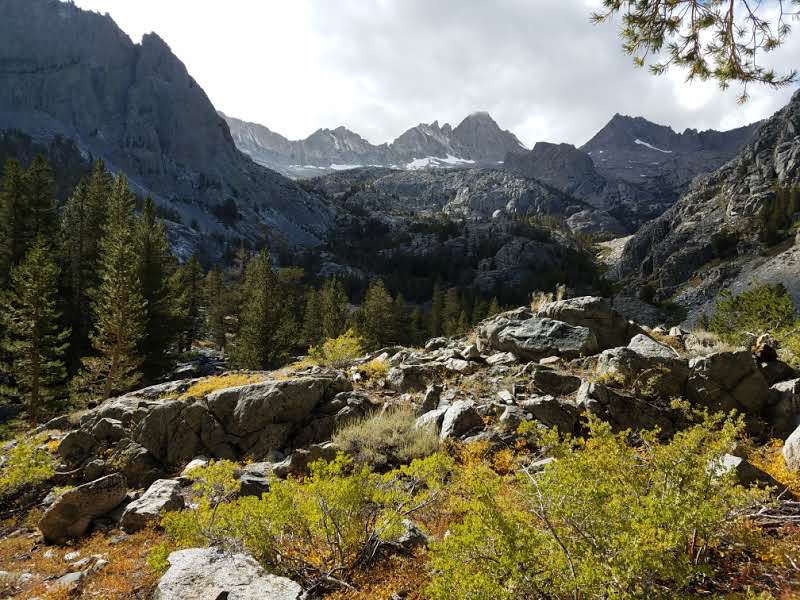
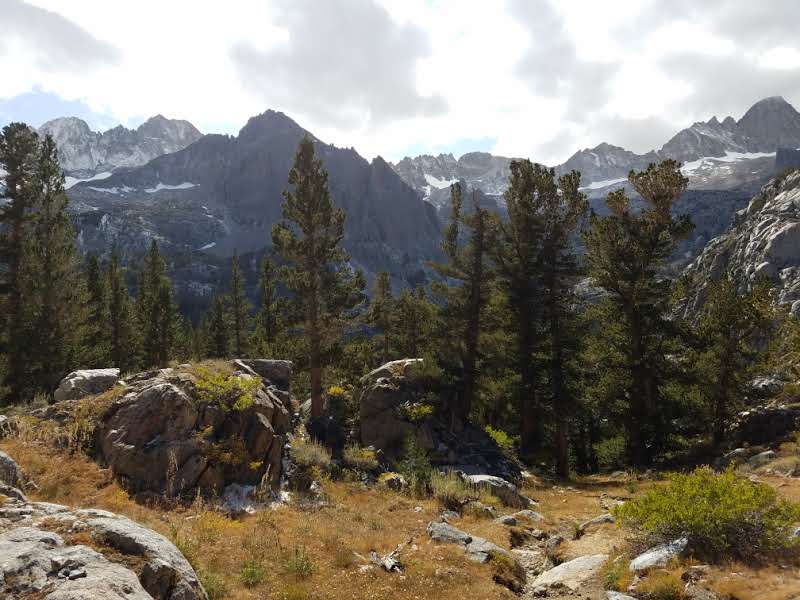
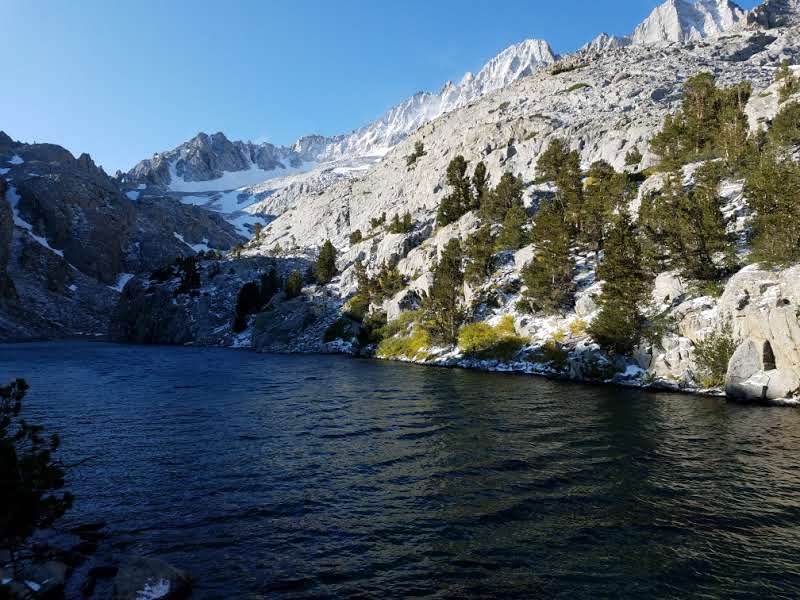
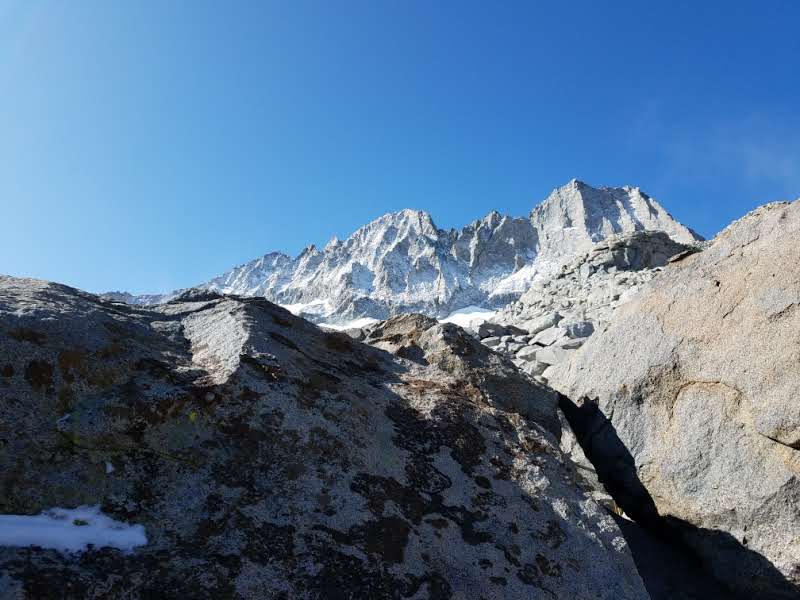
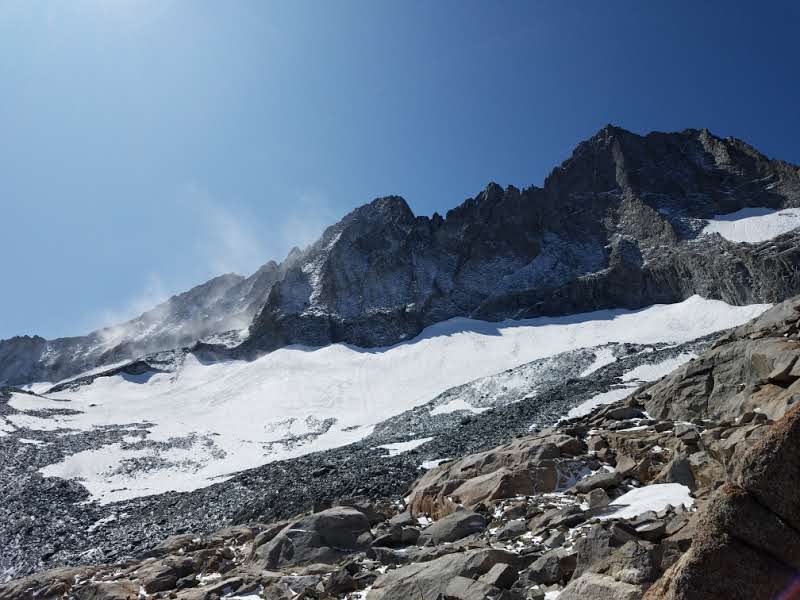
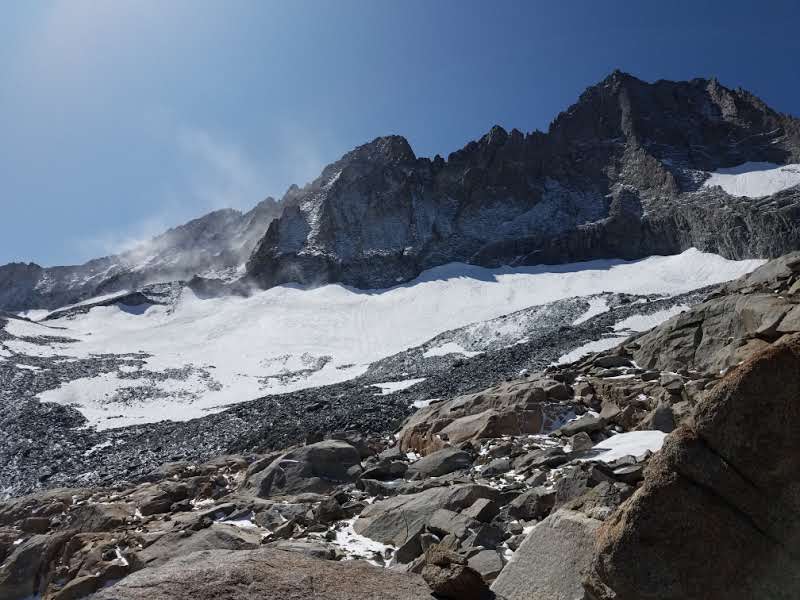
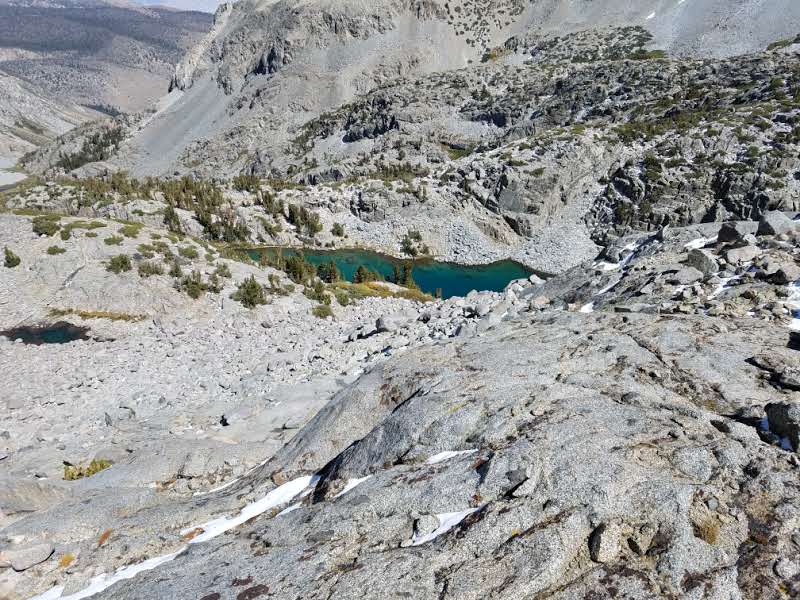
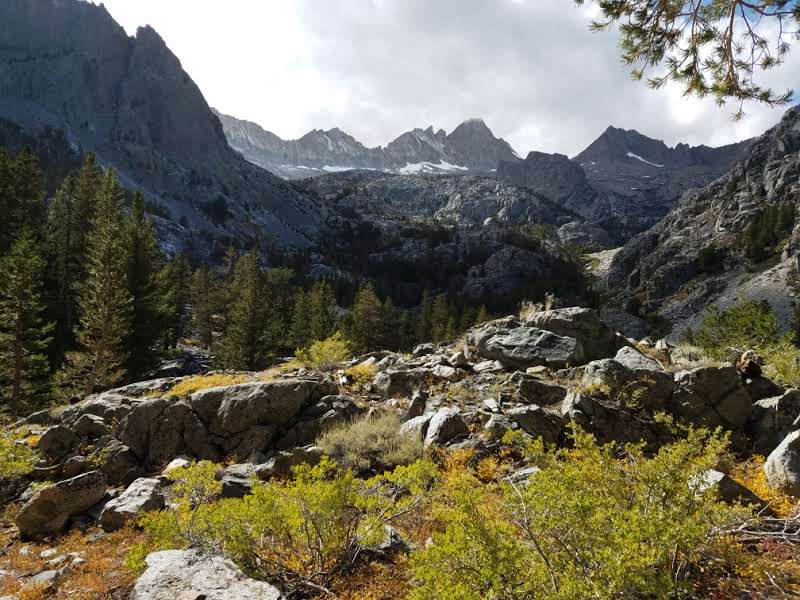
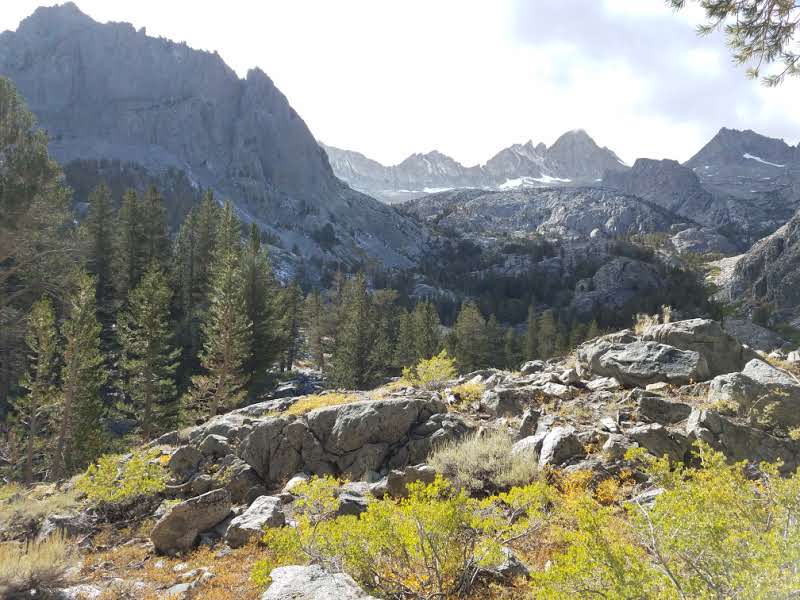
They passed me and I soon resumed and passed them again after a few minutes. Soon the trail gets prettier. As it climbs – again, slowly – the Crystal Range merges in the distance and Half Moon Lake’s basin begins to unfold below, bounded by Dick’s Peak and Jack’s Peak , both looking far and imposing.
Here I met someone sitting off the trail’s side. After casual greetings, he remarked “this trail is pretty hard!” I instantly felt bad for him. We hadn’t reached – or had just reached – 9,000 feet and nothing about this trail had particular difficulty.
And then I reprimanded myself for having any sort of judgment. Hike your own hike. He’s out enjoying nature and the low Sierra beauty. Ability be damned – be nice, have fun, and Leave No Trace.
Maybe a dozen minutes later I passed a group a little older than myself, all heading for Dick’s Pass and unknown destinations thereafter. I passed them, but quickly noticed they made very good time on the trail.
On long hikes, to save other thoughts for monotonous and wearying times, I enjoy having someone ahead or behind to catch or keep from catching. (On Mt. Shasta on the ascent to the Red Banks I kept track of how many people I passed – both for motivation and to have a mental record of just how many people climbed the mountain that day.)
I kept ahead of them though I felt my pace slowing a bit. On one section roughly 3/4 of the way to Dick’s Pass, the trail briefly splits with one steep and short section laughing at a needlessly long section that climbs to the same spot. I made the mistake of taking the longer, just in case the faint shortcut went no where. Where they rejoined, one member of the group of five or six had just started the shortcut. Uh oh. I figured I had maybe a 10 second advantage over him.
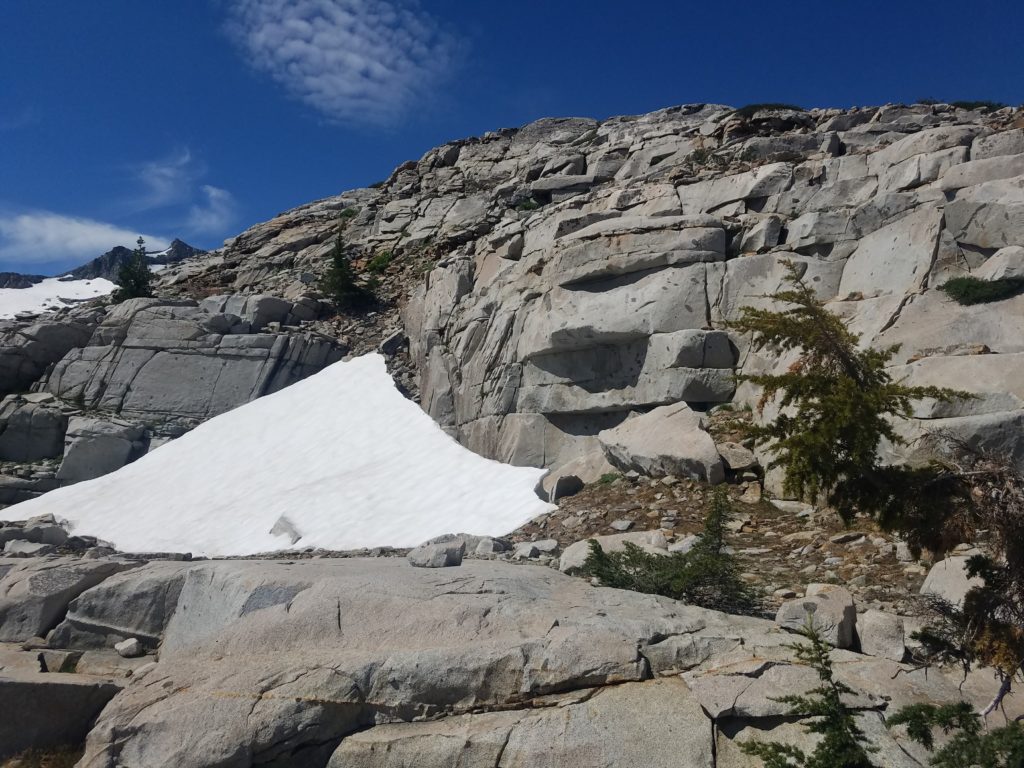
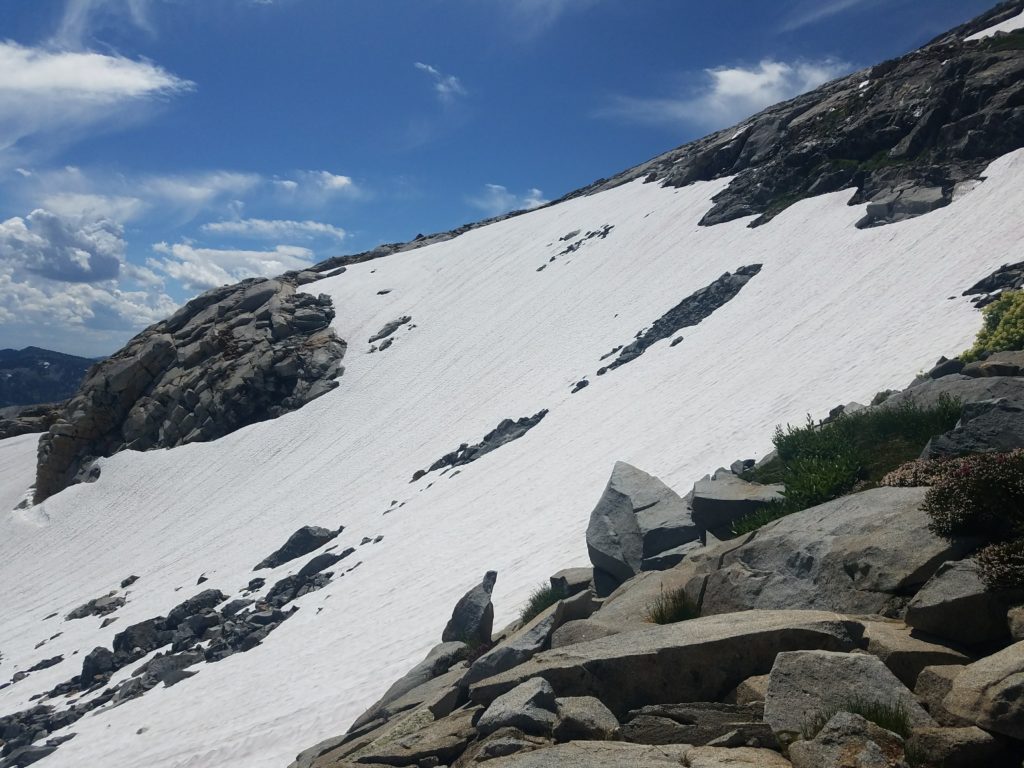
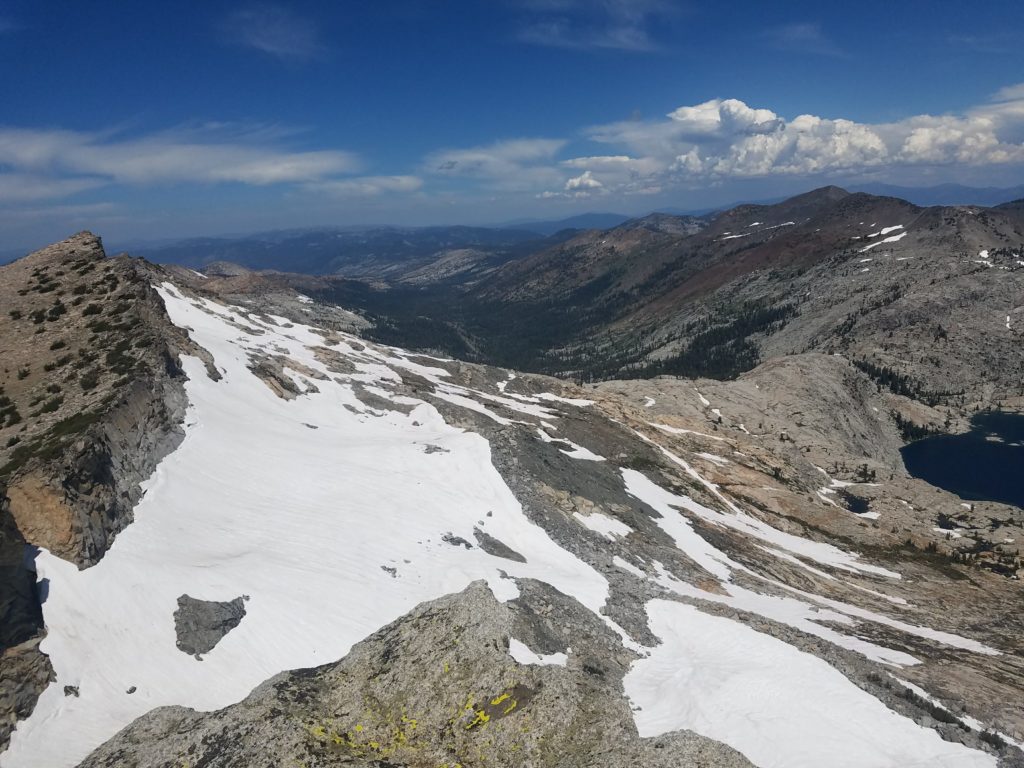
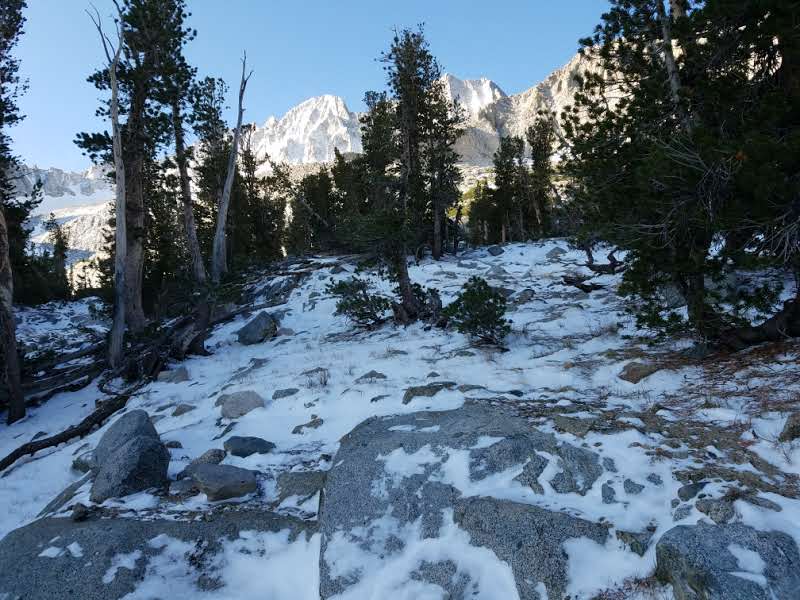
That gave me a kick in the butt. I upped my pace, ceased the occasional few second pauses, and raced over the next part of the trail. A few small snowfields remained, as they did in 2017 when I first climbed Dick’s Peak (and coupled it with an ascent of Mt. Tallac), but nothing difficult.
A few minutes later I chanced a look behind me and didn’t see the fellow hiker. Nor could I see him through the last trees before hitting the timberline around 9,200 feet. Phew. Still, his looming threat pushed me forward.
Dick’s Pass
Not long thereafter I reached Dick’s Pass. At this point, the trail winds over and down to Fontanillis Lake. A use trail leads to the talus slopes of Dick’s Peak.
I took a break under the last visible tree, enjoying this bit of shade as I munched on a bagel. Typically in summer I hike in a grey (cotton) tanktop – weather dependent, of course – but in Yosemite I started wearing a cotton t-shirt at my girlfriend’s urging given fairly bad shoulder sunburn from hiking to Shastarama Point.
The t-shirt definitely made my shoulders feel better as my backpack’s straps cut less into them. However, my designated hiking t-shirt is a solid navy blue and a heavy cotton. Great for higher altitude hikes (eg, Mt. Dana) where the weather didn’t require long sleeves; not so great for sun-exposed hikes in Desolation’s typical August heat.

As a result, I had sweat through the back of my shirt, dehydrating me. Foolishly, I was slow to replenish lost liquids, a problem I also faced when hiking Mt. Price (but which I avoided when climbing Half Dome, El Capitan and Eagle Peak, Mt. Dana, and Mt. Shasta).
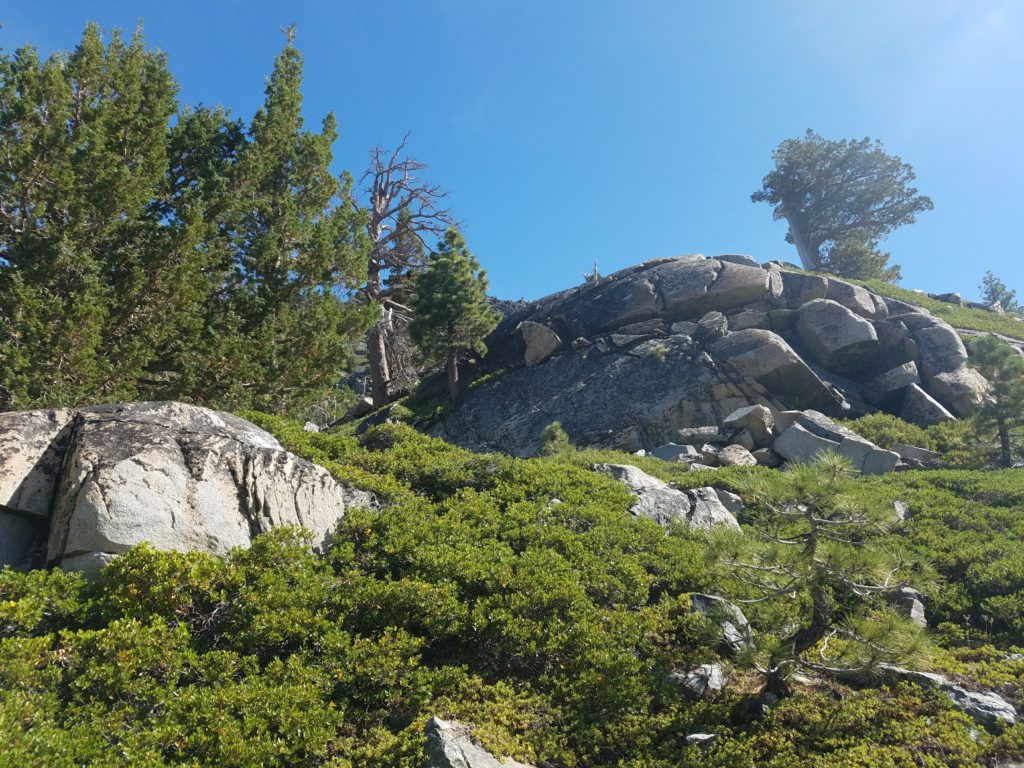
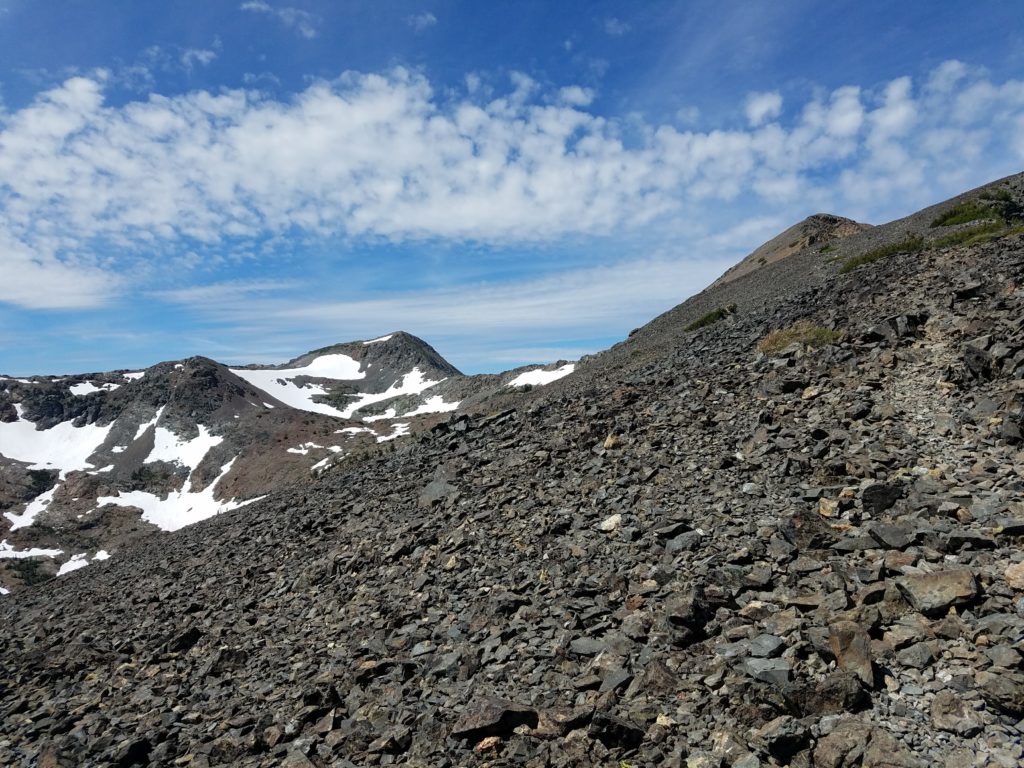
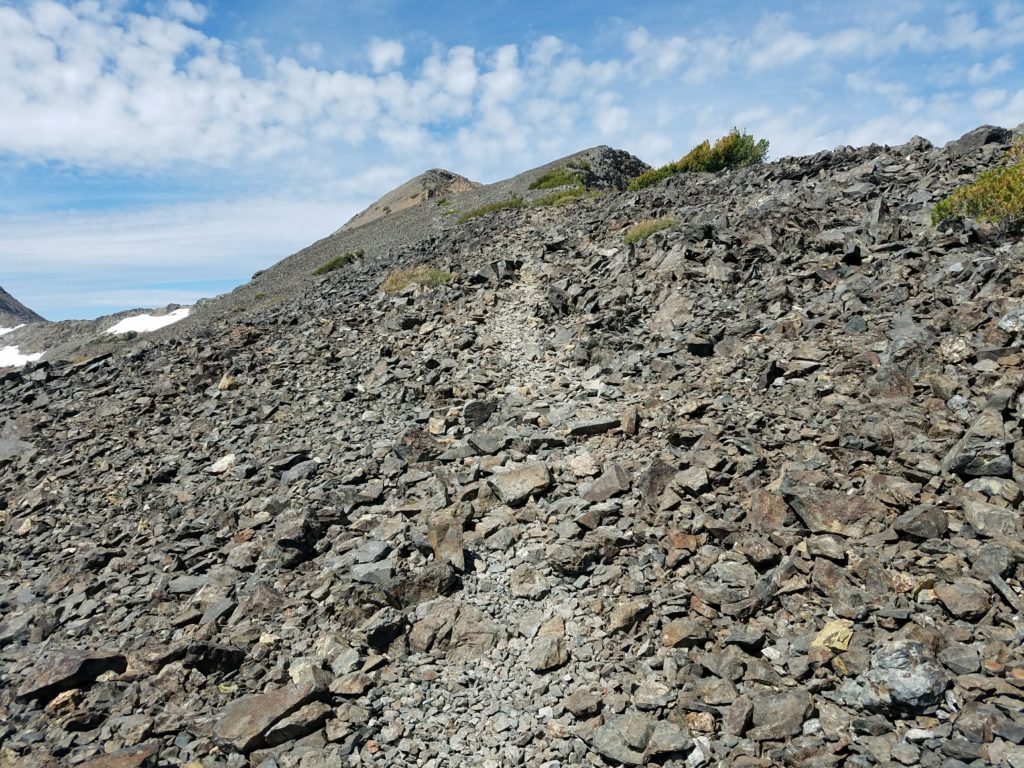
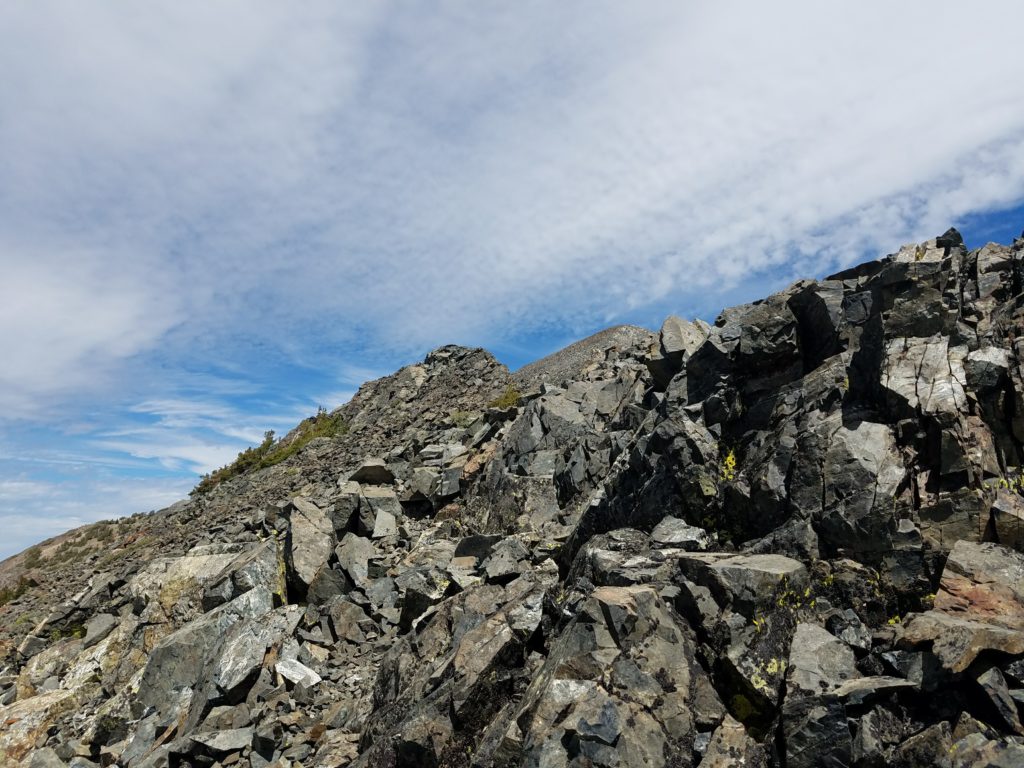
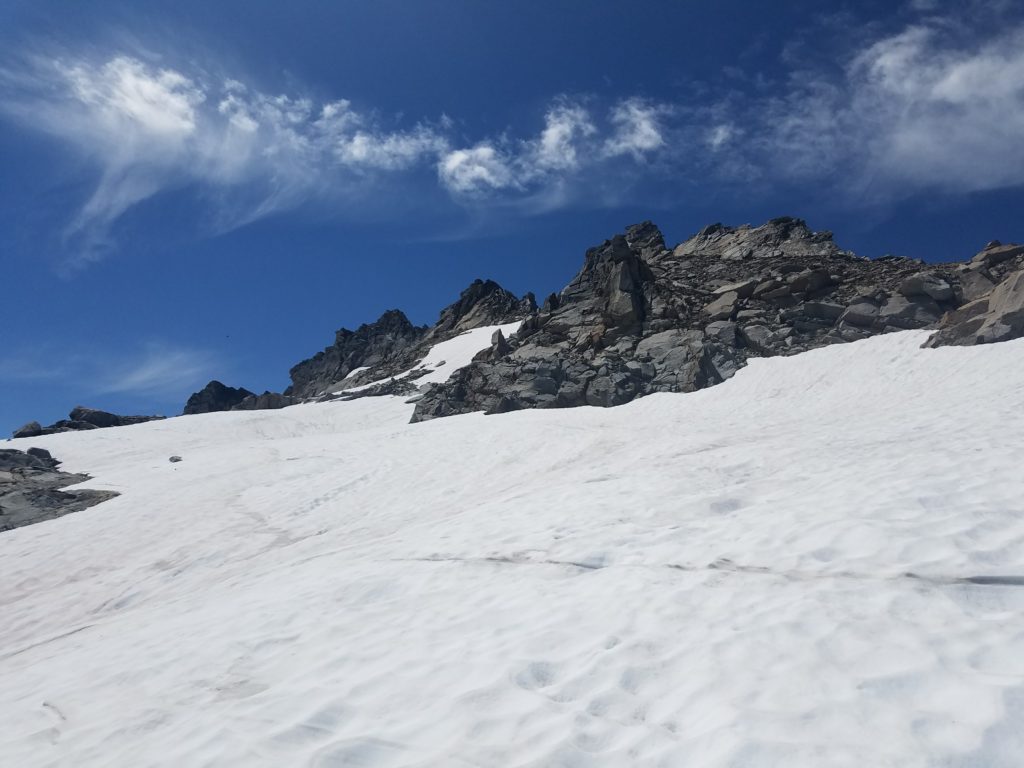
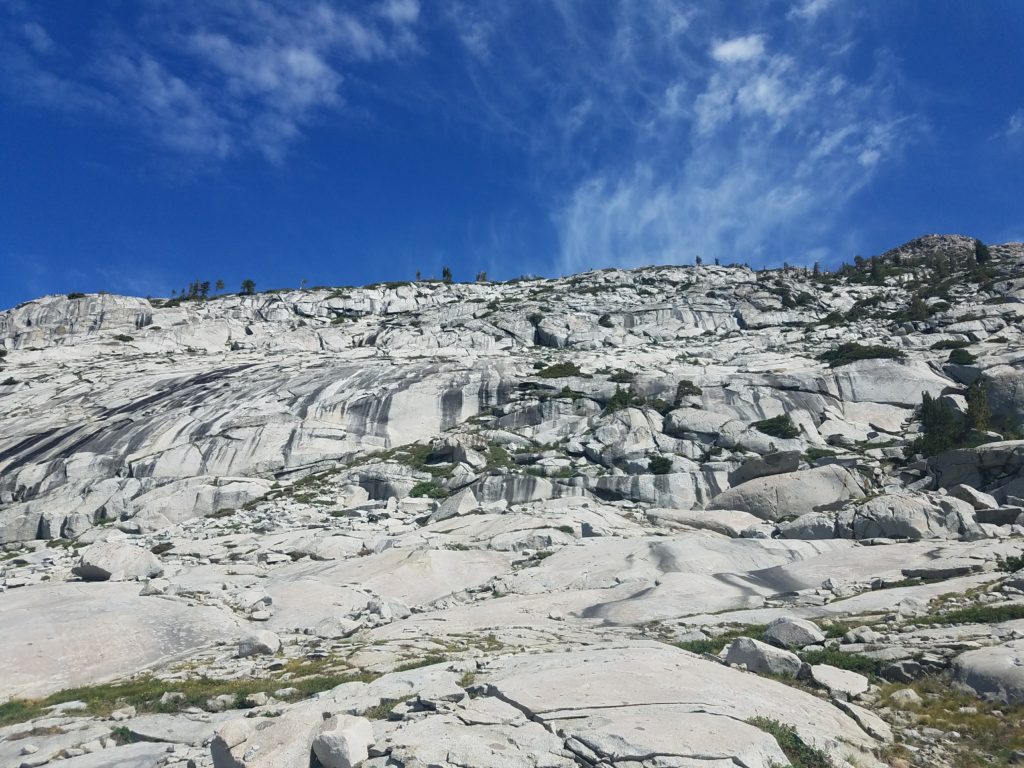
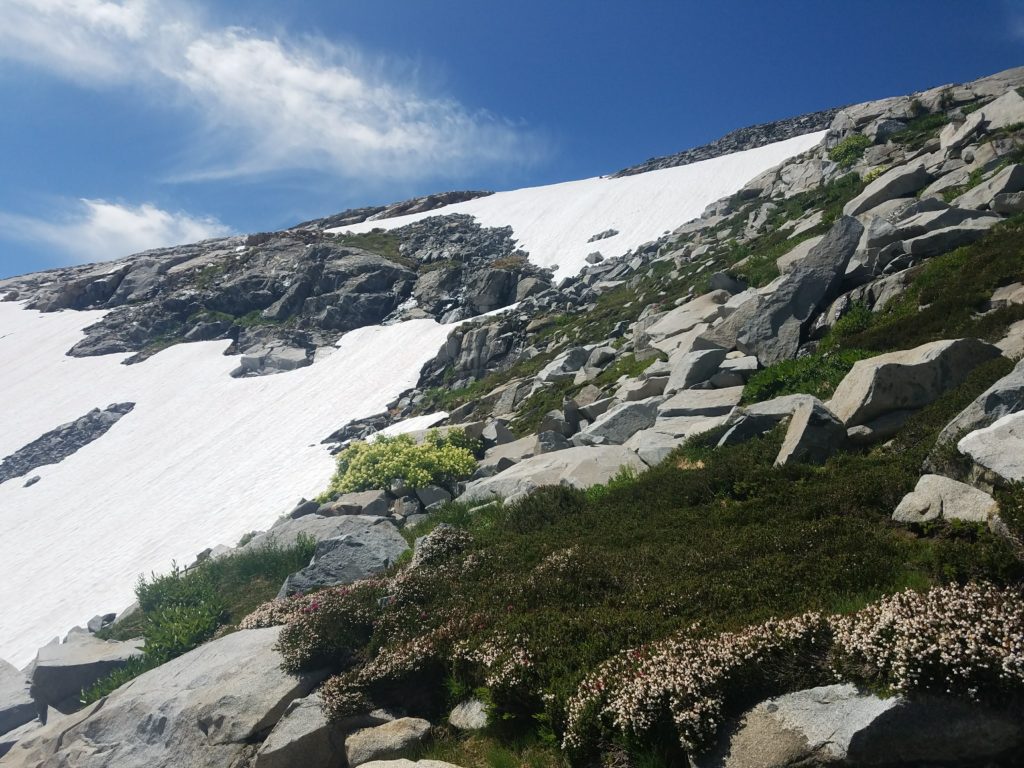
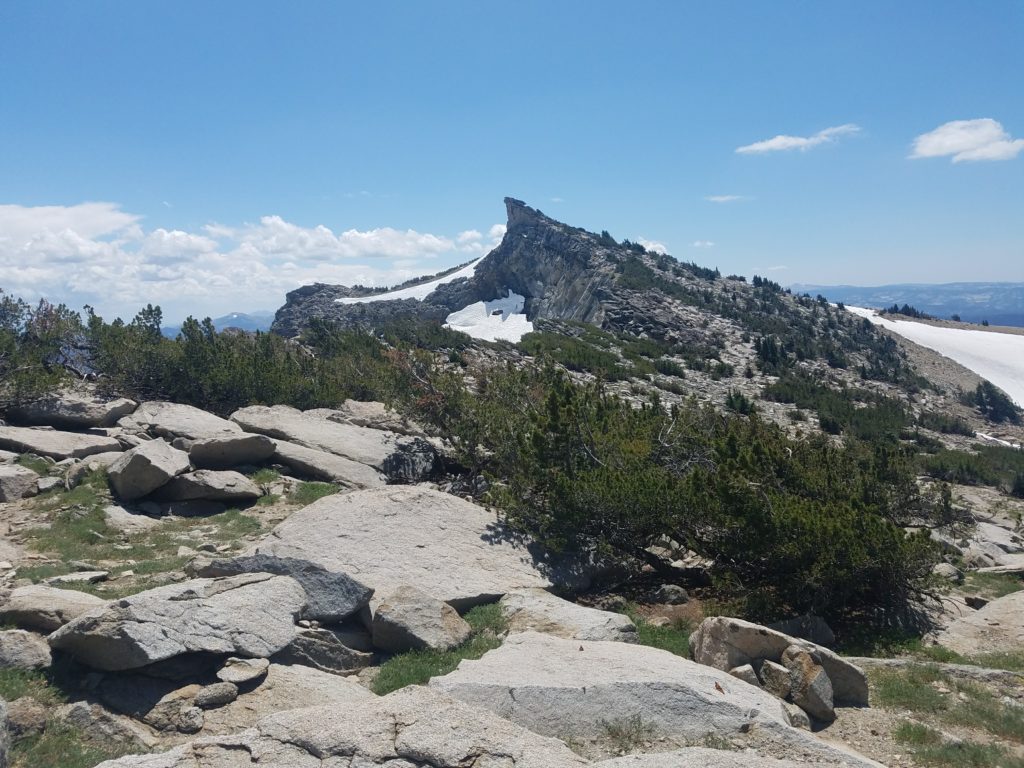
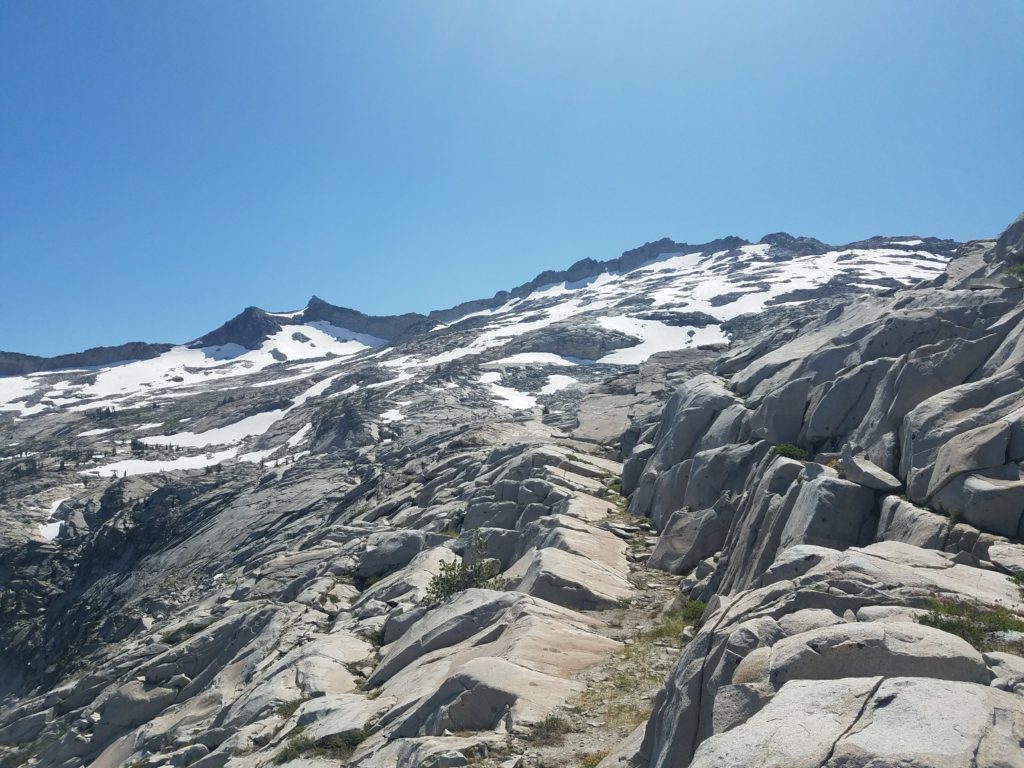
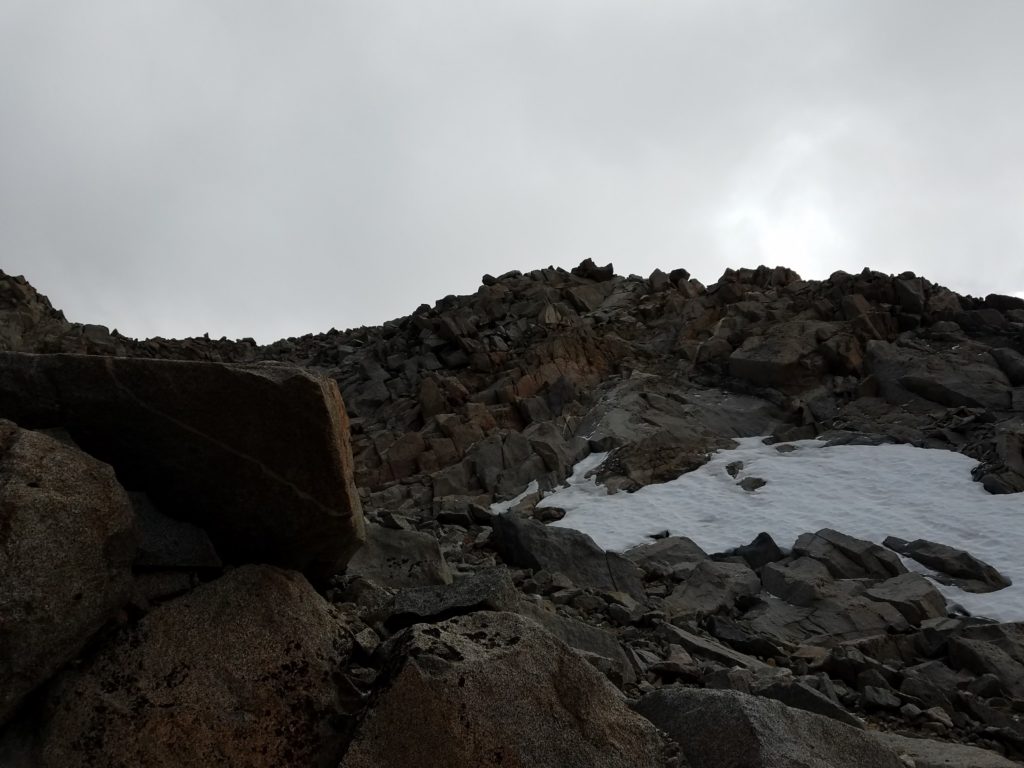
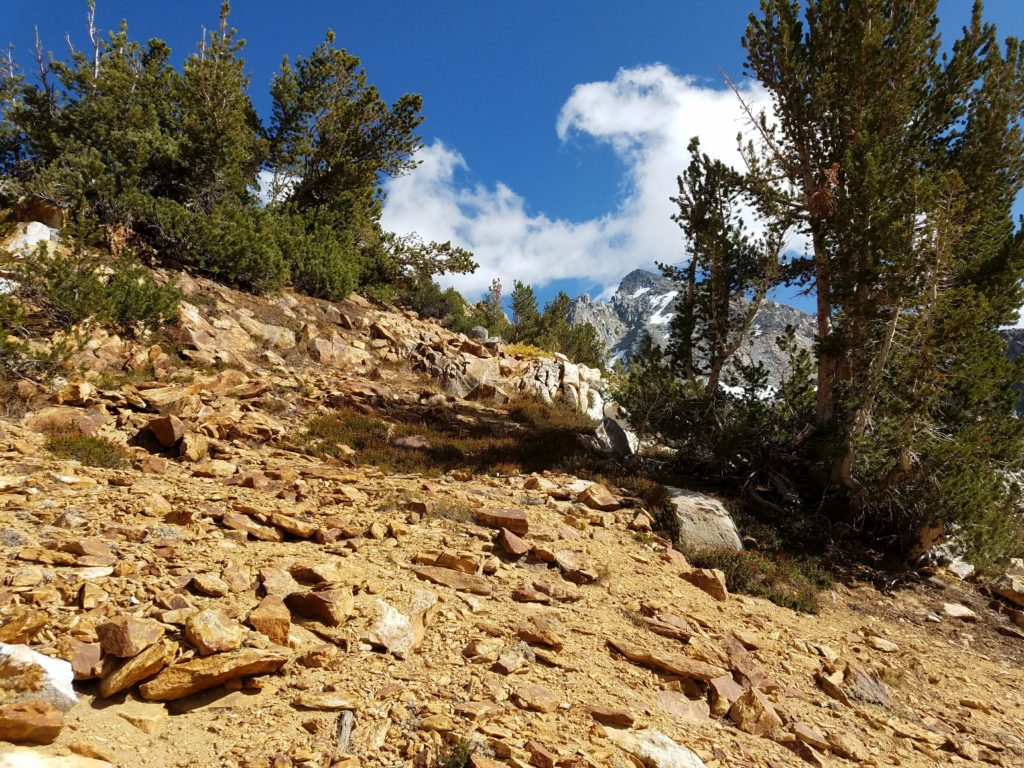
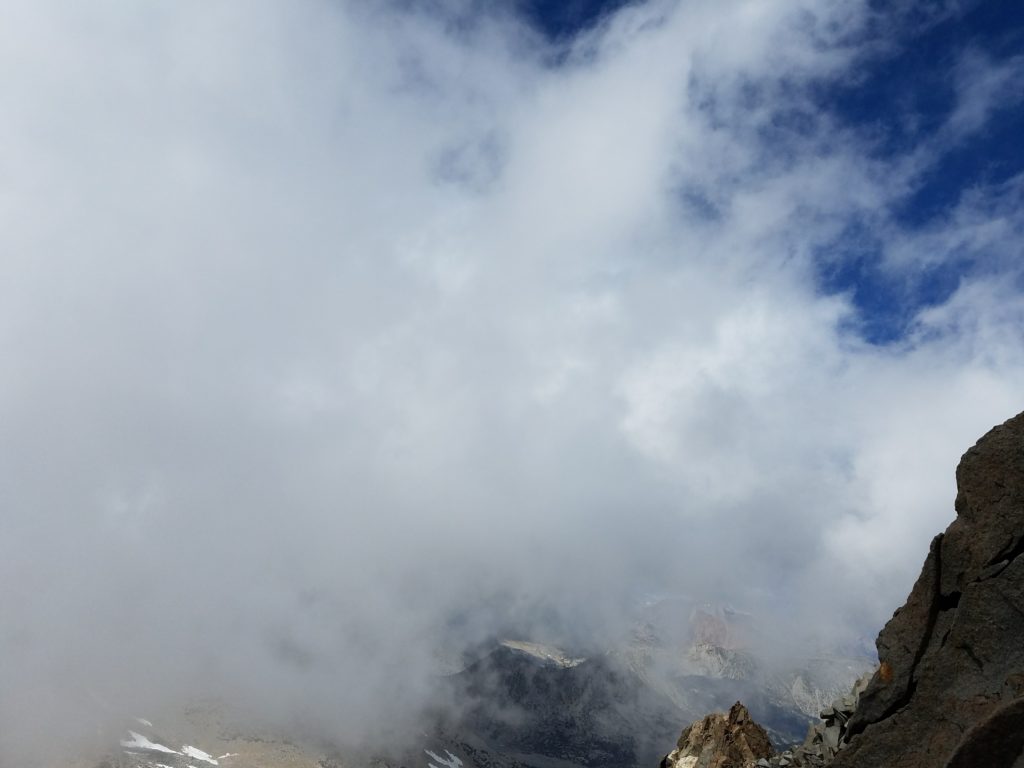
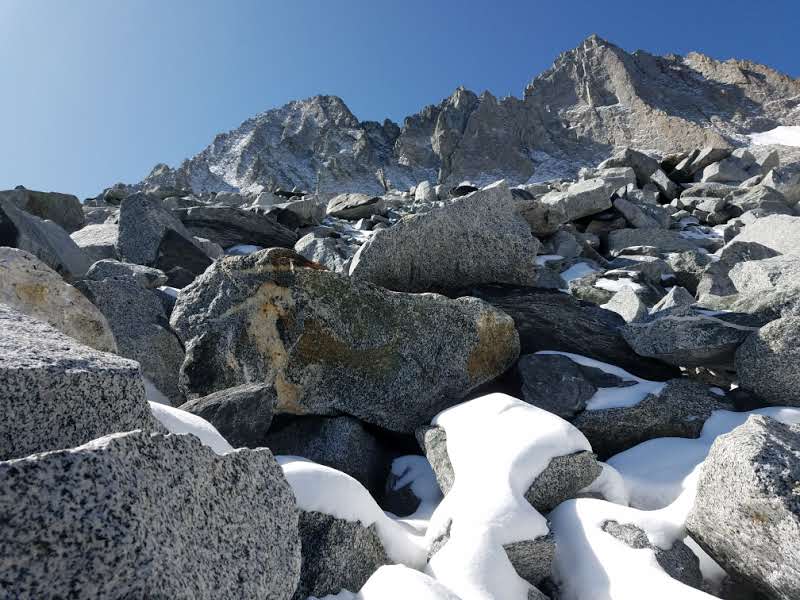
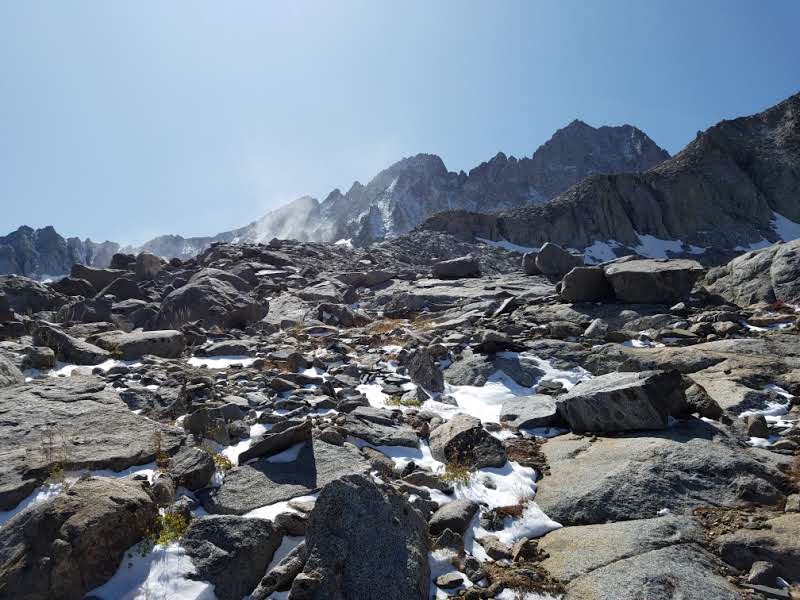
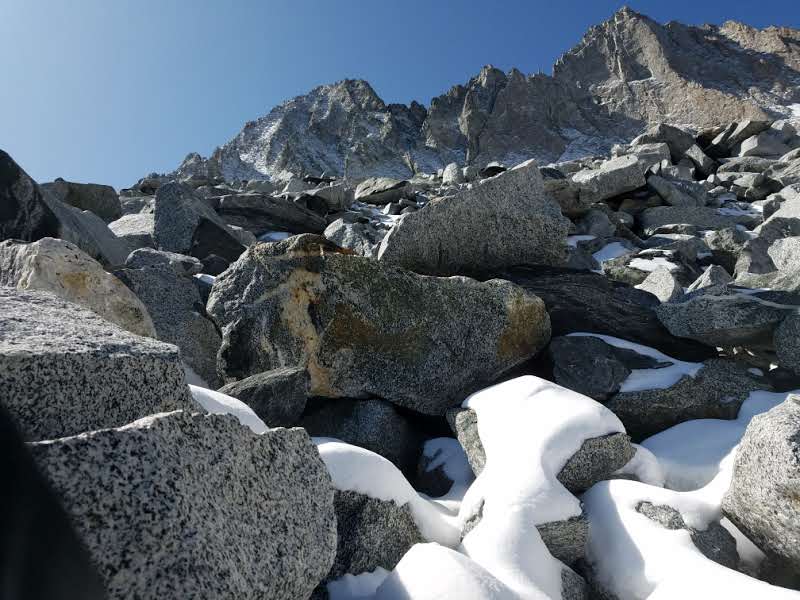
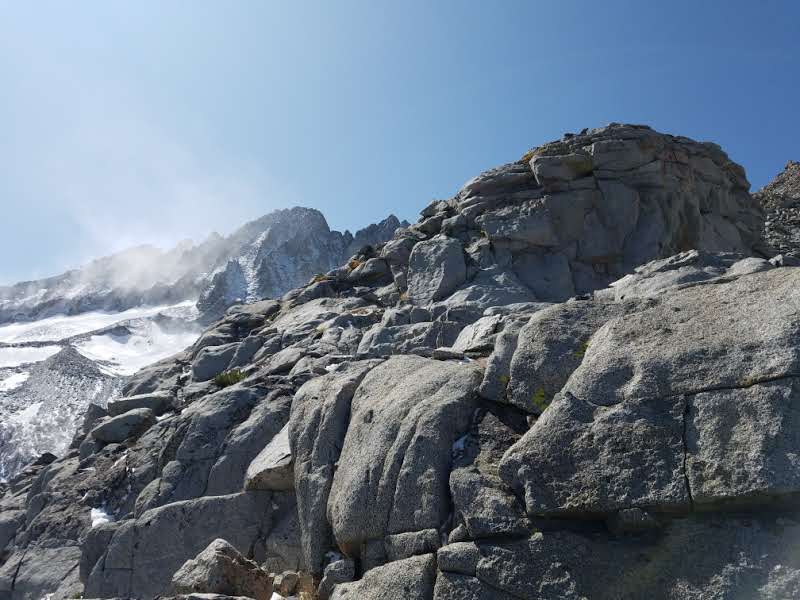
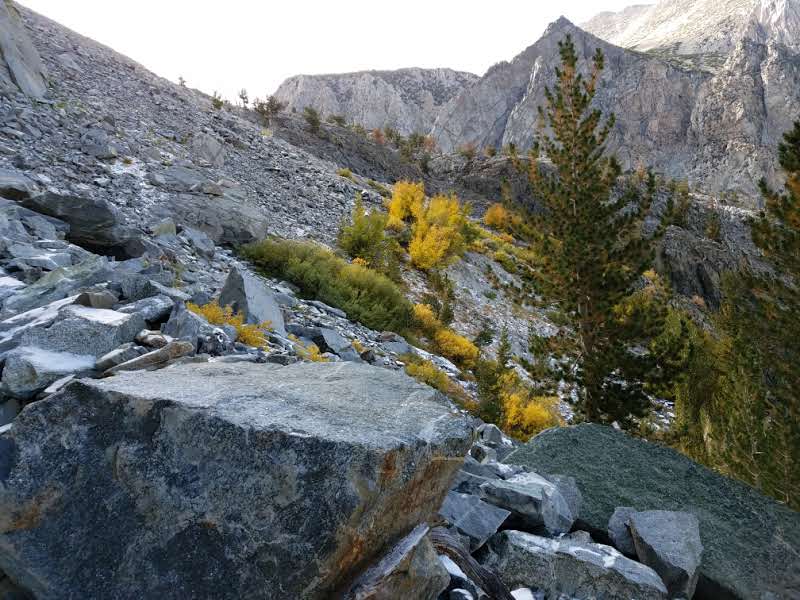
After the snack break (and, despite resting for a handful of minutes, not seeing the hiker once so close to me), I continued the climb to Dick’s Peak. Cairns and a faint use trail lead through an oddly dark rock field and onto the final ridge.
To Dick’s Peak
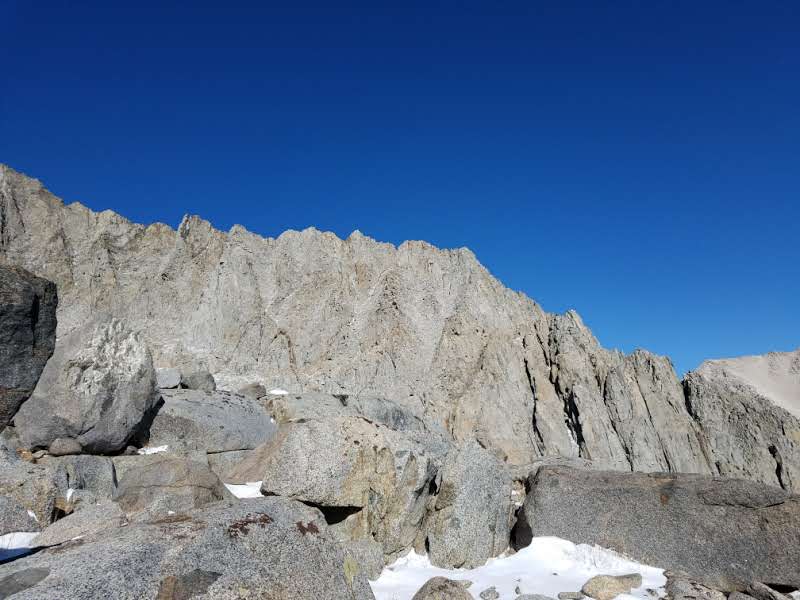
The last ridge climb to Dick’s Peak involves Class 2 maneuvers around ledges and over boulders. At worst, there are maybe a couple low Class 3 moves – and only because of some exposure. Some cairns guide through a path of least resistance, but overall you don’t really need them. Just climb.
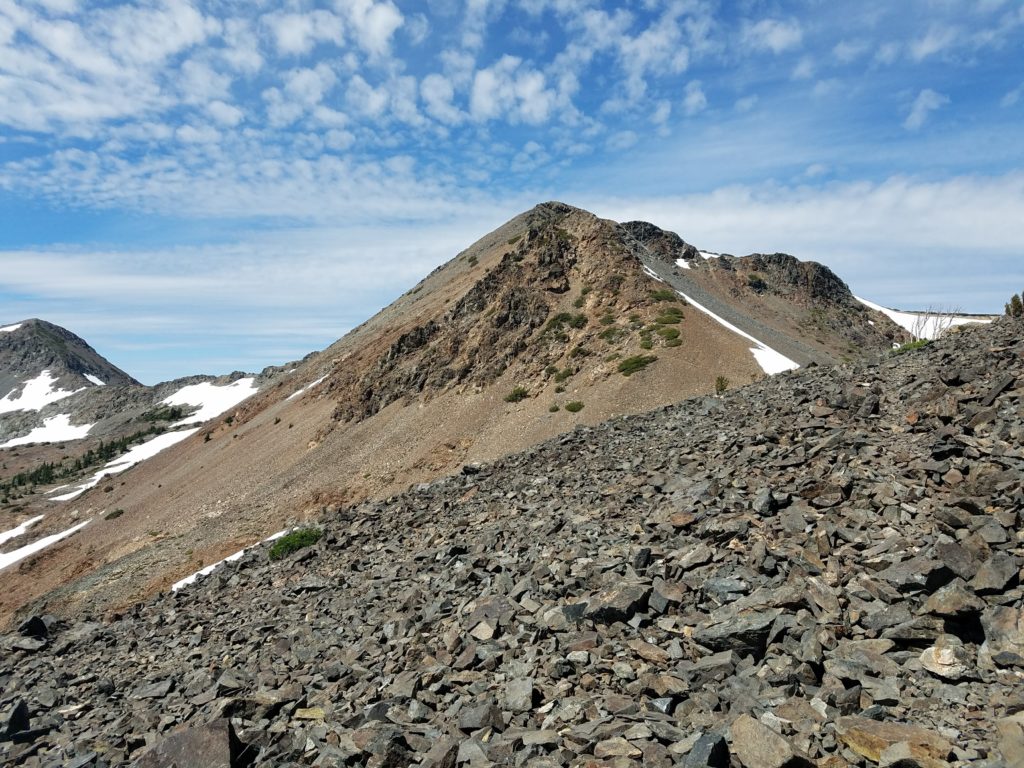
This bit of difficulty ends with a false summit. From there, the last bit of climbing to Dick’s Peak takes only a few minutes and drops in difficulty.
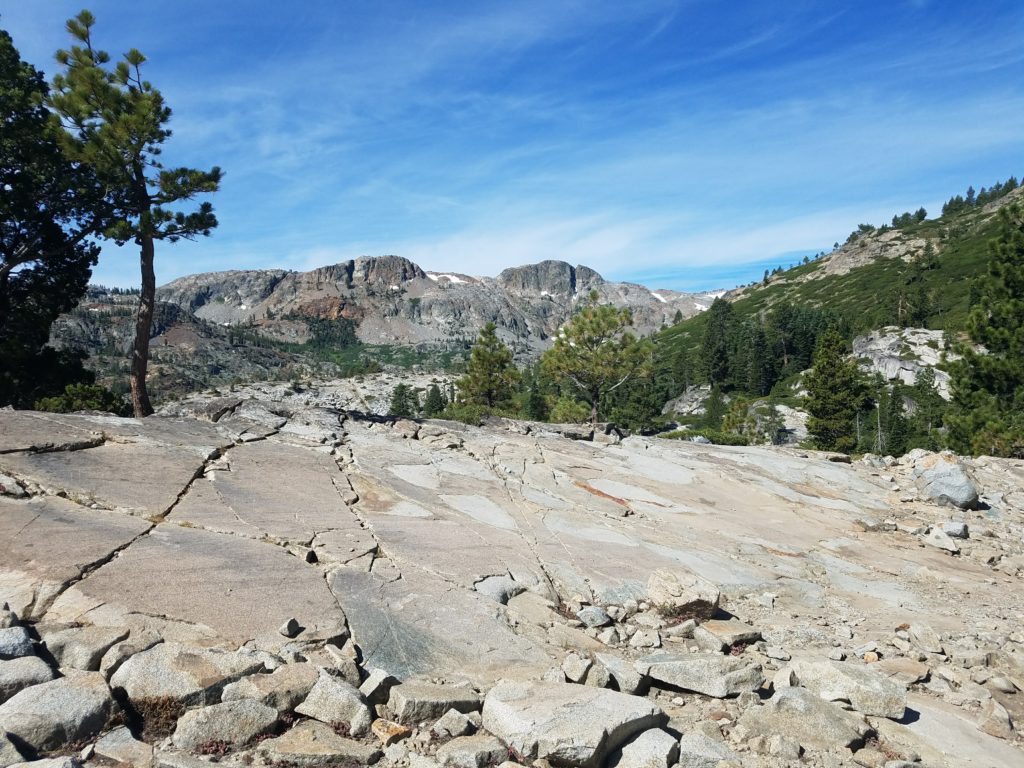
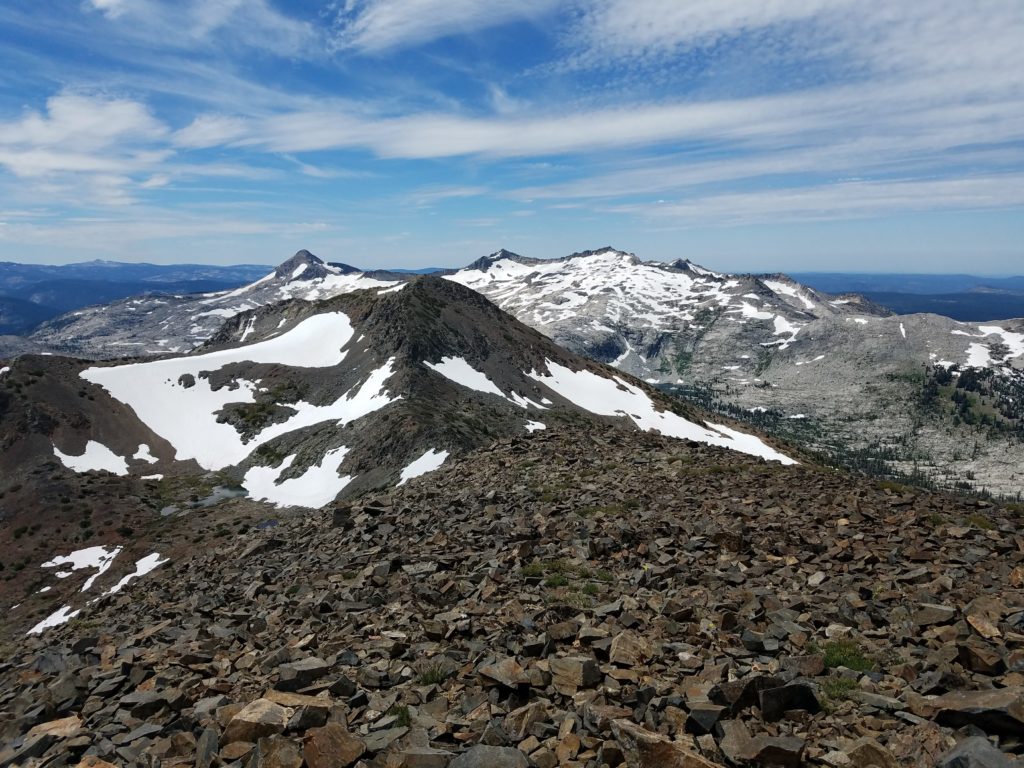
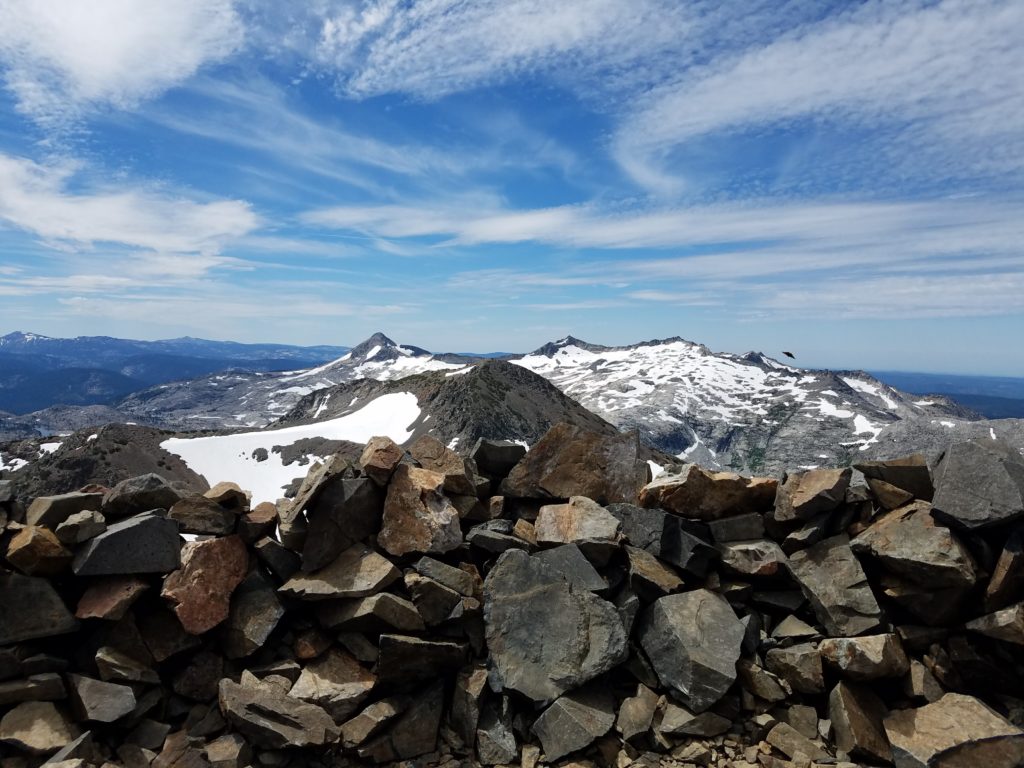
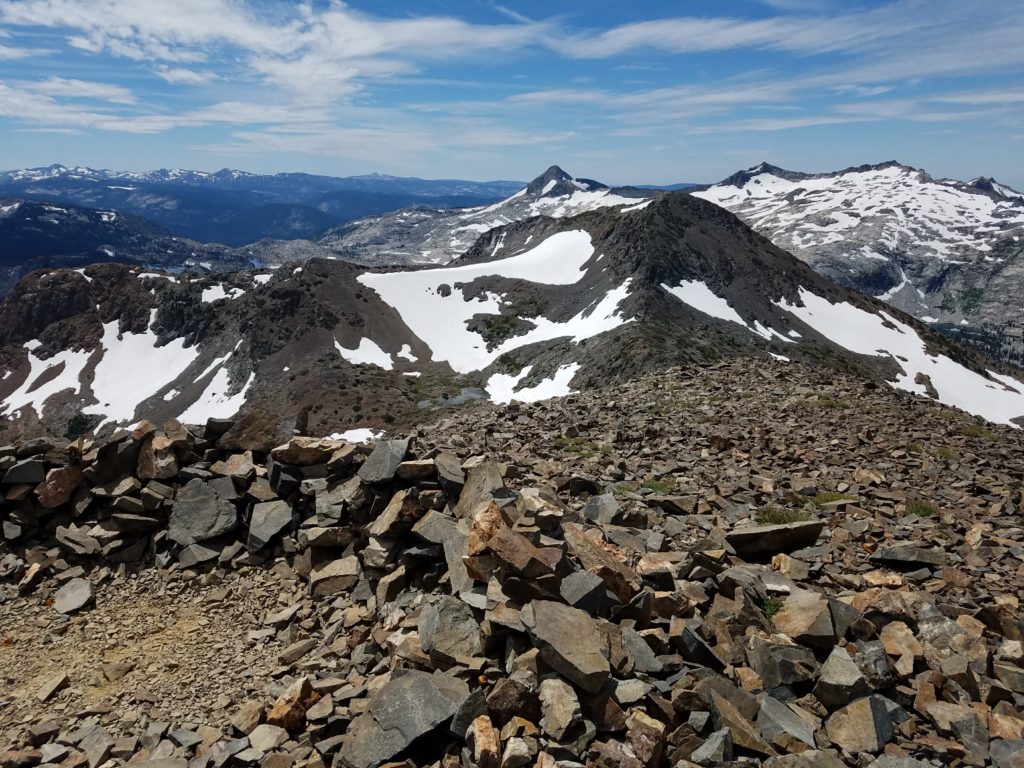
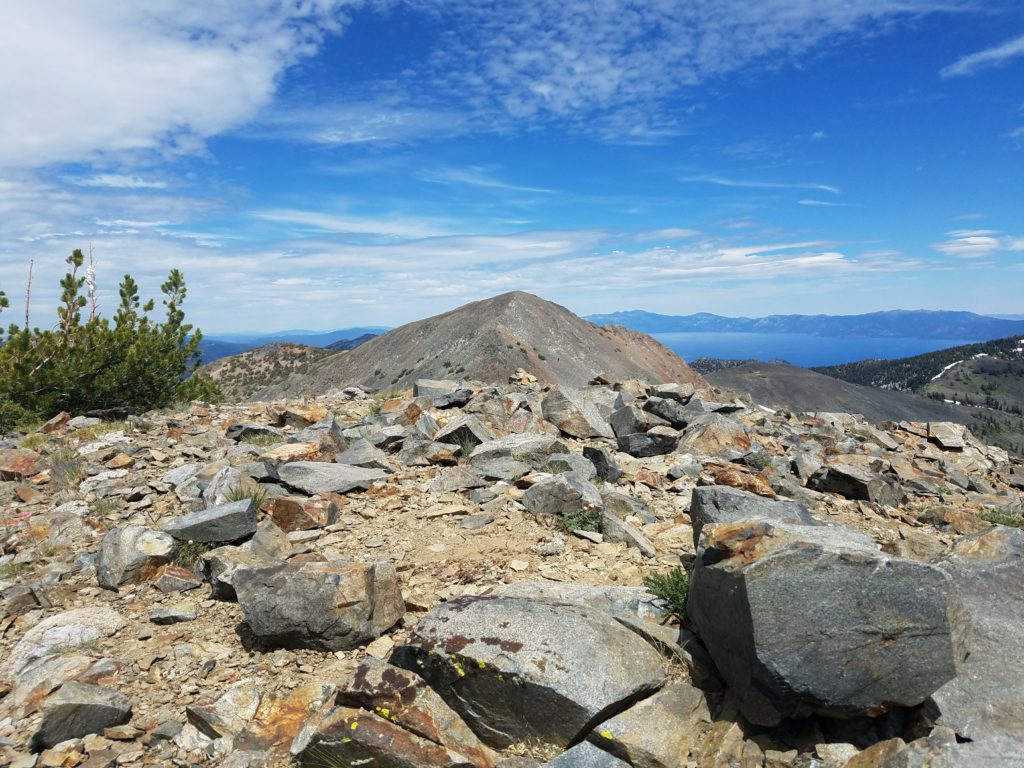
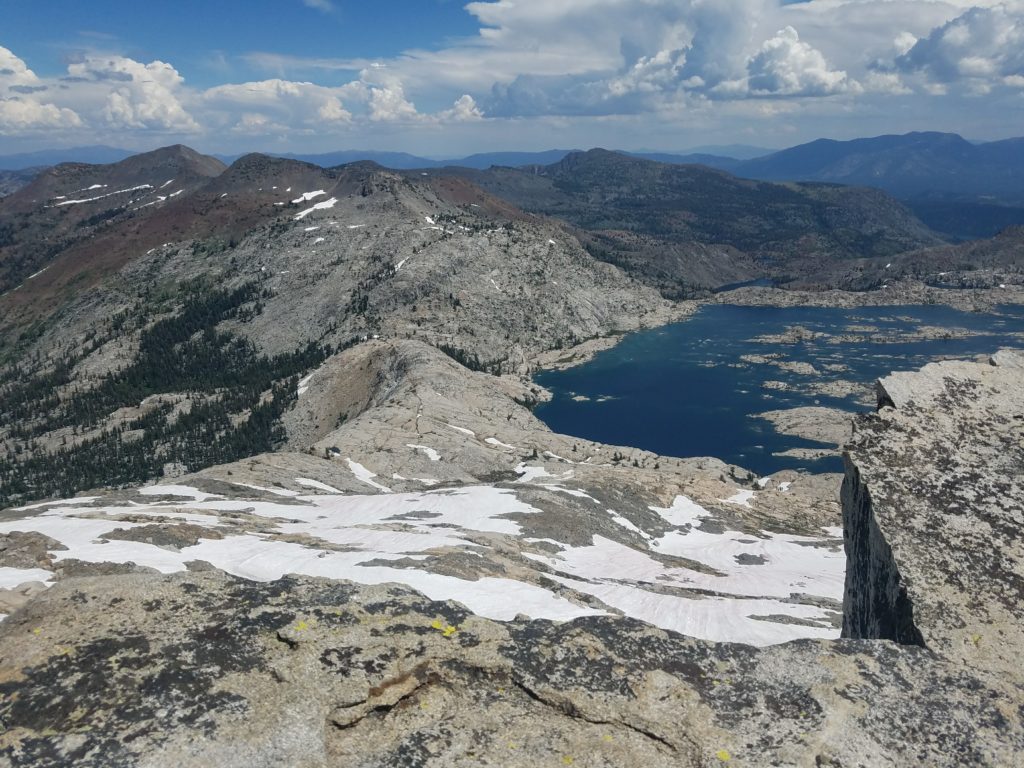
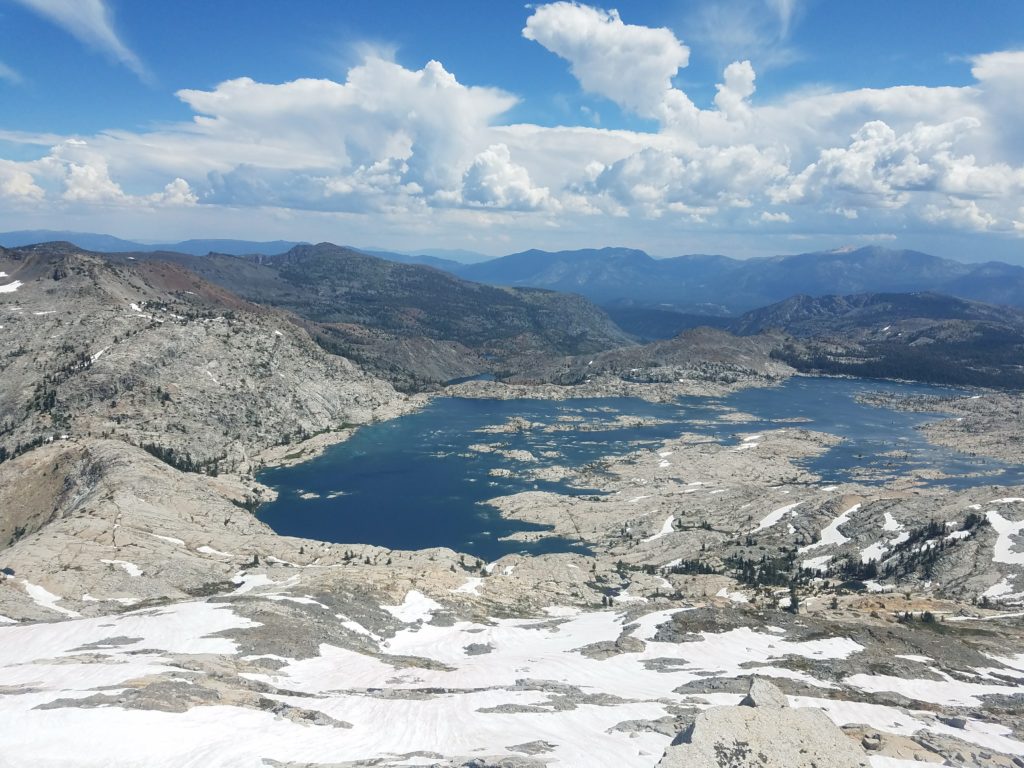
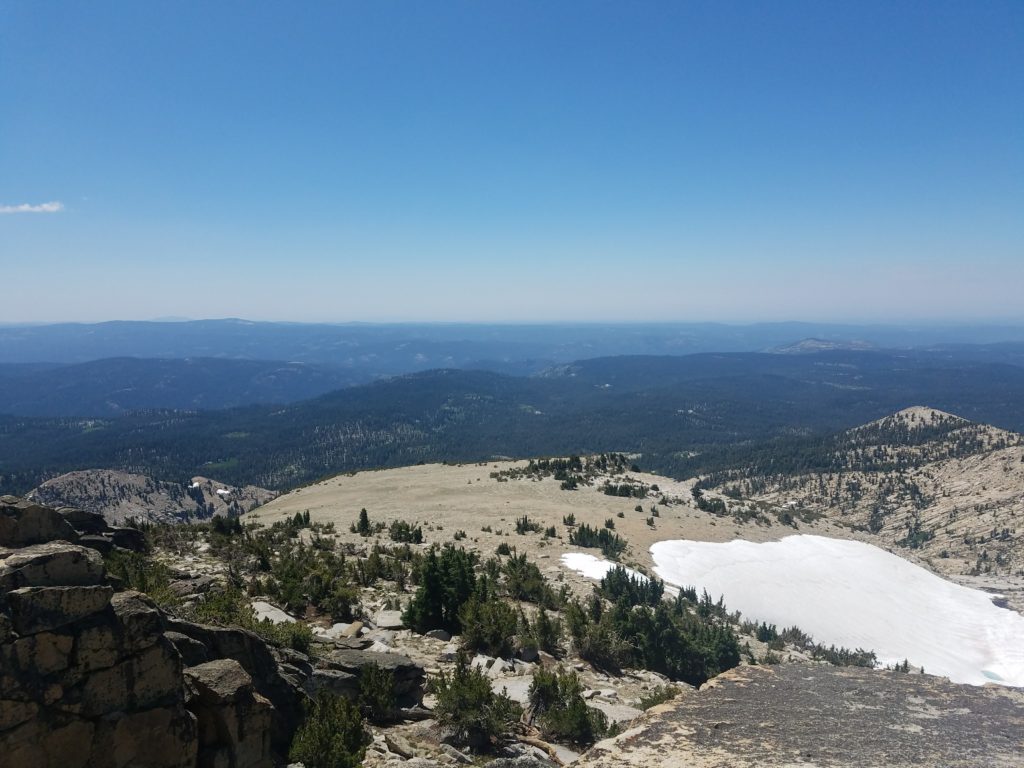
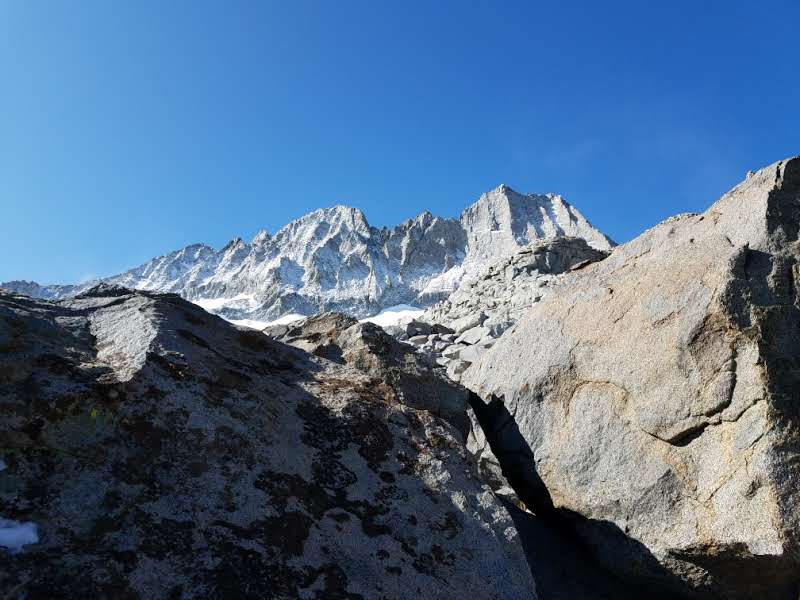
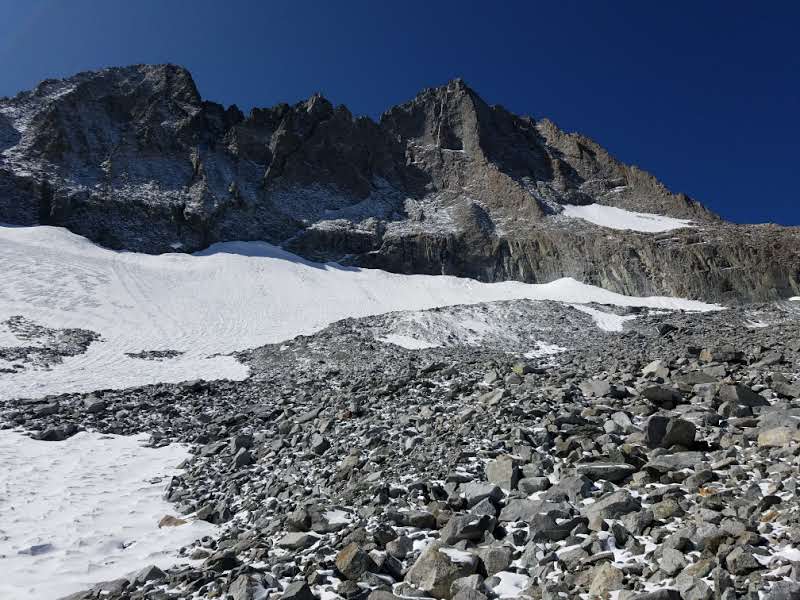
The summit, the third highest in Desolation Wilderness (one foot shorter than Mt. Price), is a broad and flat plateau with a depression to avoid the wind.

Dick’s Peak
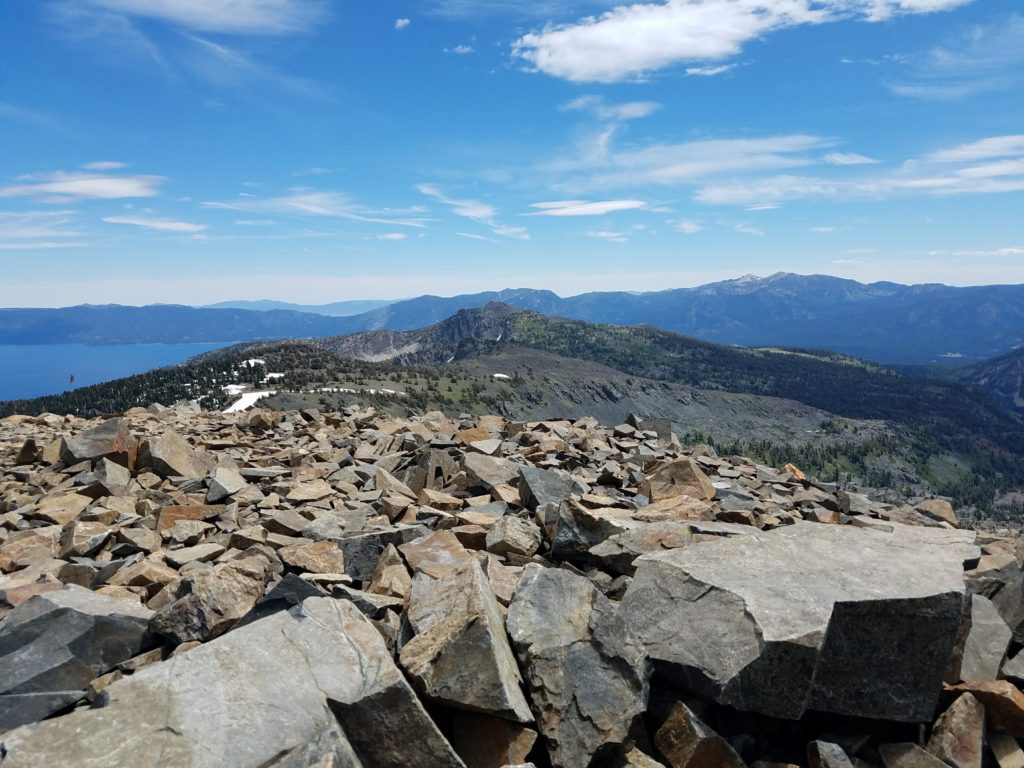
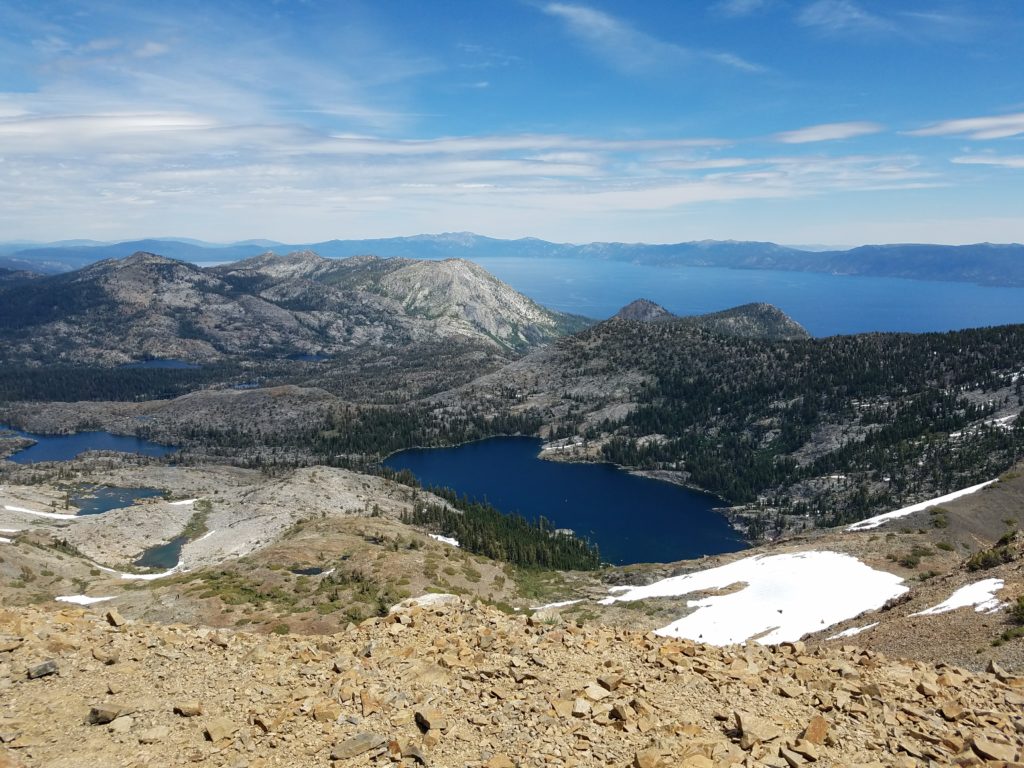
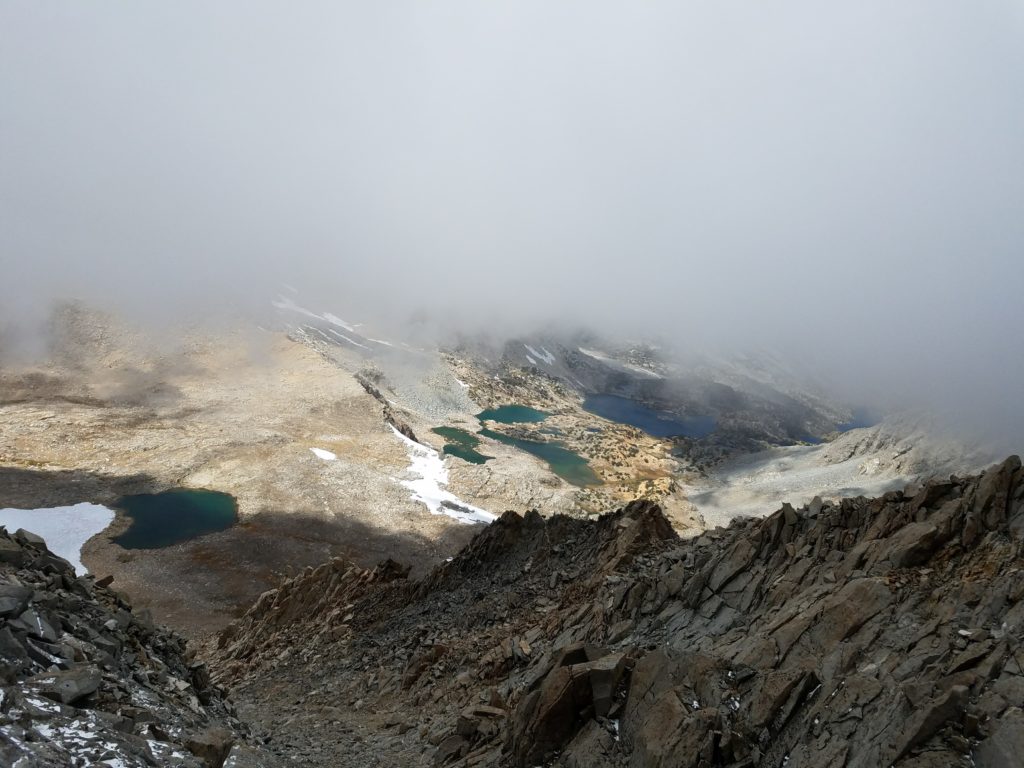
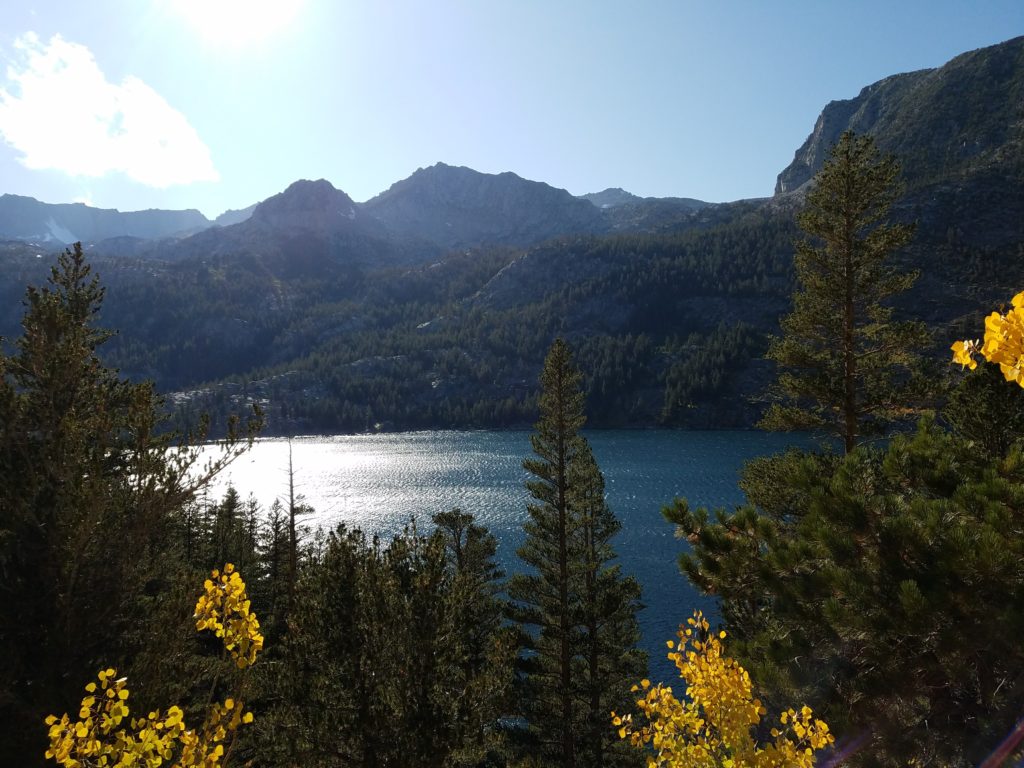
It offers stunning views around Desolation Wilderness, from Dick’s Lake and Fontanillis Lake in the north to Lake Tahoe and Mt. Tallac in the east, Half Moon Lake and the Cracked Crag and distant Sierra slopes to the south, and Rockbound valley to the west. I keep forgetting to research which crests and peaks look so high and seducing south of I-50.
On clear days, hikers can even enjoy such distant beauties such as the Trinity Alps, Mt. Lassen, and the Mt. Shasta area. This clarity typically happens after storms roll through, so not too typical in summer.
I enjoyed a sandwich and the views for 15 or 20 minutes. It was 11:30 or so when I arrived and I figured I had plenty of time to reach Jack’s Peak and climb from it down to Lake Aloha.
After some final obligatory summit selfies, I retreated off the east side of the summit. I didn’t know the best way of reaching the ridge that separated Jack’s Peak and Dick’s Peak. Going up and over Dick’s Peak didn’t seem great – it looked very steep and with unstable shale on which I wouldn’t want to trust my weight.
To Jack’s Peak
Instead, returning to the east ridge, I downclimbed a bit and then turned towards Jack’s Peak, opting to traverse laterally over shale and scree to the ridge. This wasn’t pleasant. On each step my foot slipped and the layers of talus risked falling further with any weight placed. As I continued I wondered if going up and over Dick’s Peak would have been easier.
I worked to avoid a couple snowbanks, traversing above them at times on narrow ground. Overall, though, nothing proved technically challenging. Just annoying.
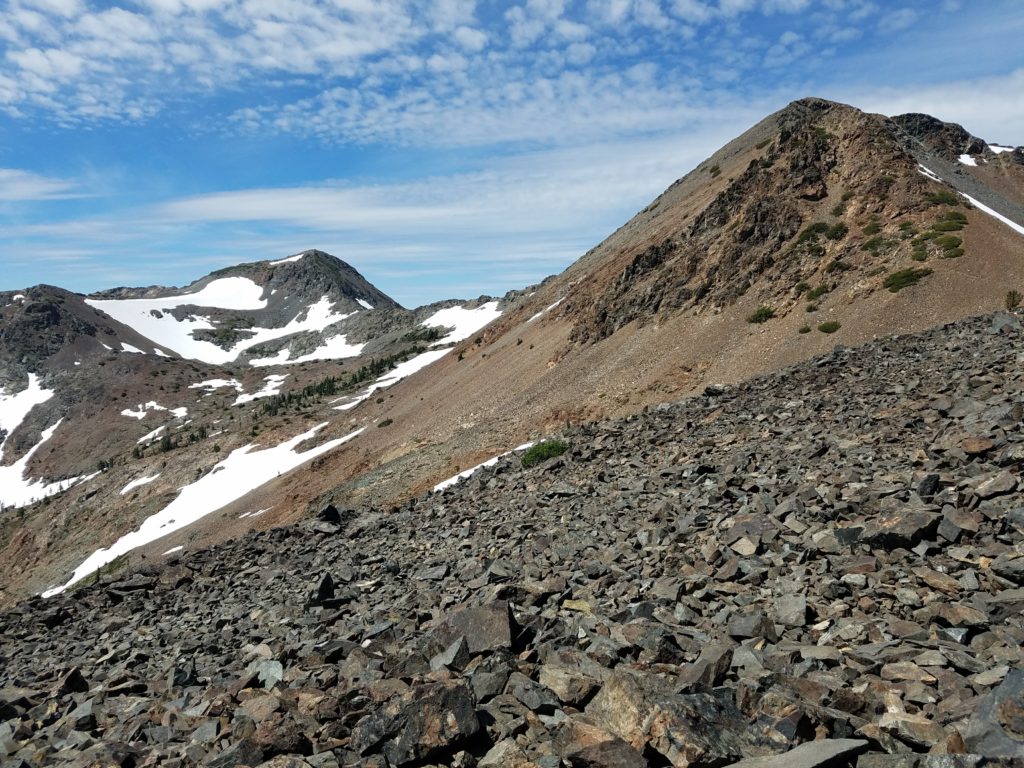
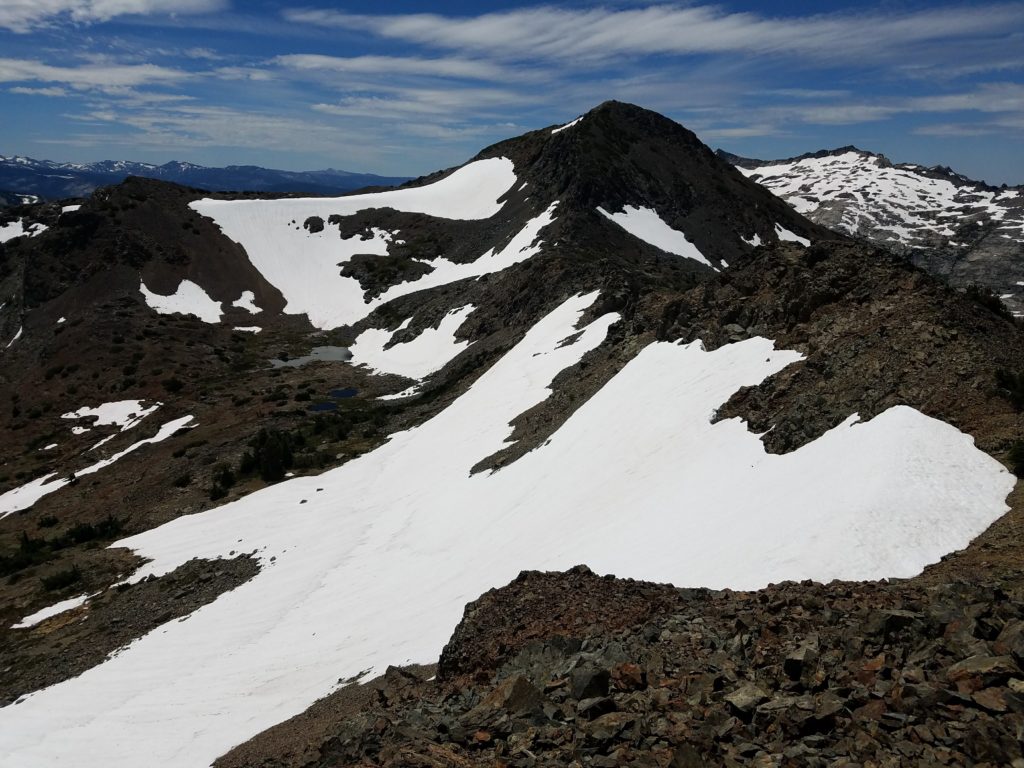
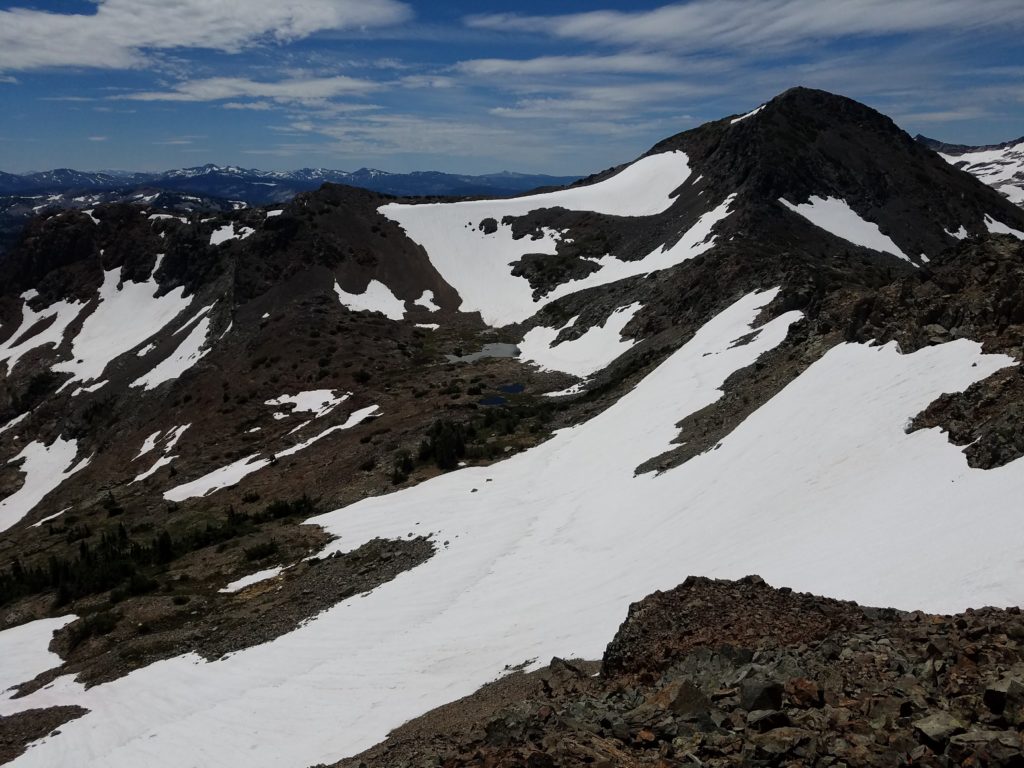
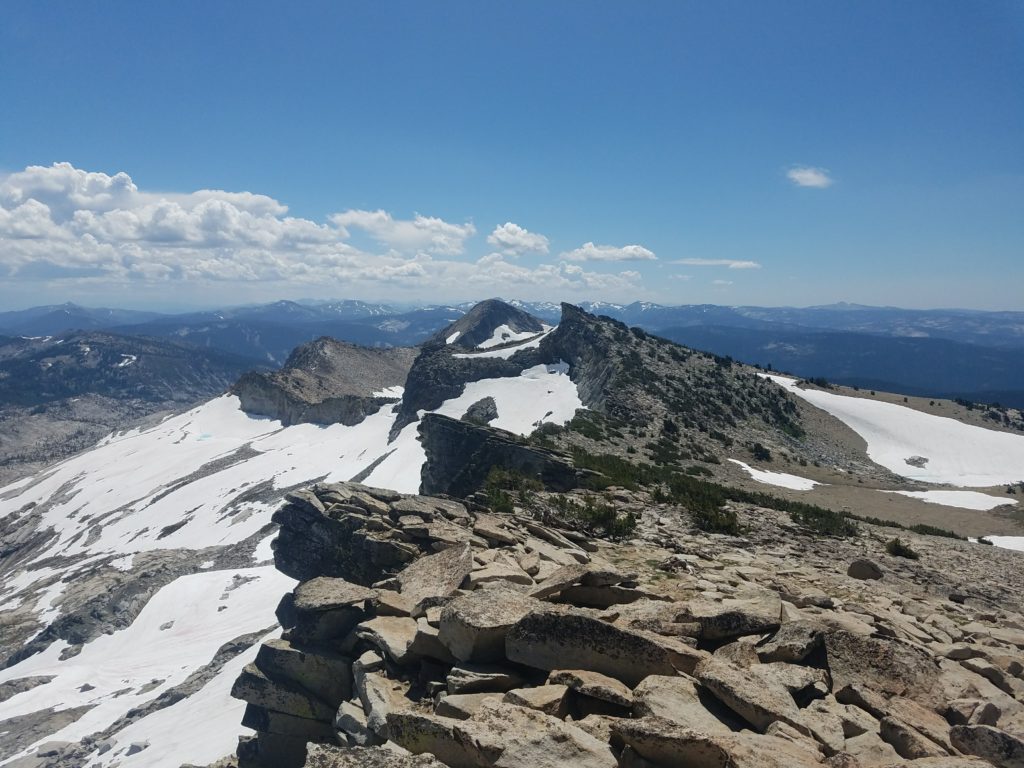
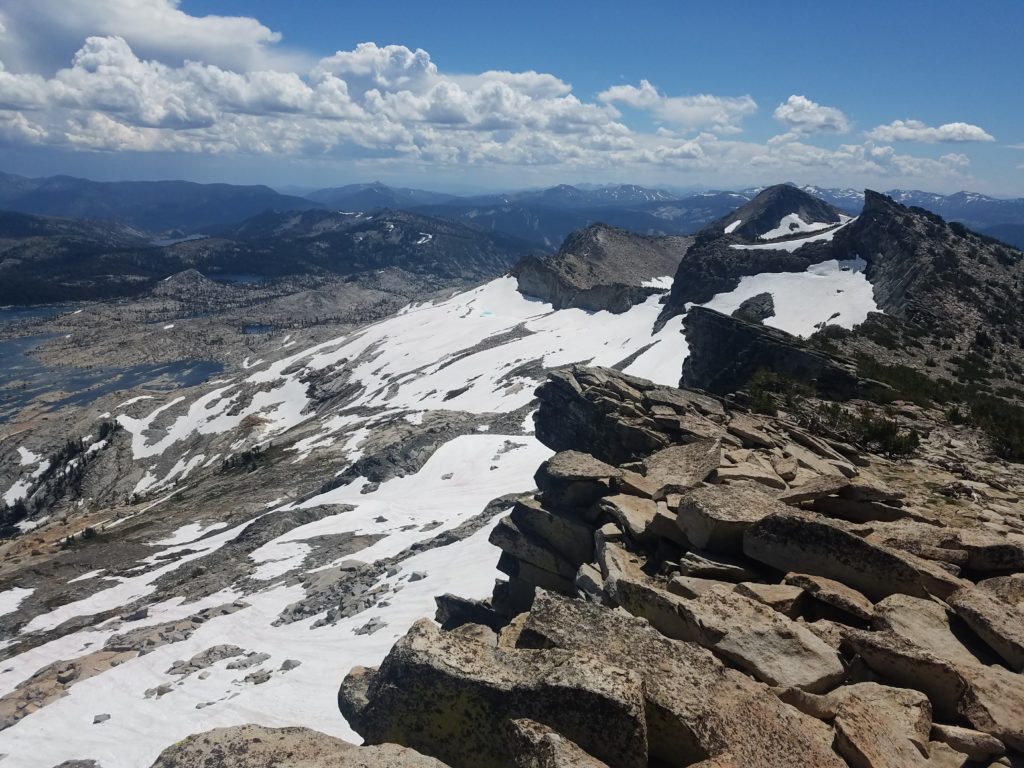
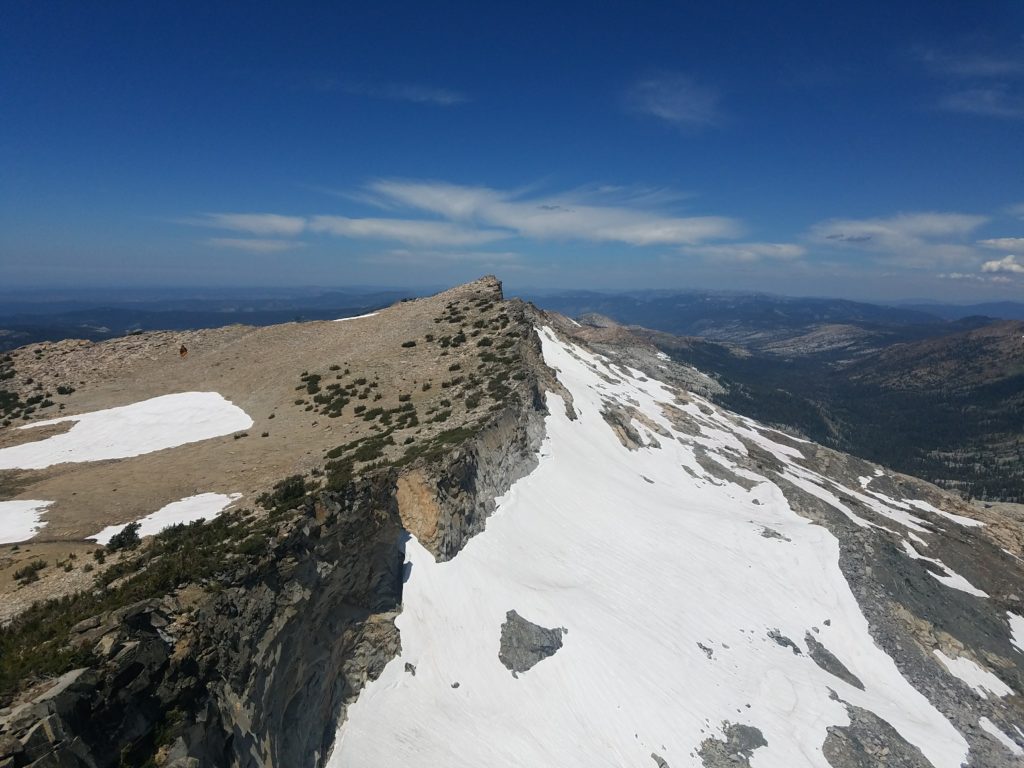
Jack’s Peak loomed ahead on reaching the ridge, a few hundred feet below Dick’s Peak. Here the rock hardened and the ridge itself didn’t require more than Class 2 scrambling. The only difficulty stood at the saddle below the climb up to Jack’s Peak.
A brief Class 3 move separates Jack’s Peak from the ridge. It looks daunting from afar, and the entire time on the ridge I wondered how I would climb it, but once there obvious hand and footholds appear with only limited exposure. Maybe 10 feet.
Jack’s Peak
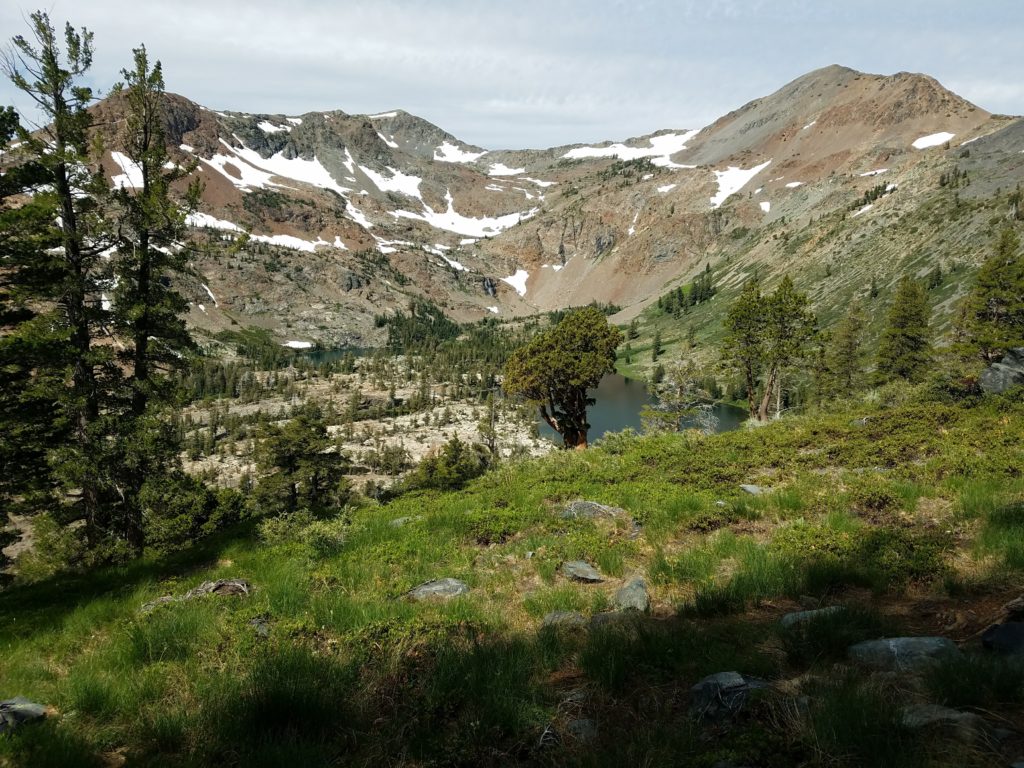
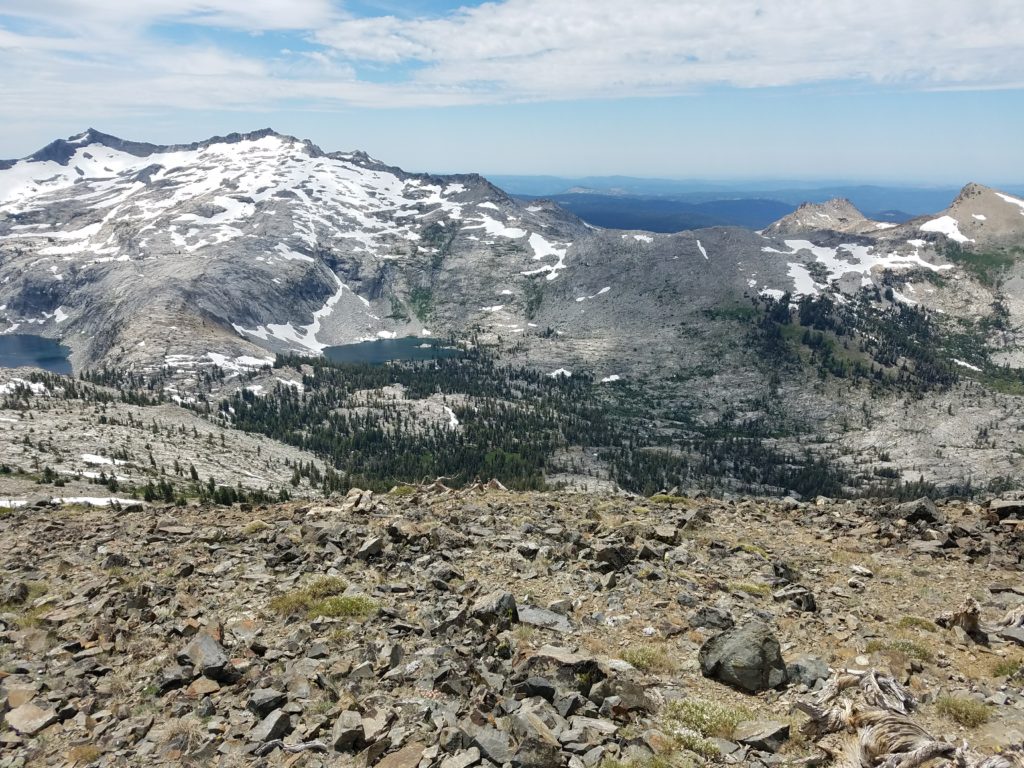
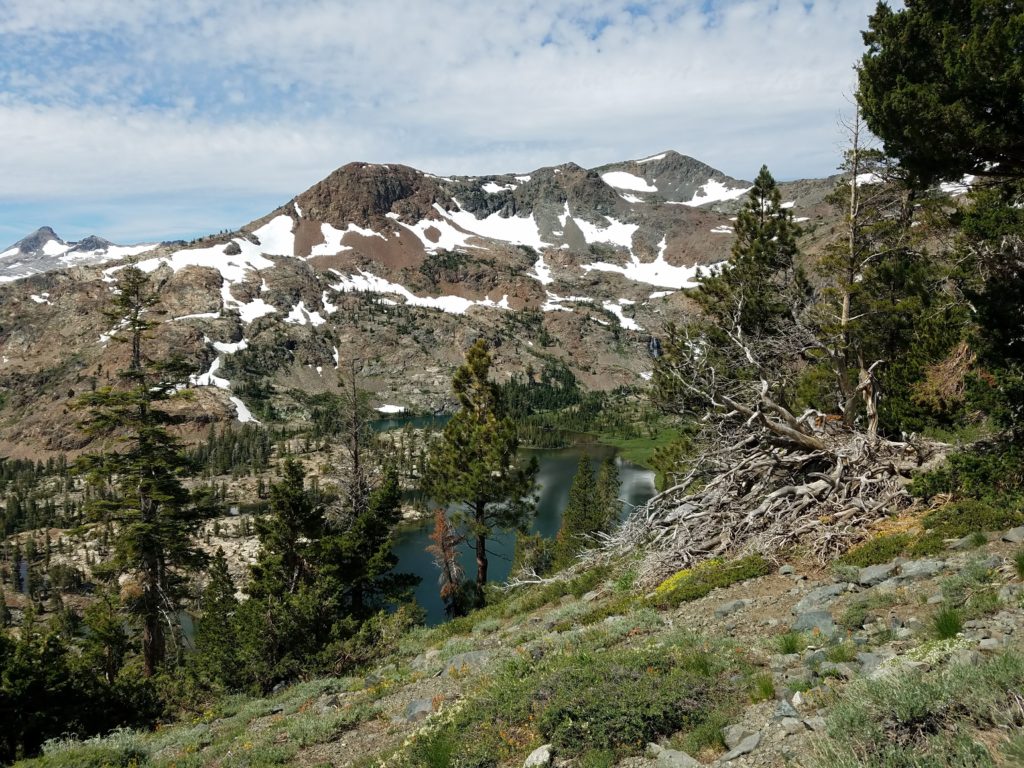
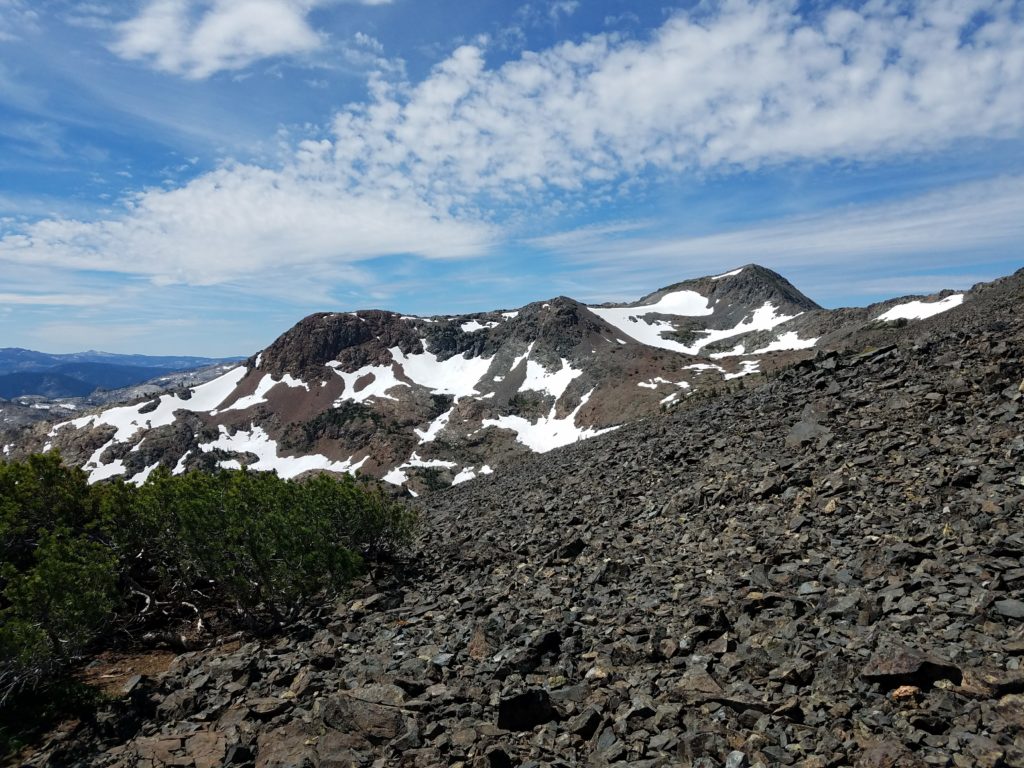
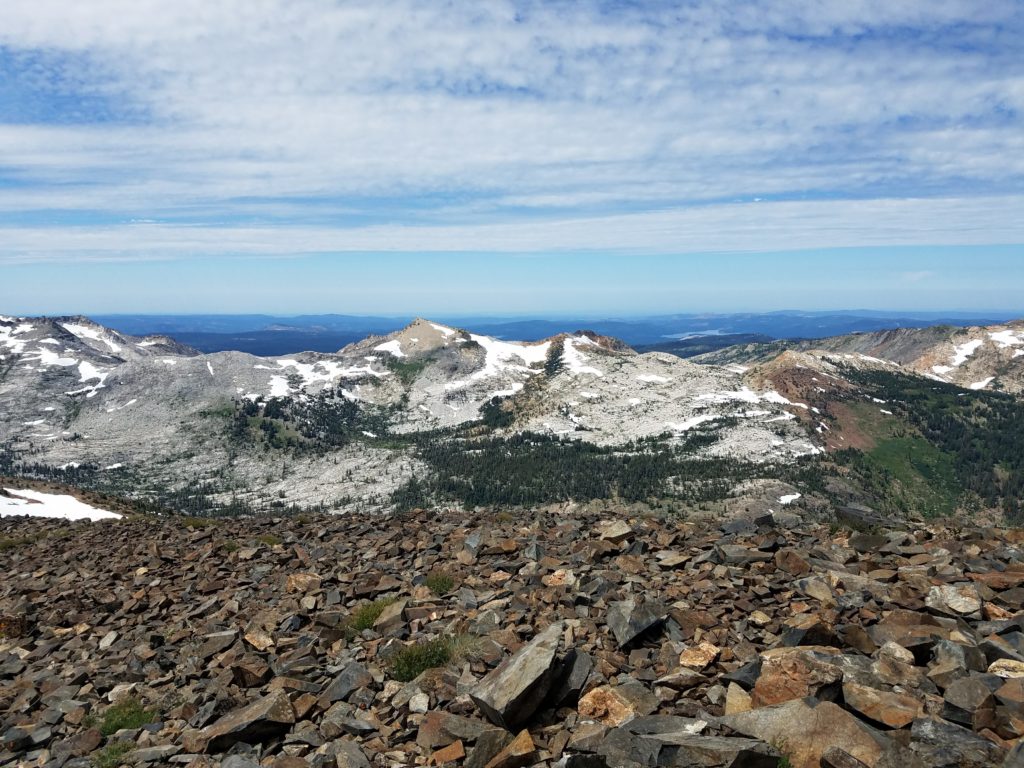
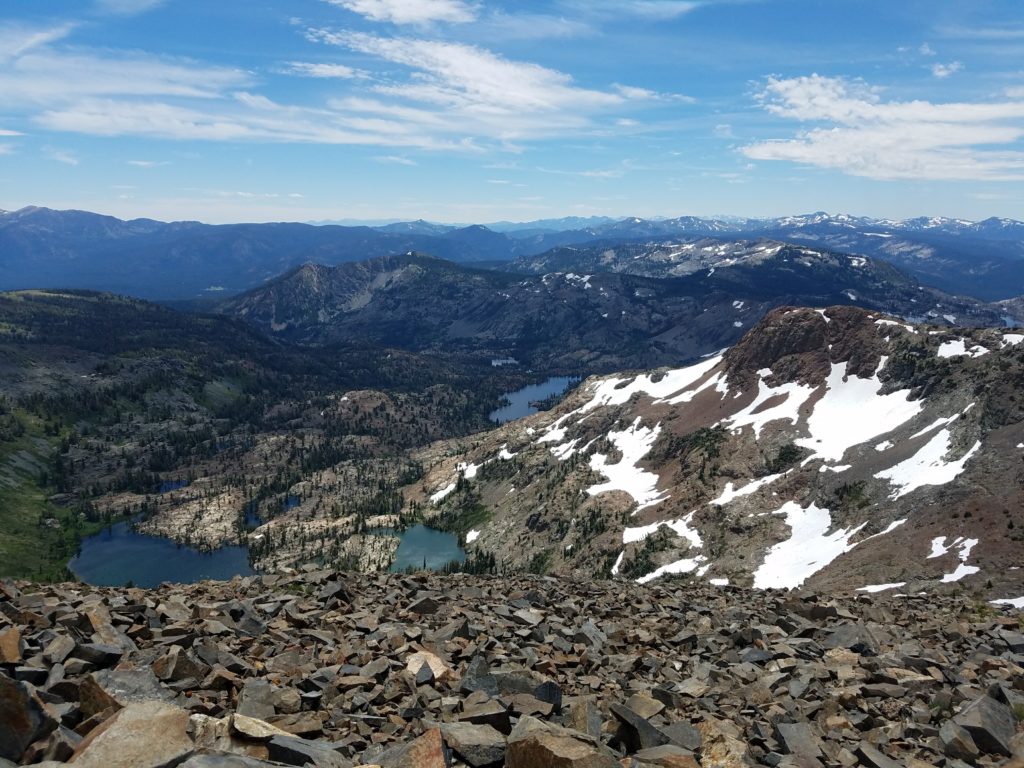
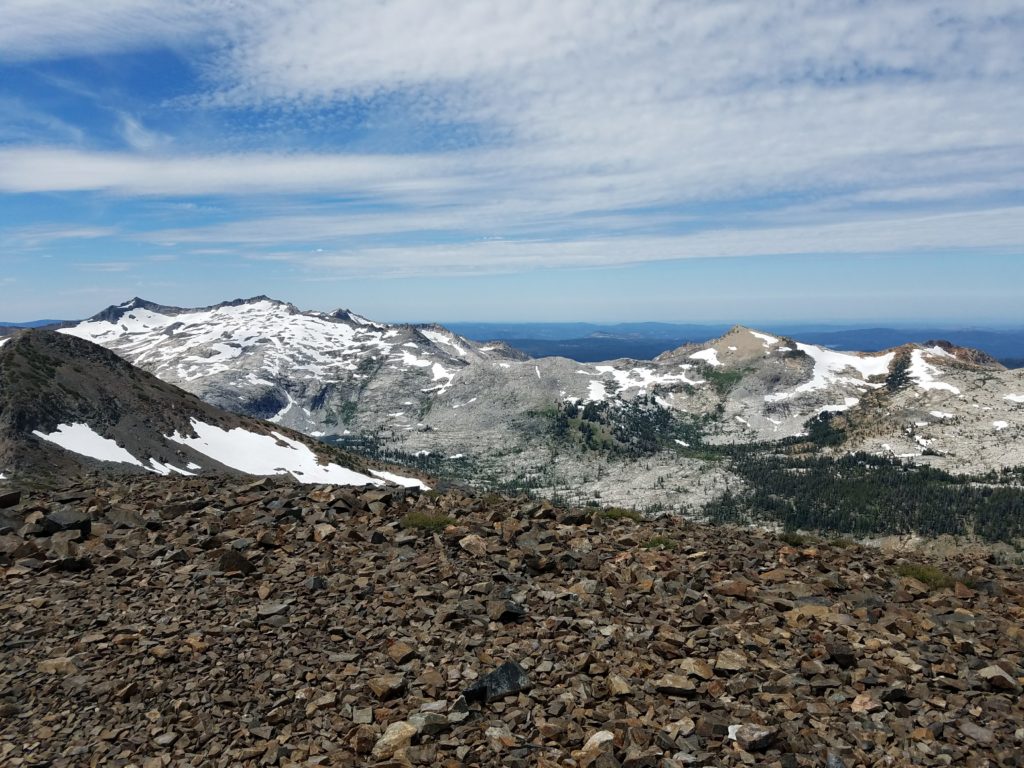
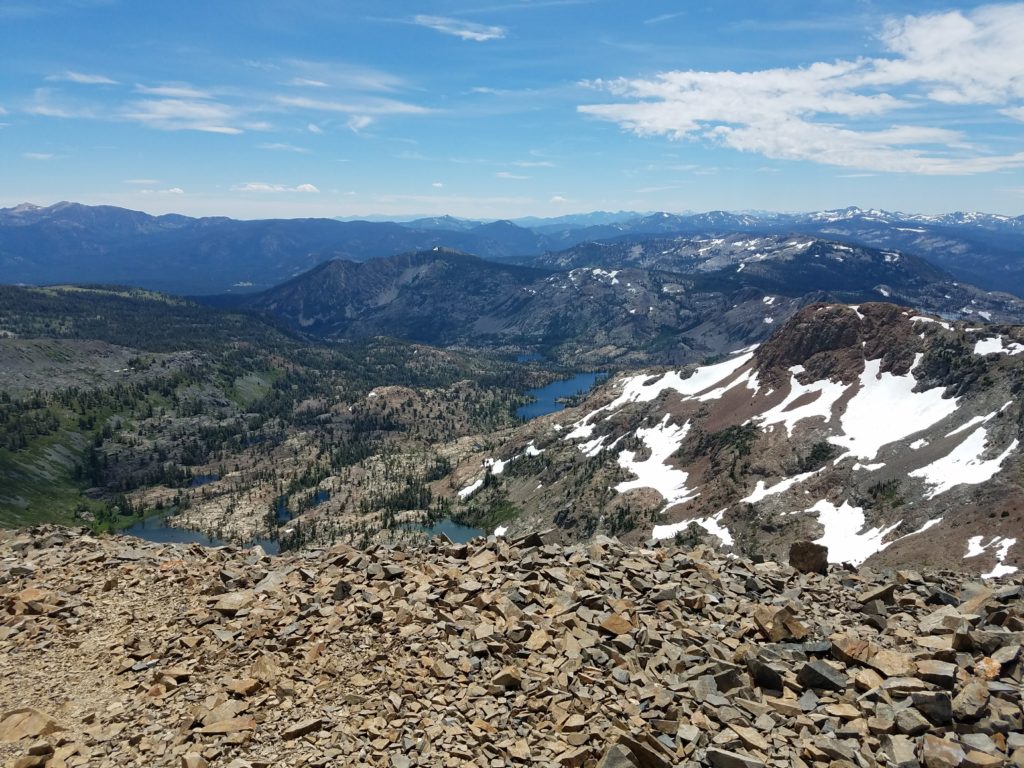
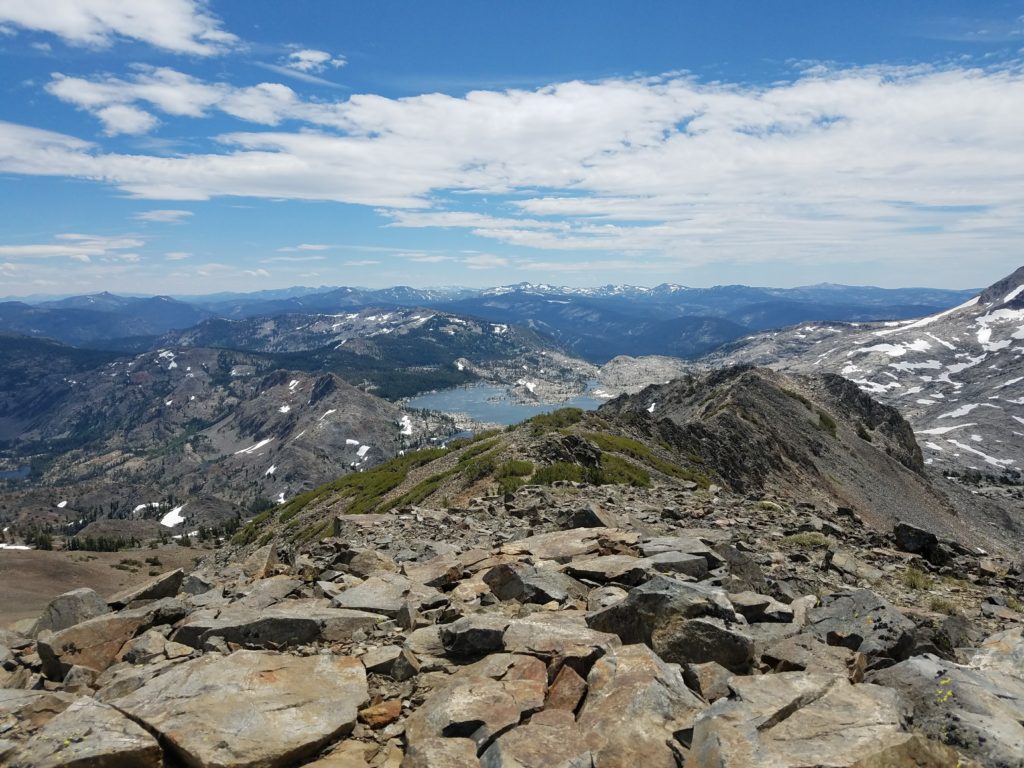
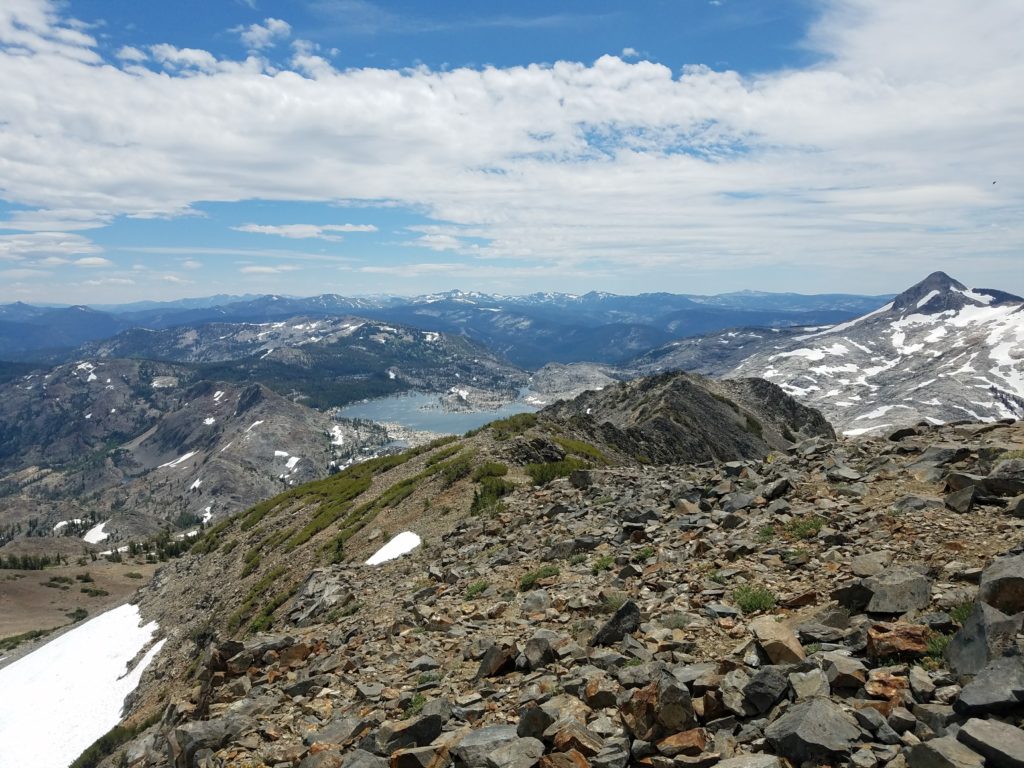
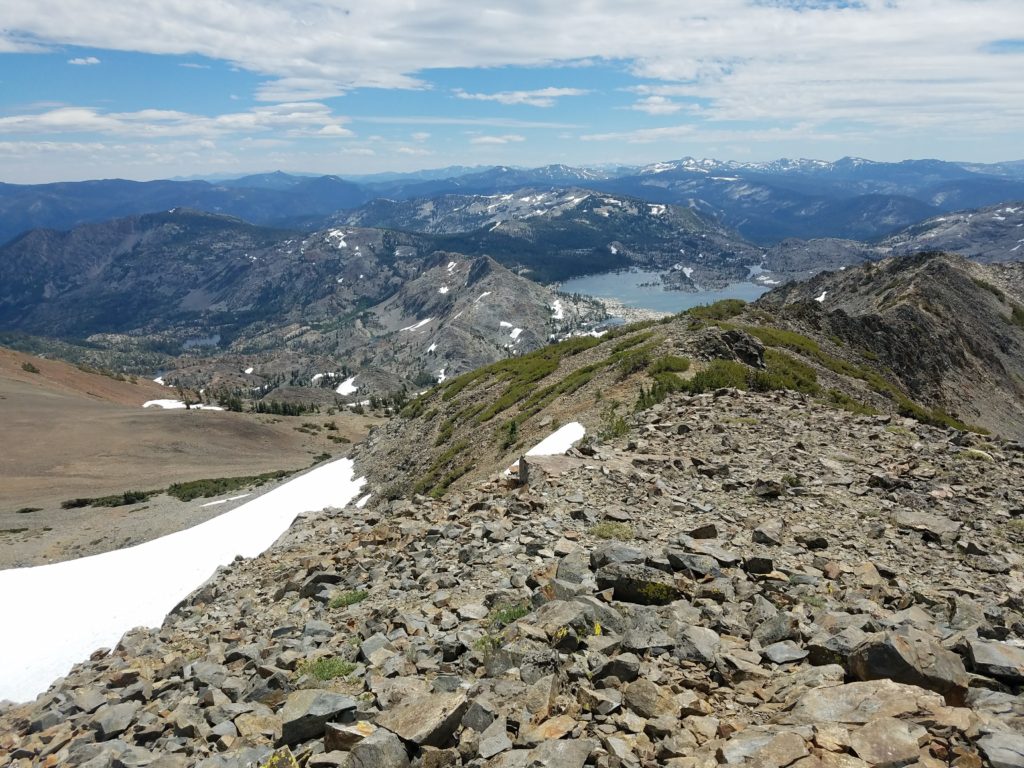
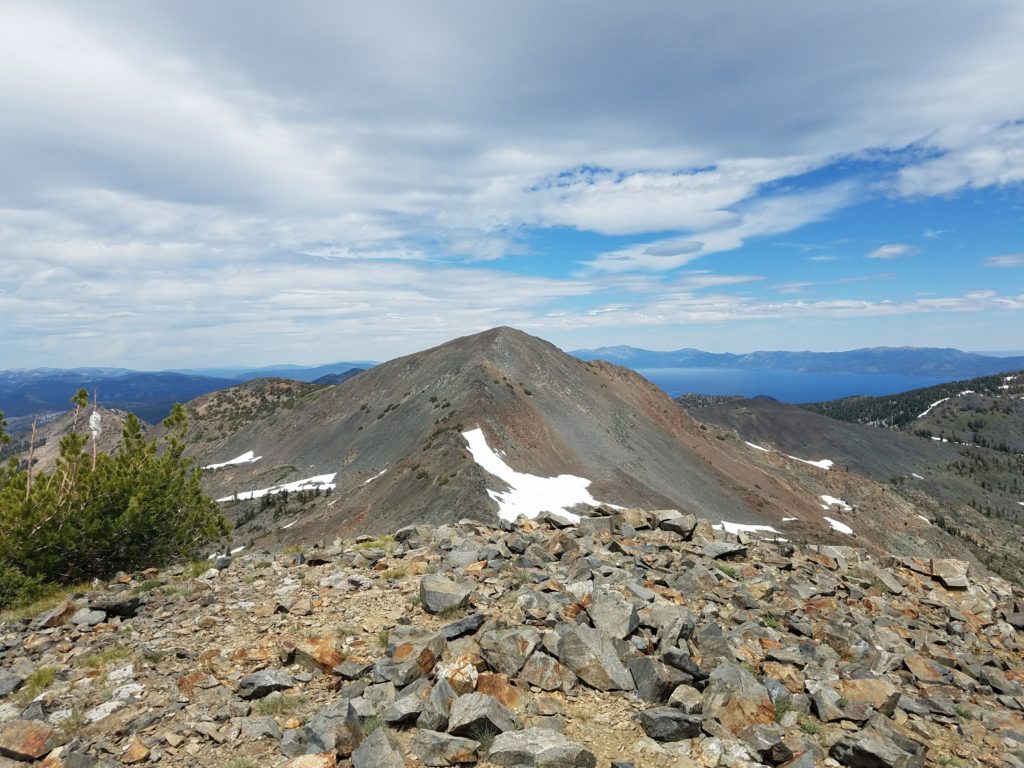
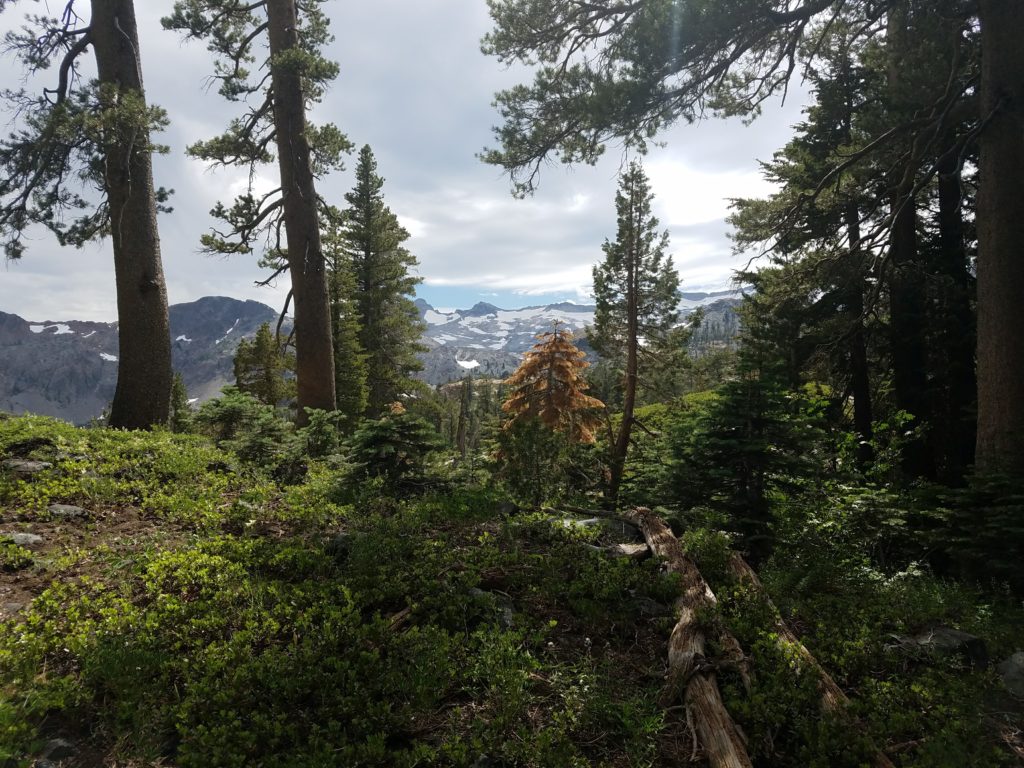
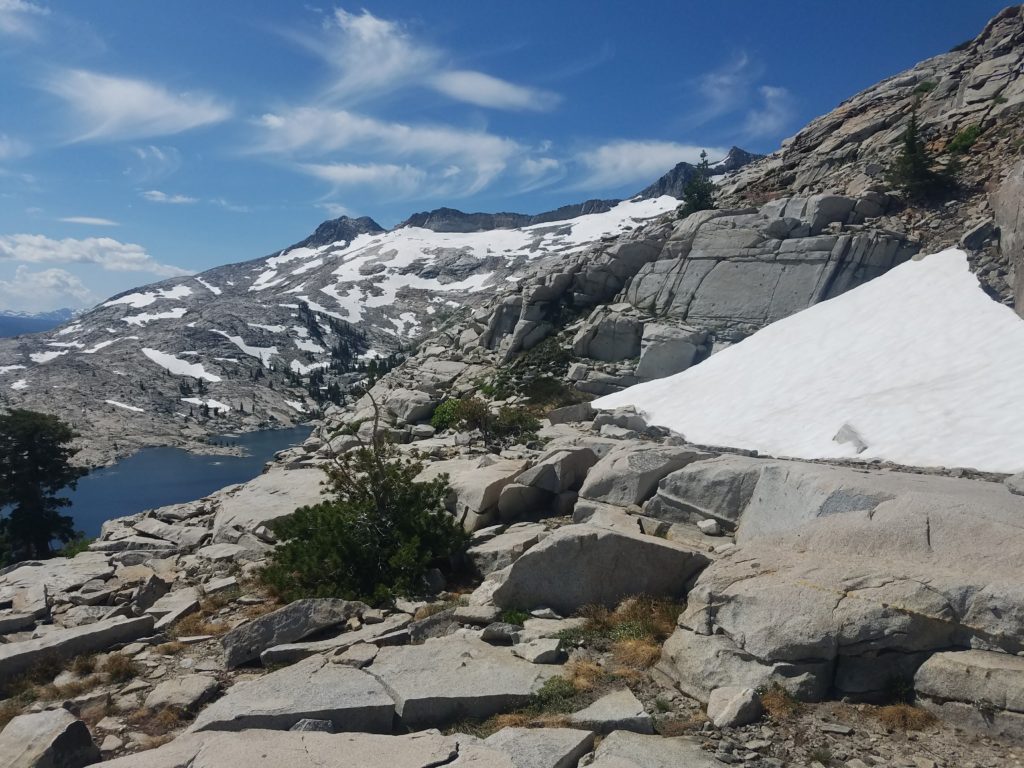
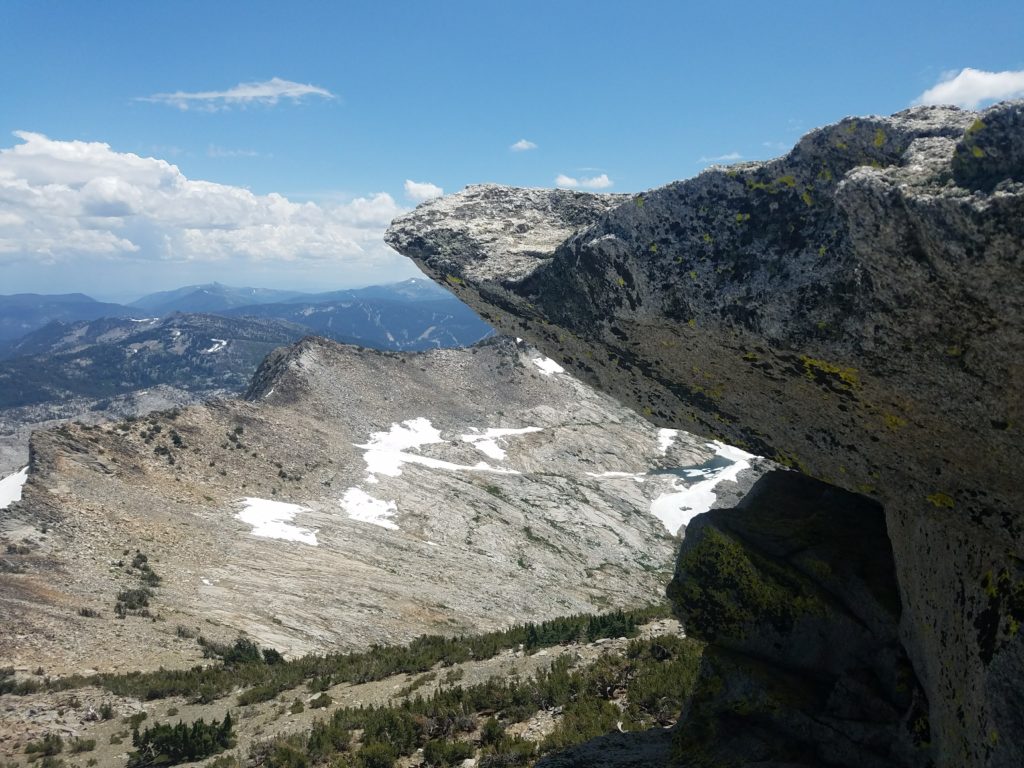
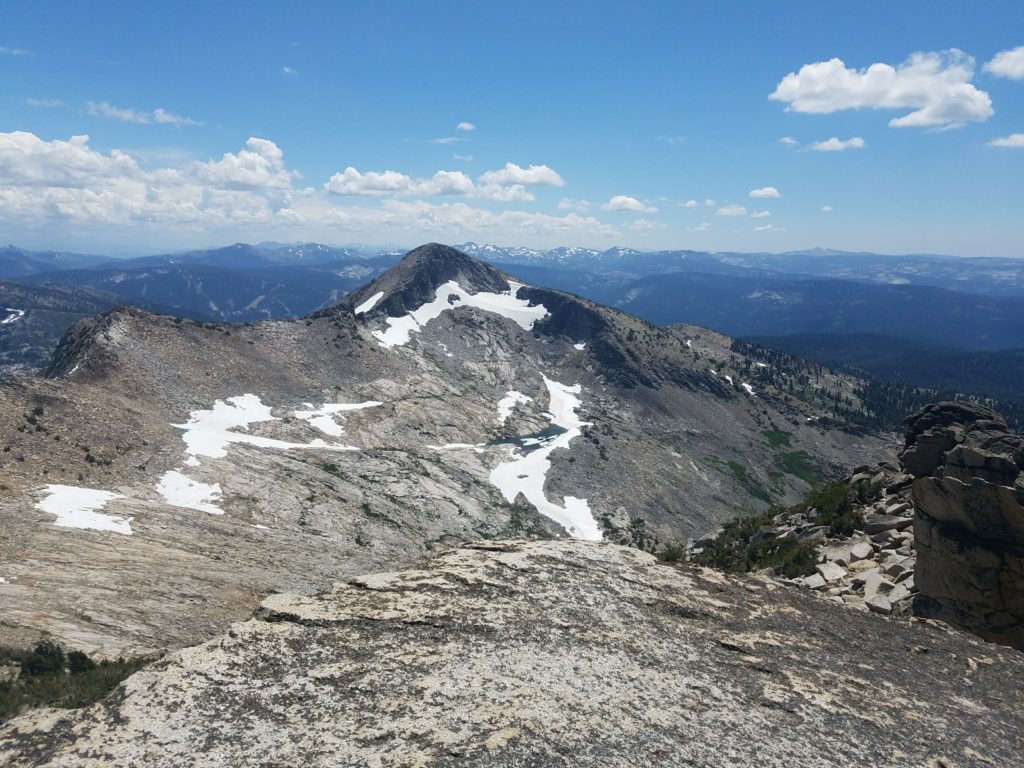
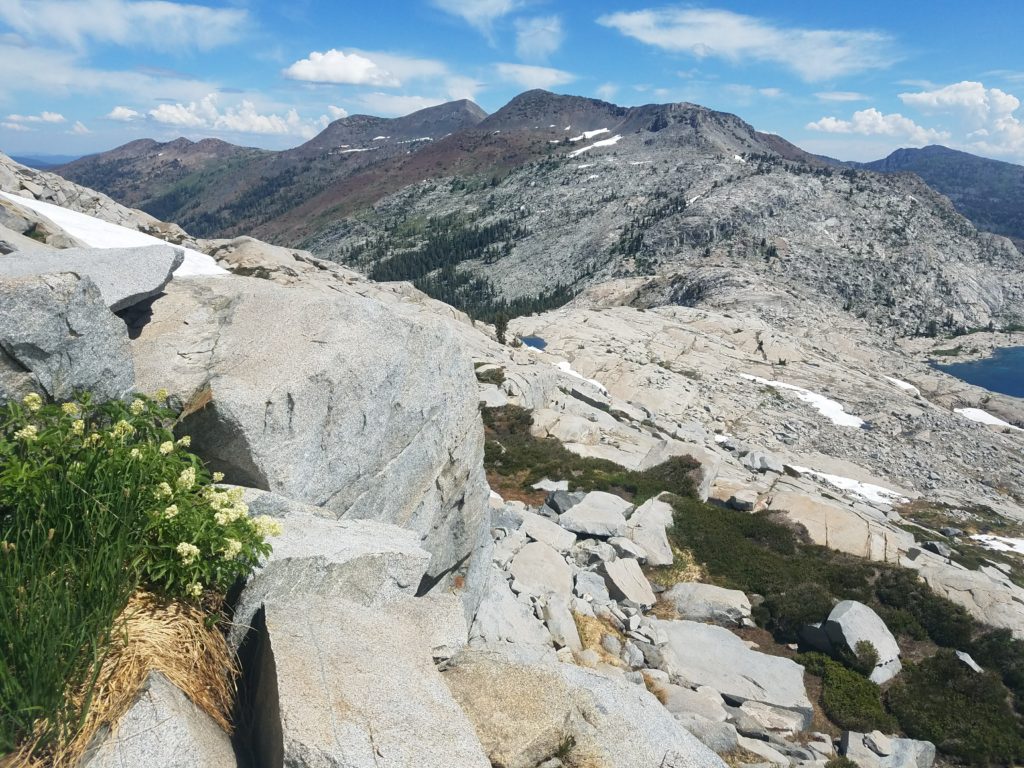
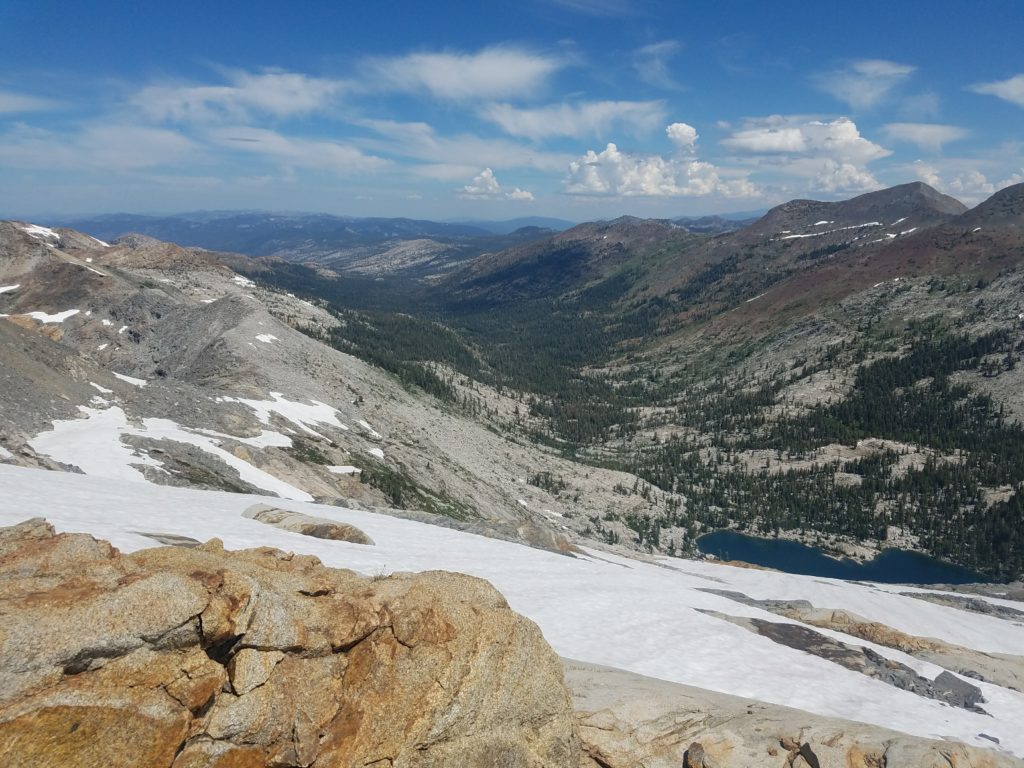
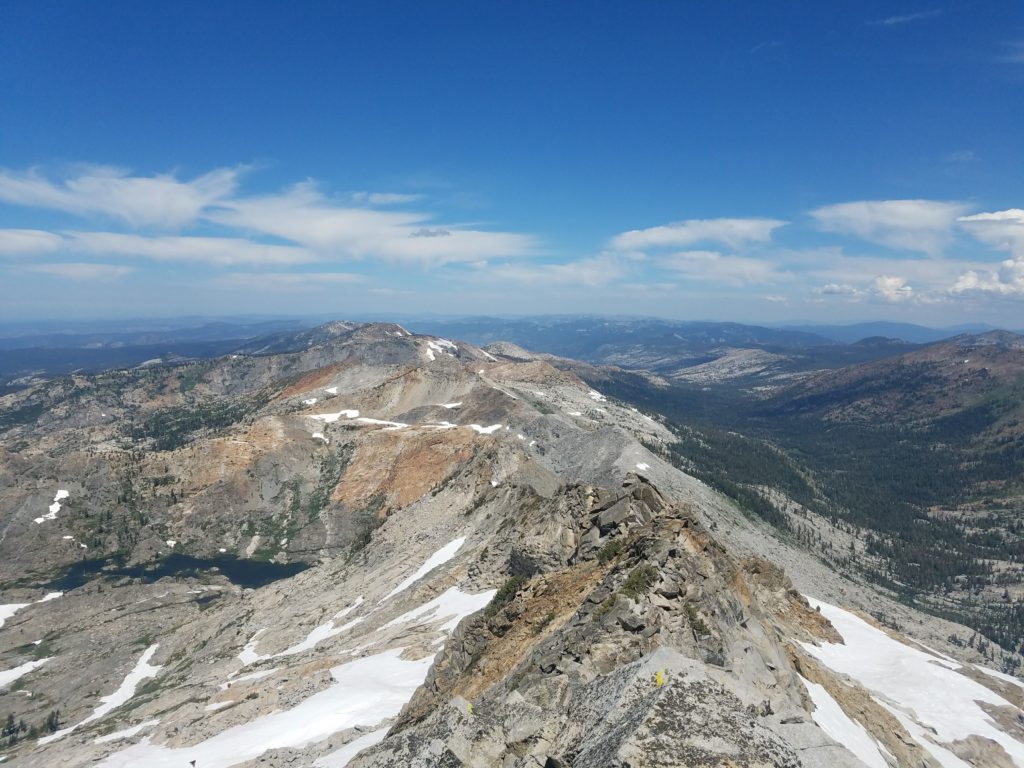
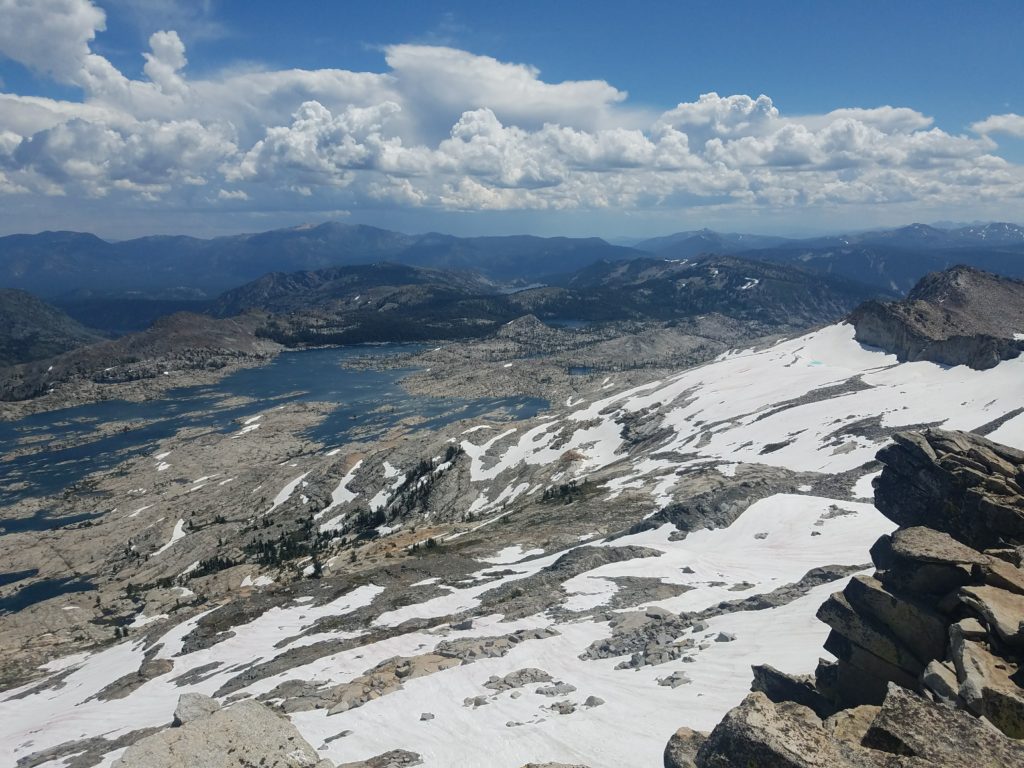
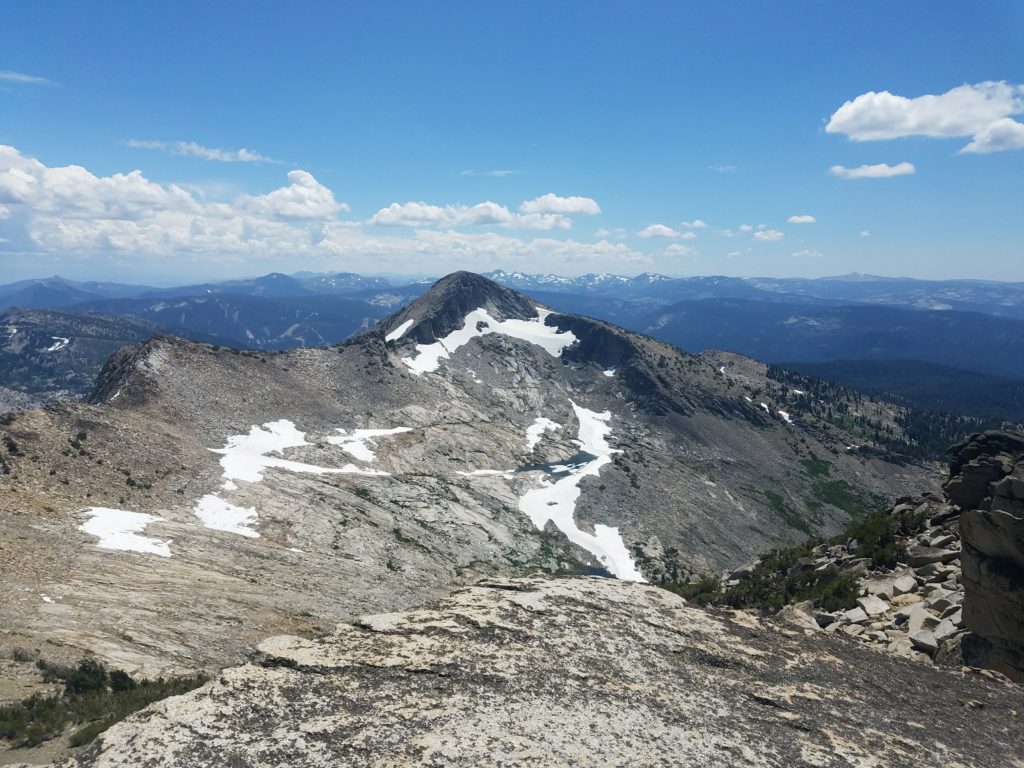
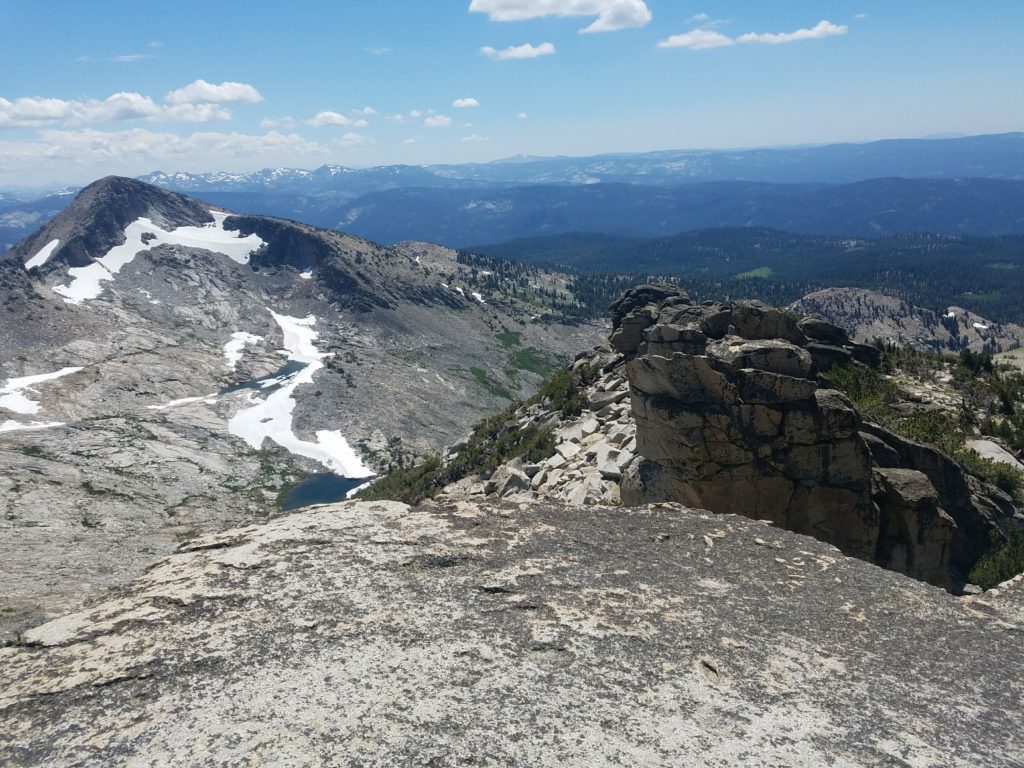
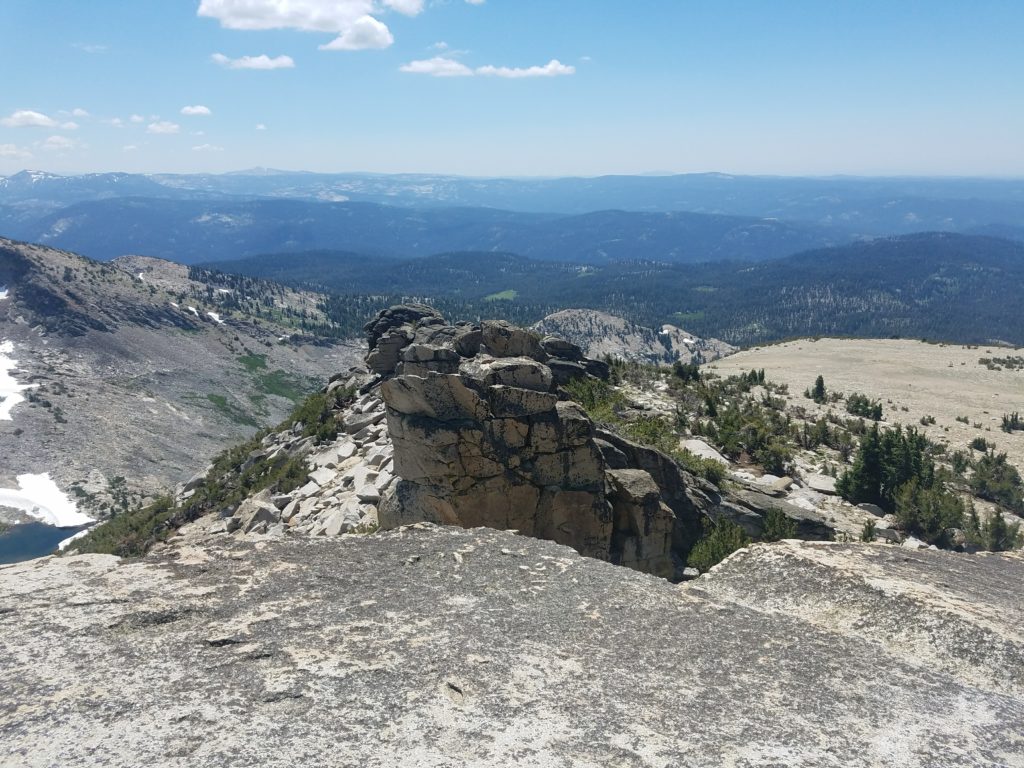
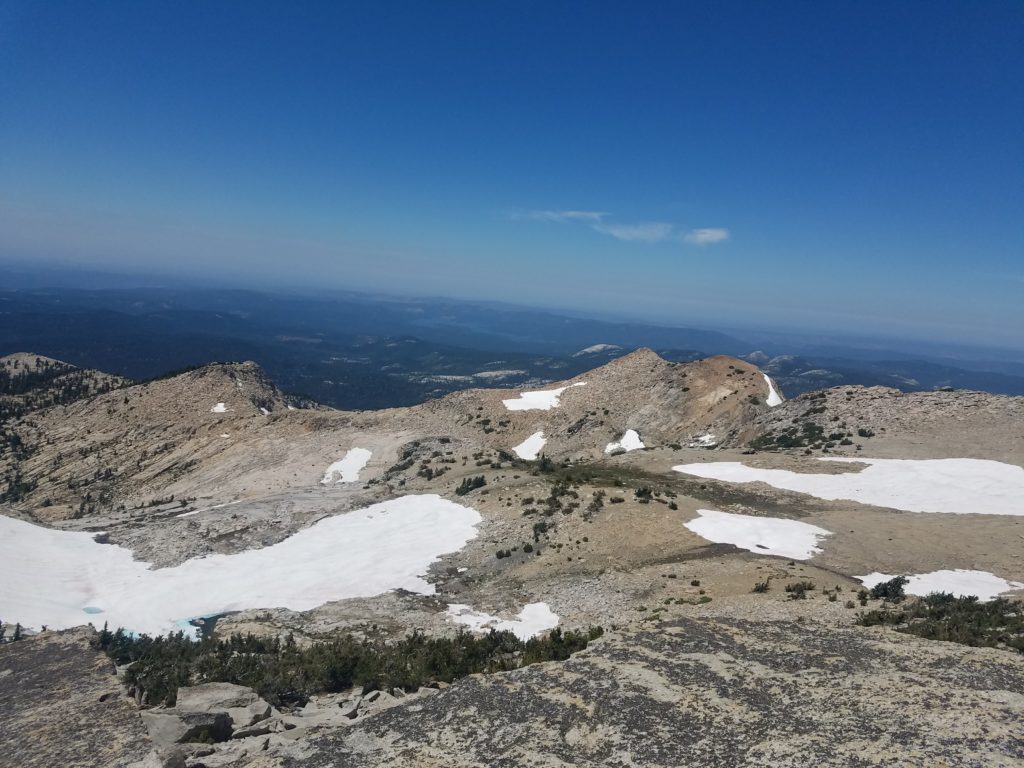
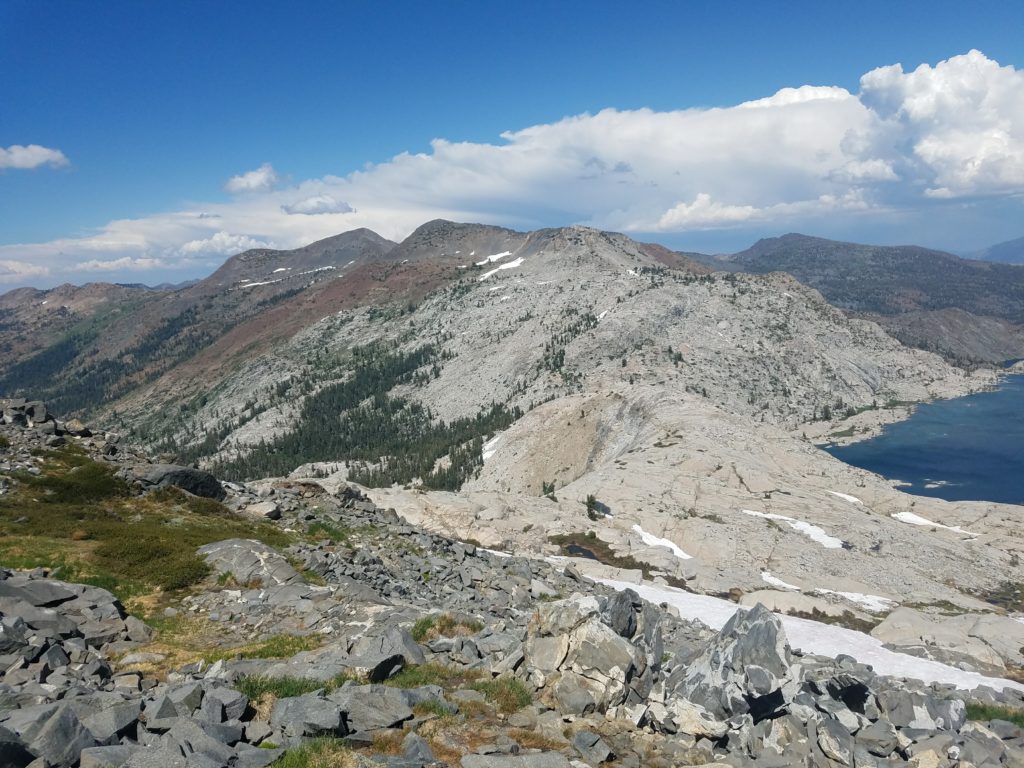
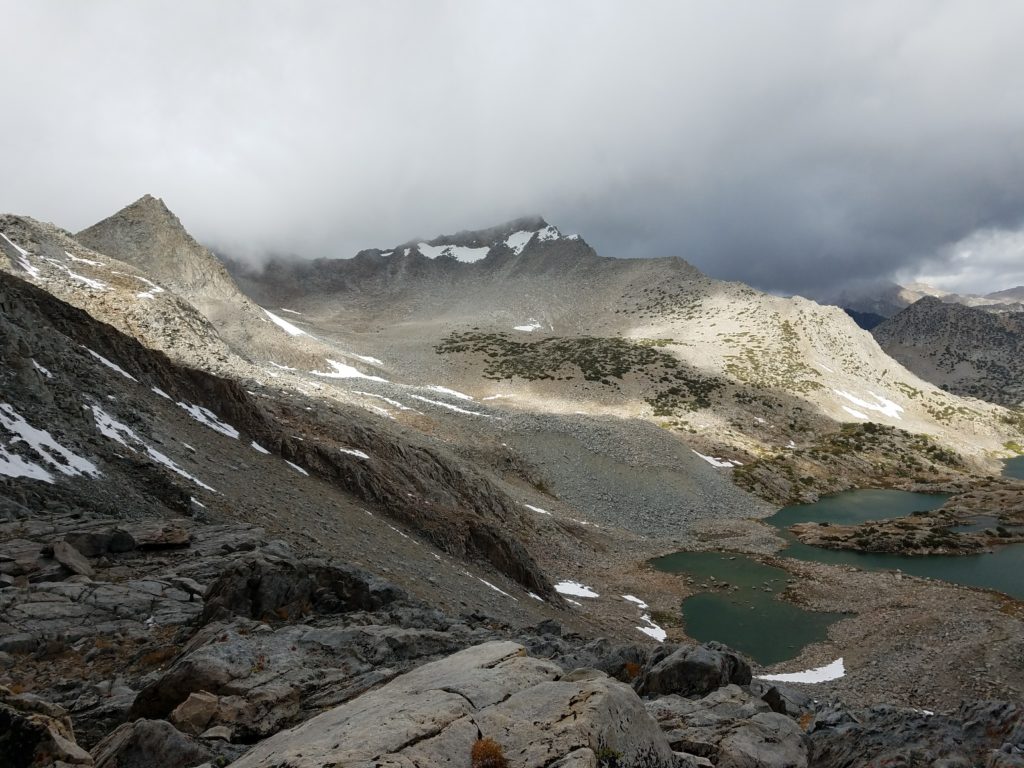
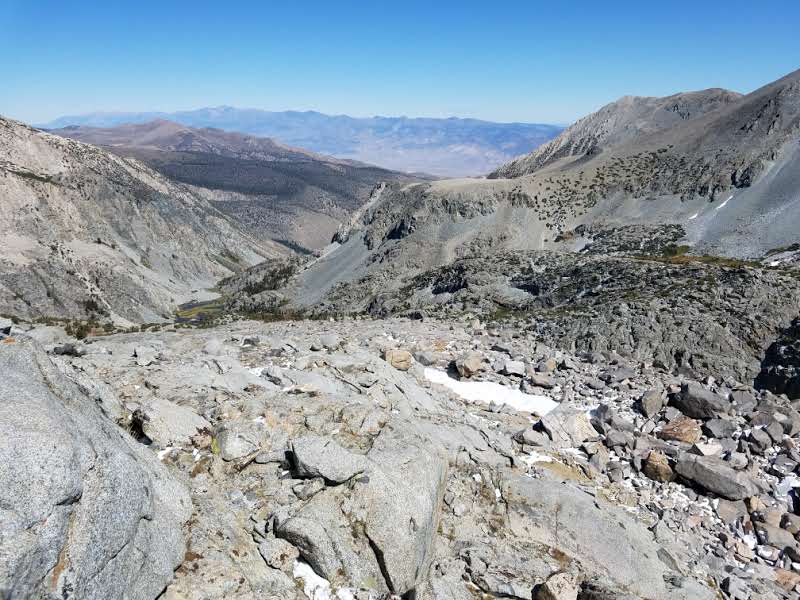
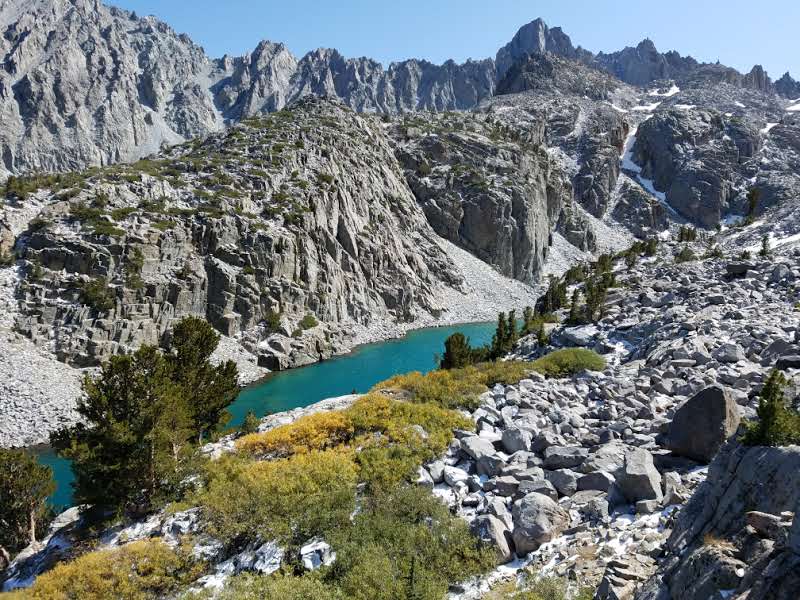
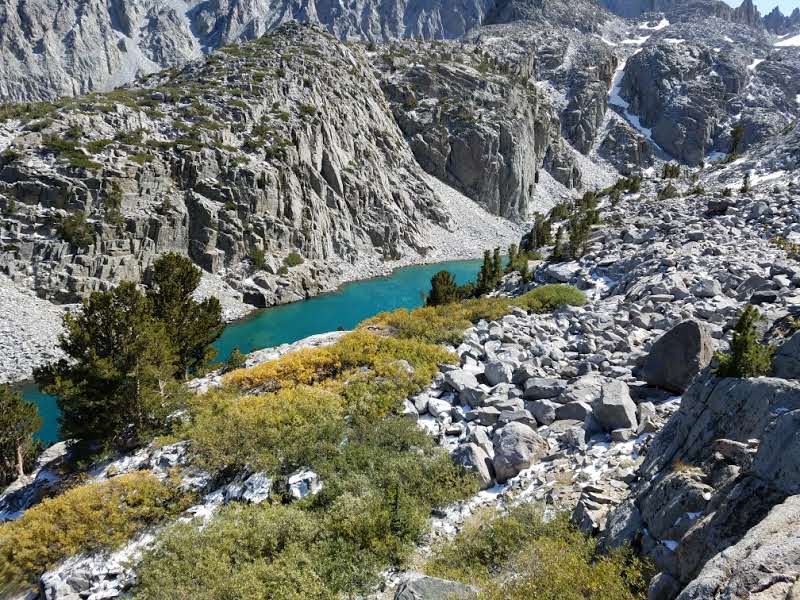
From there, simple rock scrambling with some pesky bushes leads up the final few hundred feet to Jack’s Peak. The summit offers a unique and stunning view of the unfolded Crystal Range, with Mt. Price separated only by Mosquito Pass, 1500 feet below. Snowbanks adorned the Crystal Range and seeing the aforementioned Mt. Price, Mt. Agassiz, and Pyramid Peak so distinctly – and so close – from an angle different than the usual views offered from Desolation Valley induced awe.
Lake Aloha shimmered in the bright sun; the Cracked Crag – a stretch goal for the day – looked unimpressive and short from Jack’s Peak. Dick’s Peak peered to the north with worrying grey clouds creeping to its summit.
Below, Half Moon Lake, Susie Lake, and Heather Lake all sat in deep blue.
I had been dehydrated and climbed slowly. What should have taken 30 minutes took close to an hour. On the summit, I ate, rested, and enjoyed being atop a new peak.
Cutting Jabu
As mentioned, I had hoped to climb down Jack’s Peak to Lake Aloha and loop to Jabu Lake – and perhaps even the Cracked Crag – before beginning the seven mile slog back to Fallen Leaf Lake. However, atop the summit I read some trip reports looking for beta on the route down and found that very few – if anyone – climbed down to Lake Aloha.
Typically, hikers ascend from Lake Aloha to Jack’s Peak. Though steep, the climb presents no technical challenges. It does, however, run into headwalls that, obviously enough, are cliffs on the way down. I didn’t particularly want to risk walking off a cliff, even though I assumed I would be able to safely spot and easily avoid most.
The cost-benefit didn’t quite add up. Lack of visible path would make a steep descent harder. So, Jabu and the Cracked Crag get saved for yet another year.
To Half Moon Lake
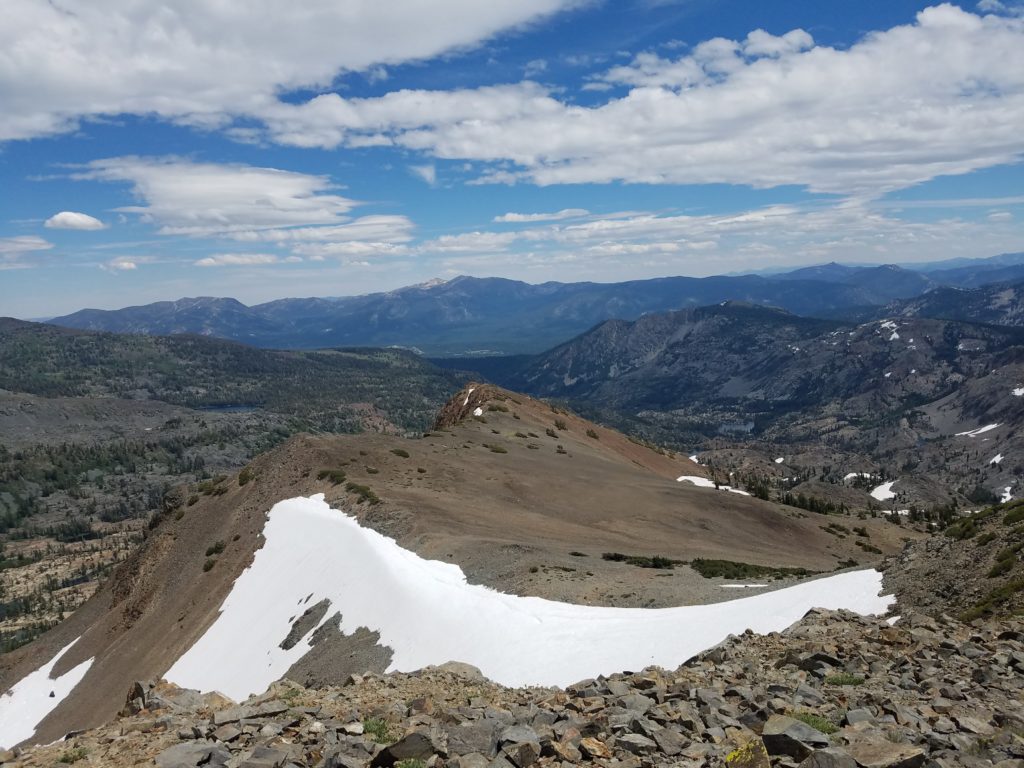
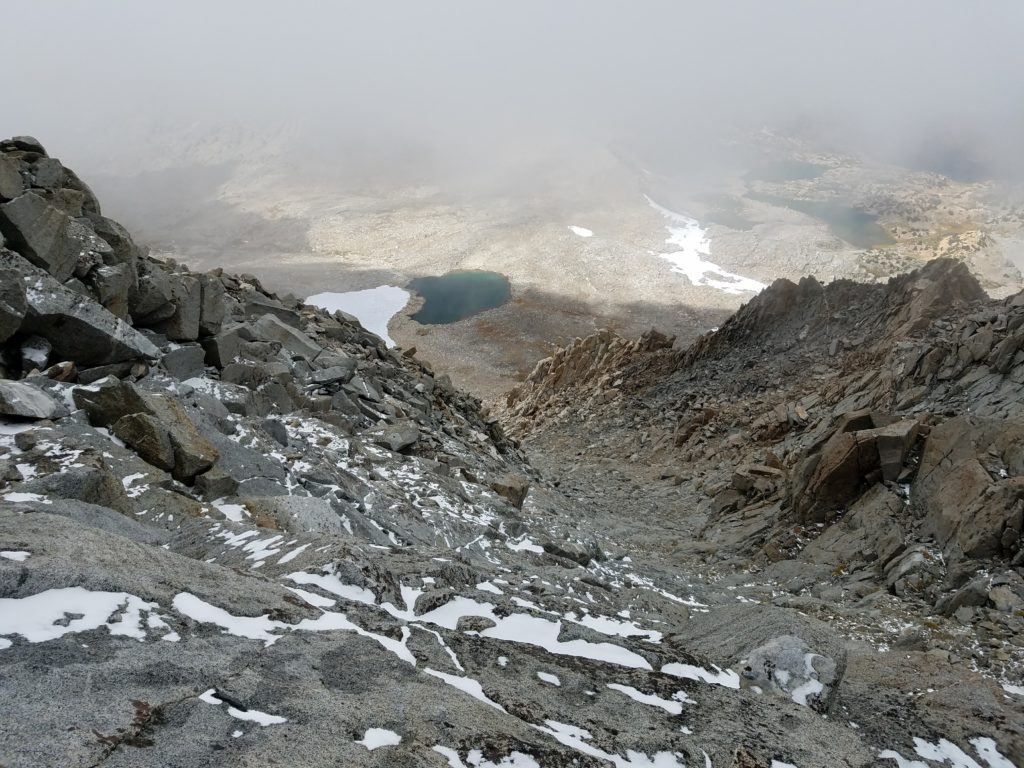
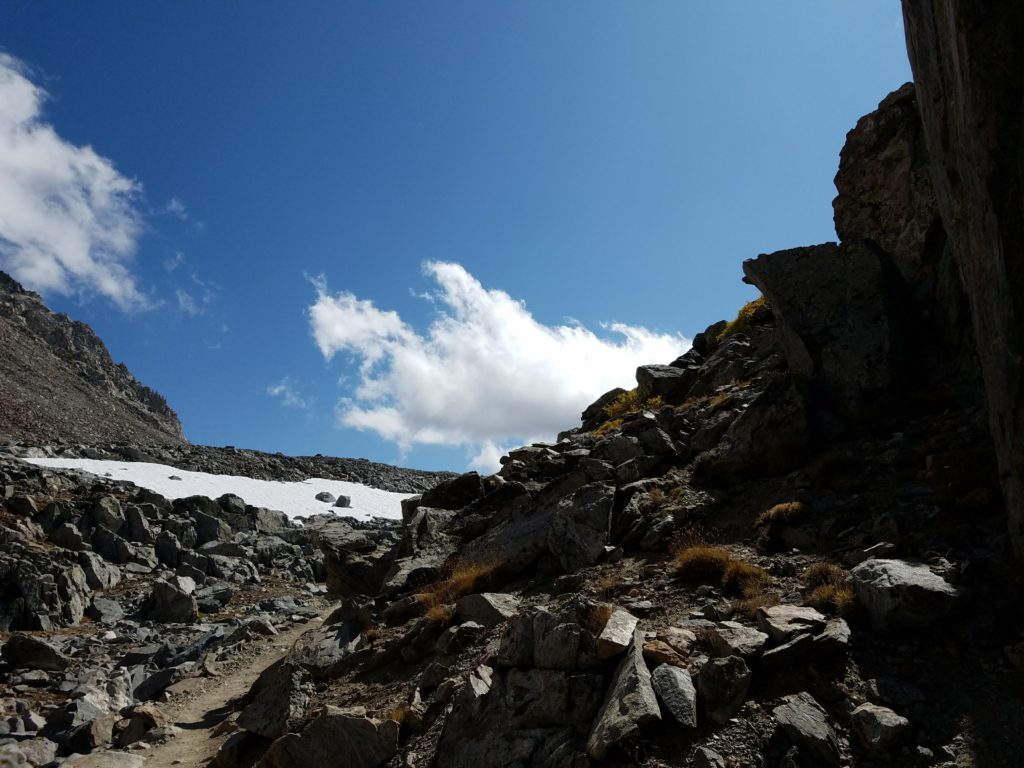
Instead, I decided to downclimb to Half Moon Lake. I did this partly because I didn’t want to again maneuver the talus slog and partly because a change of scenery would be nice. With grey cloud mass nearby – though not covering the sun and not really accumulating – I figured losing altitude and rockbound exposure would also be wise.
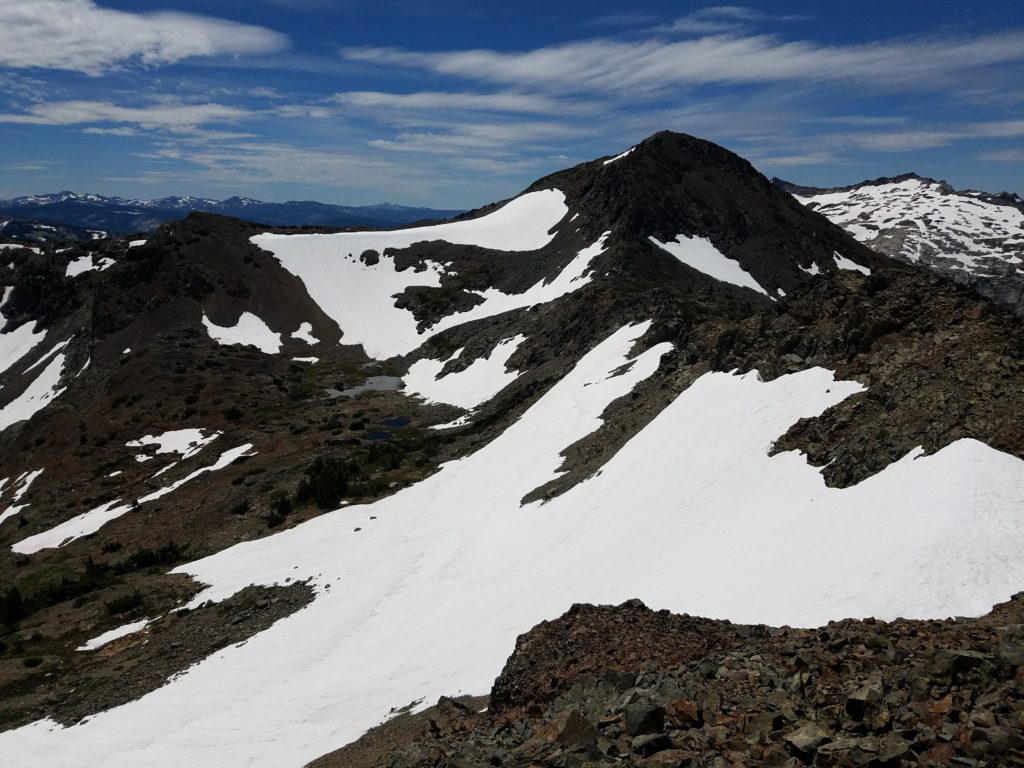
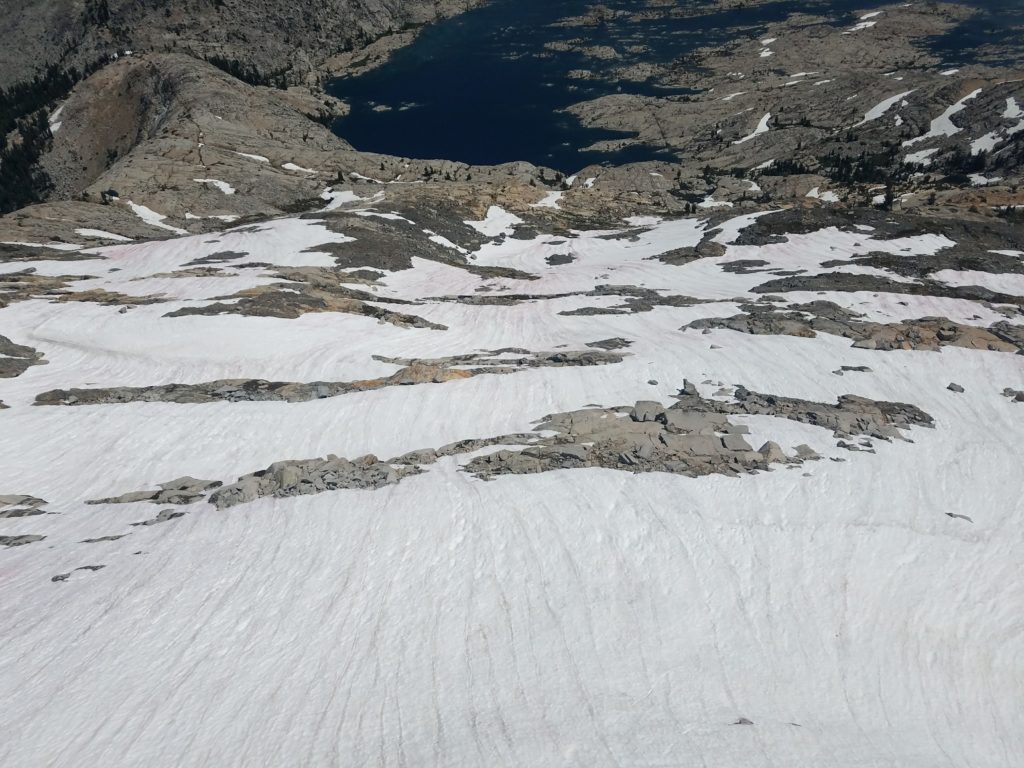
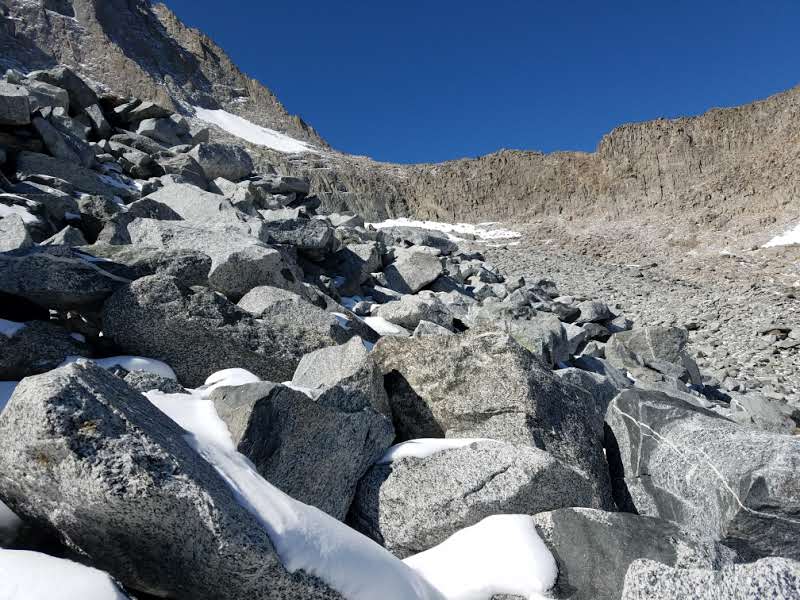
I climbed down Jack’s Peak, again had no problems on the one clear Class 3 move, and walked over the ridge to the Dick’s Peak saddle. There, I climbed lower than previously and aimed for a plateau underneath the summit shale.
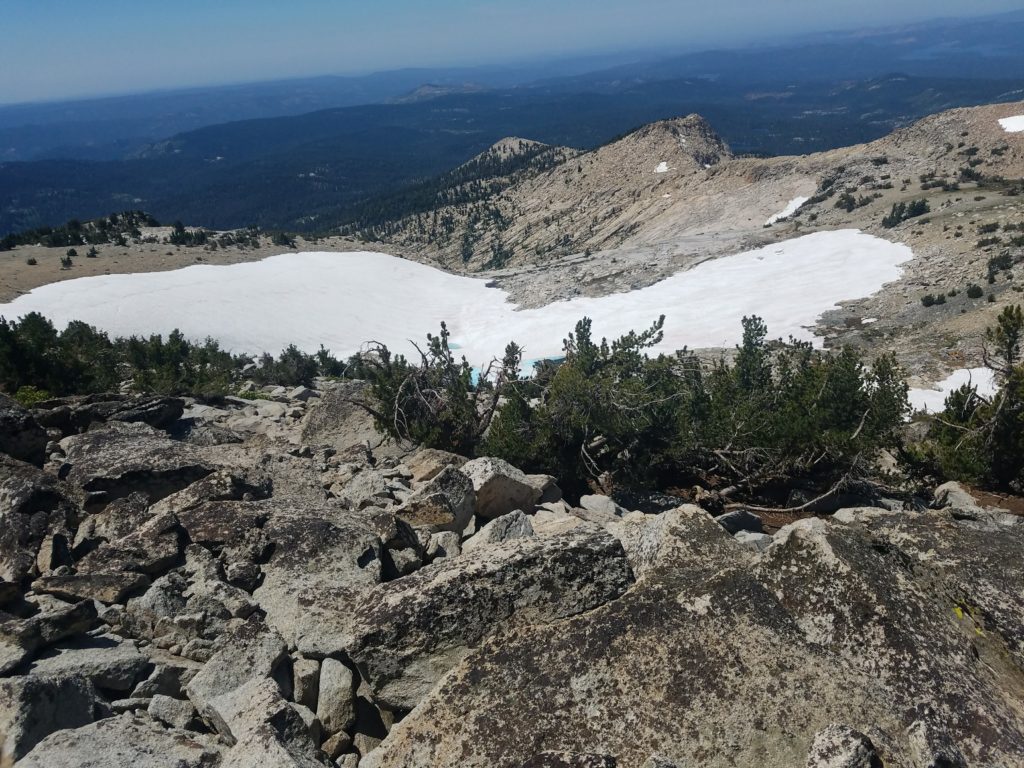
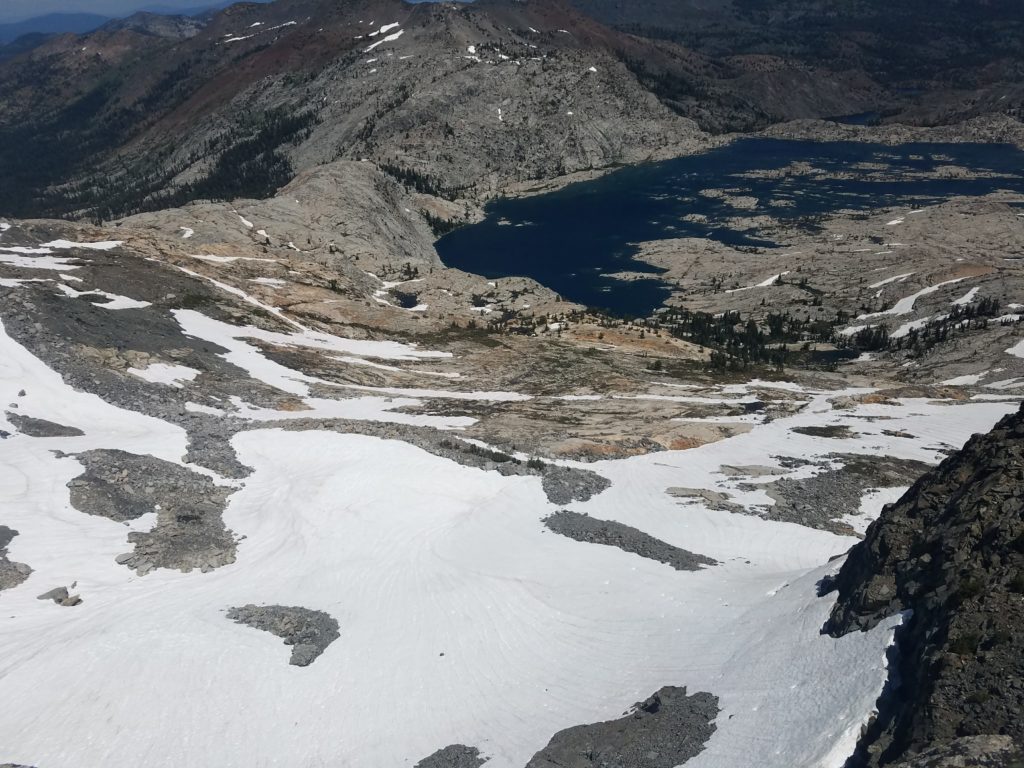
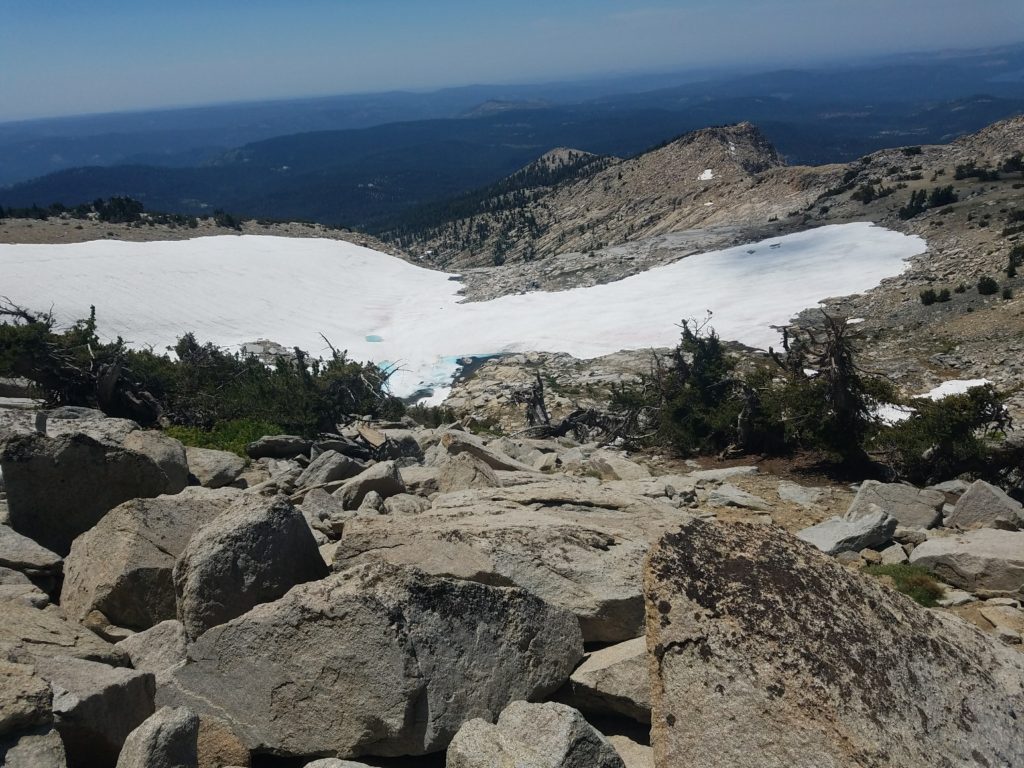
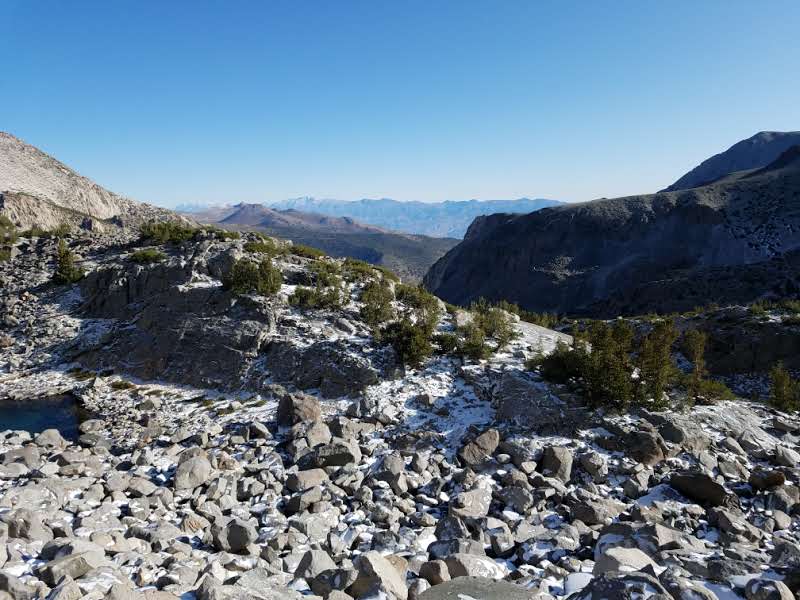
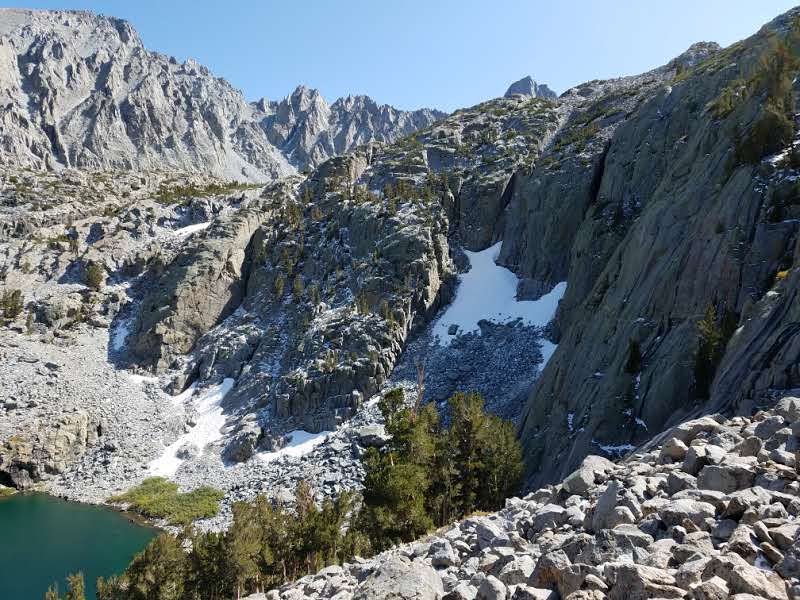
Doing so required going over a couple of long snowbanks, but neither were particularly steep and while slick, posed no challenges. I continued until I was maybe half a mile from Dick’s Pass. From there, I began scoping a route down to Half Moon Lake, which would be a roughly 1200 foot cross country descent.
Cross-Country Descent
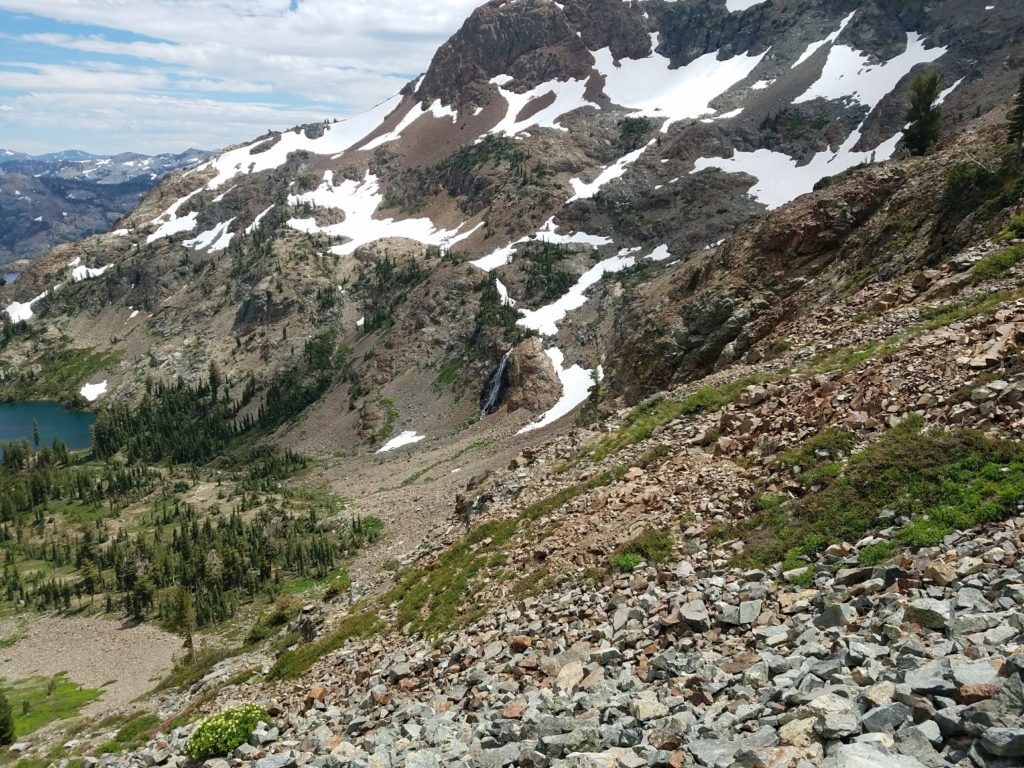
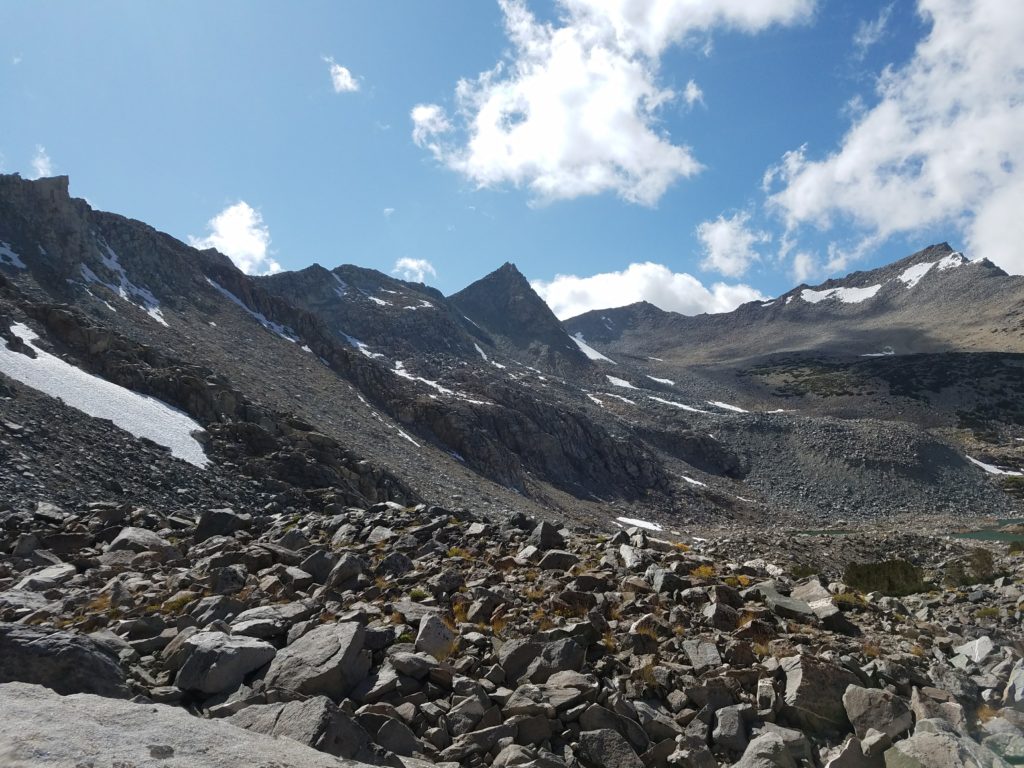
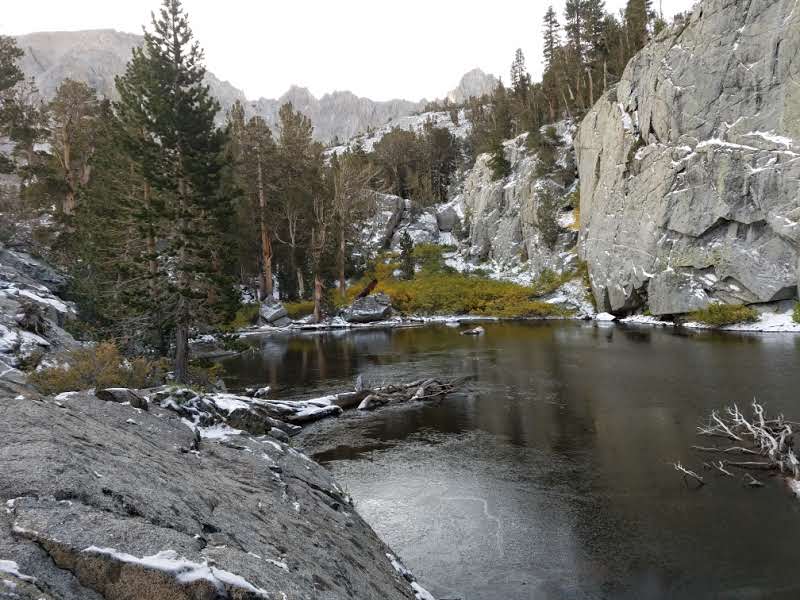
My best route paralleled a stream fed by the still-remaining snow fields. This small chute led down to Half Moon Lake’s shores without running into cliffs or overly steep terrain. Its downsides included occasionally slick rock from the stream and a fair amount of brush and bushwhacking.
Overall, though, it wasn’t too difficult to work down to Half Moon Lake. By necessity of the steepness and some uncertainty in step (when covered by grasses or brush) I didn’t make good and soon tired of the cross country (as I had two days ago when descending off-trail from Angora Peak).
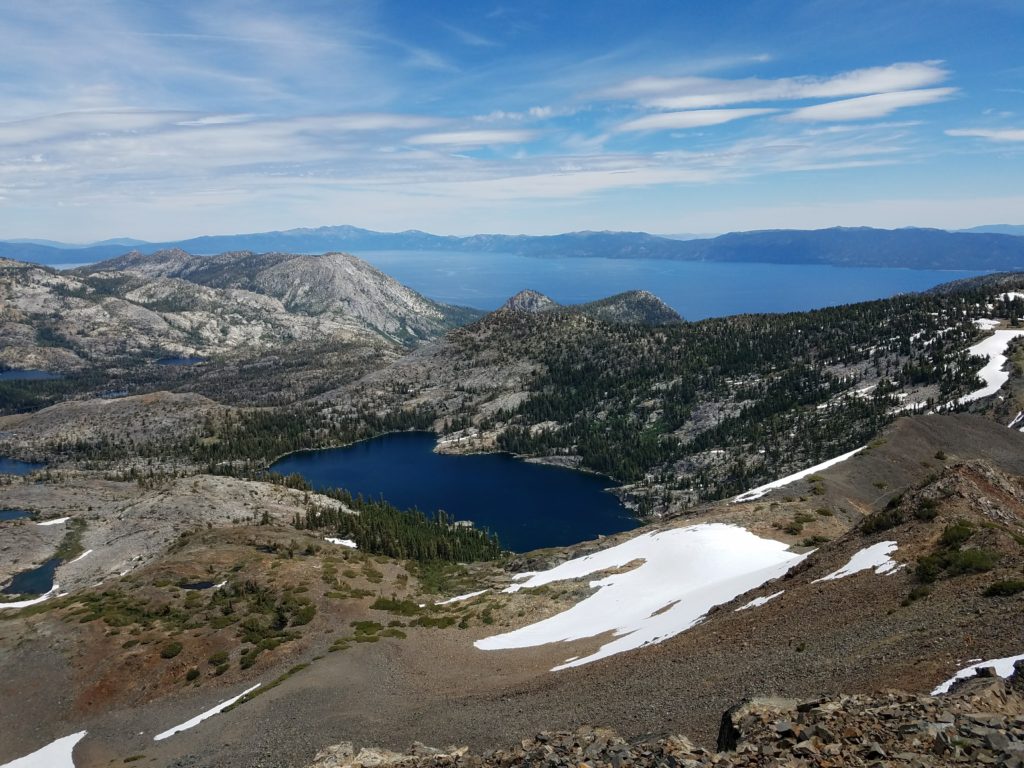
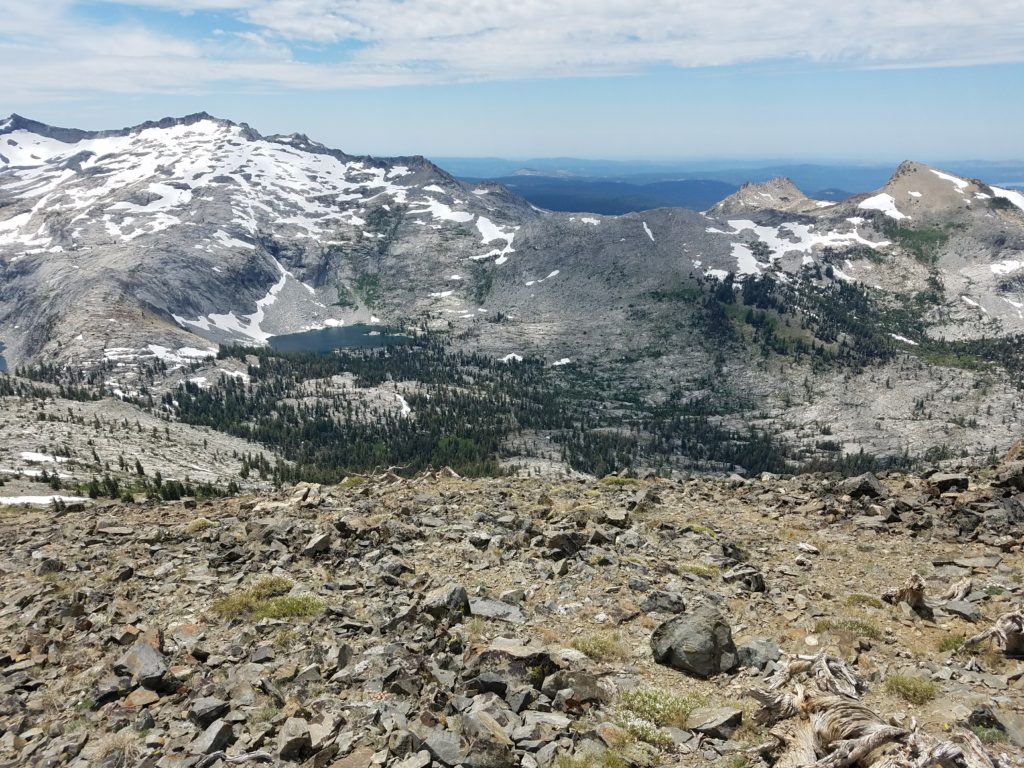
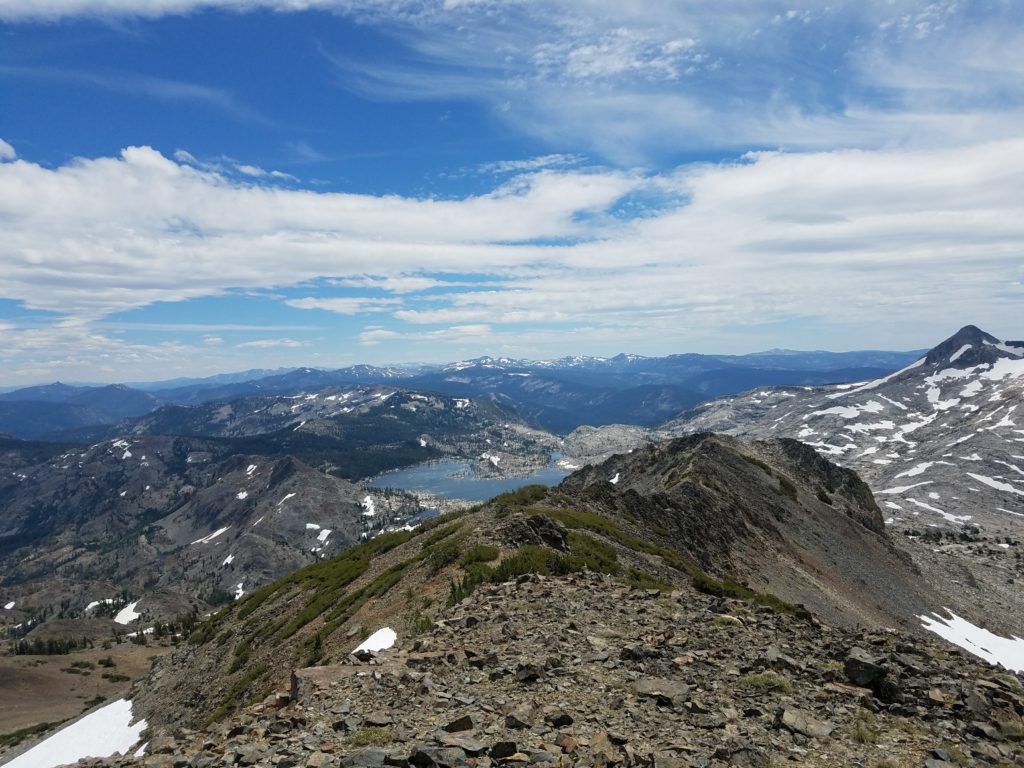
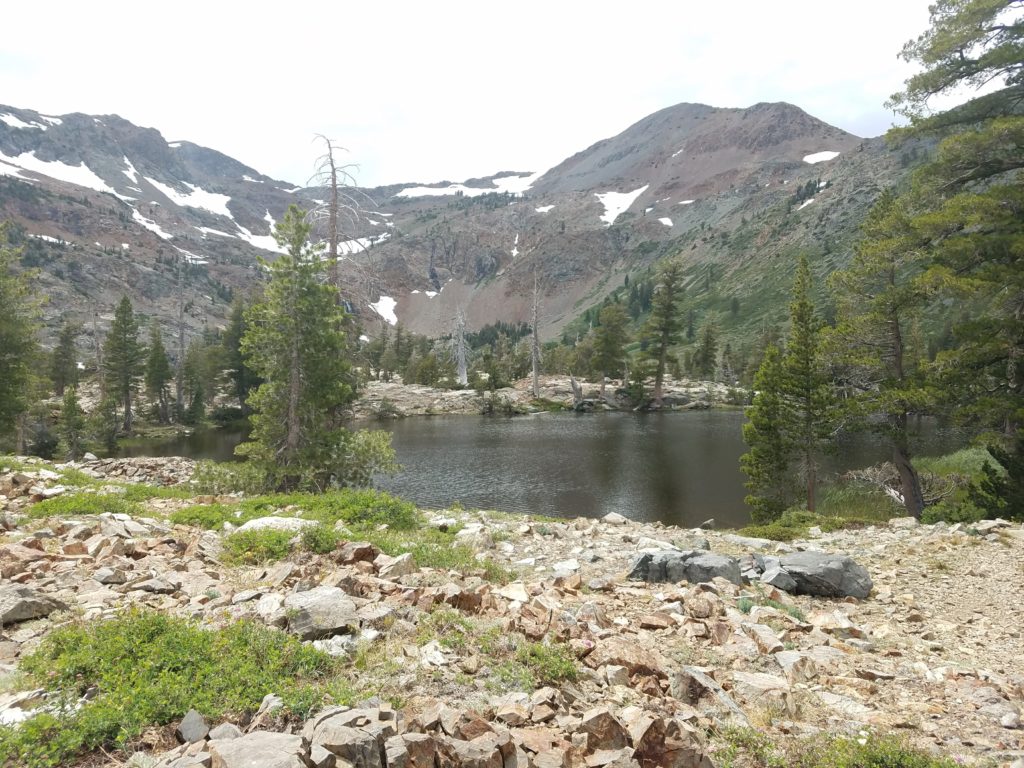
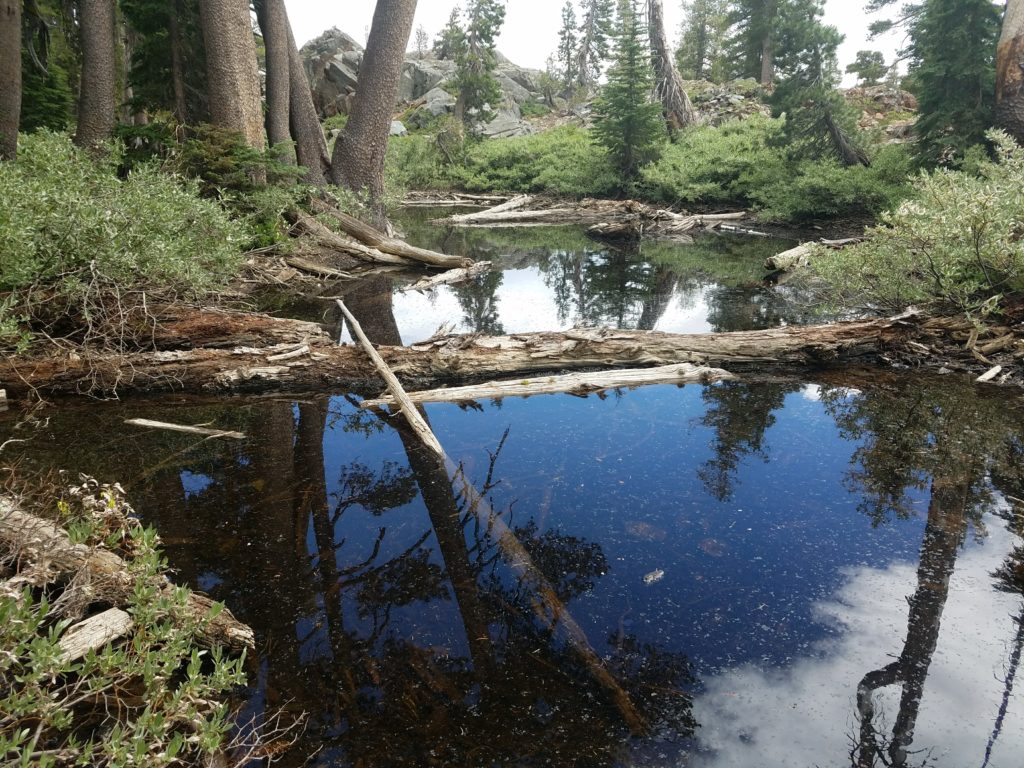
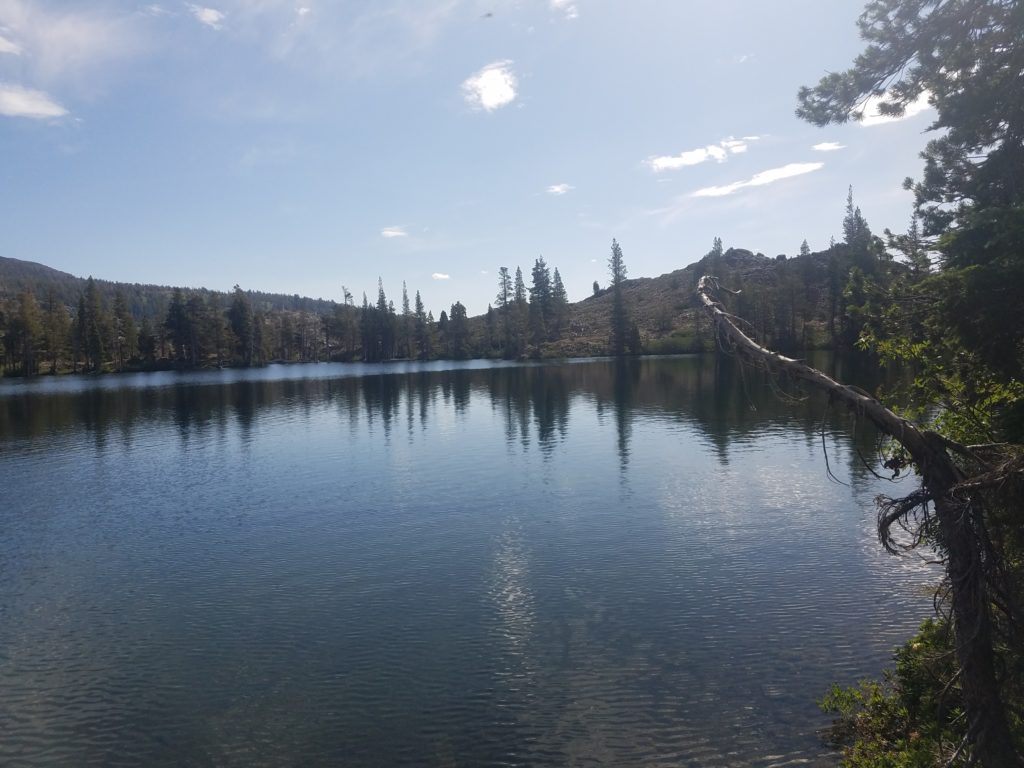
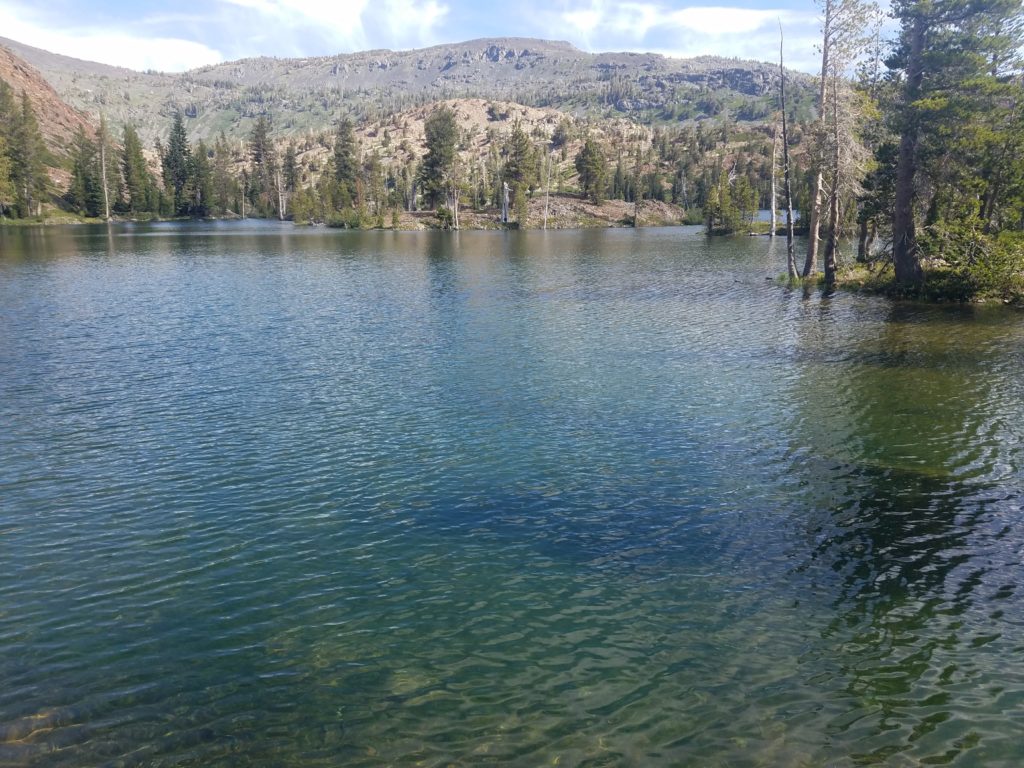
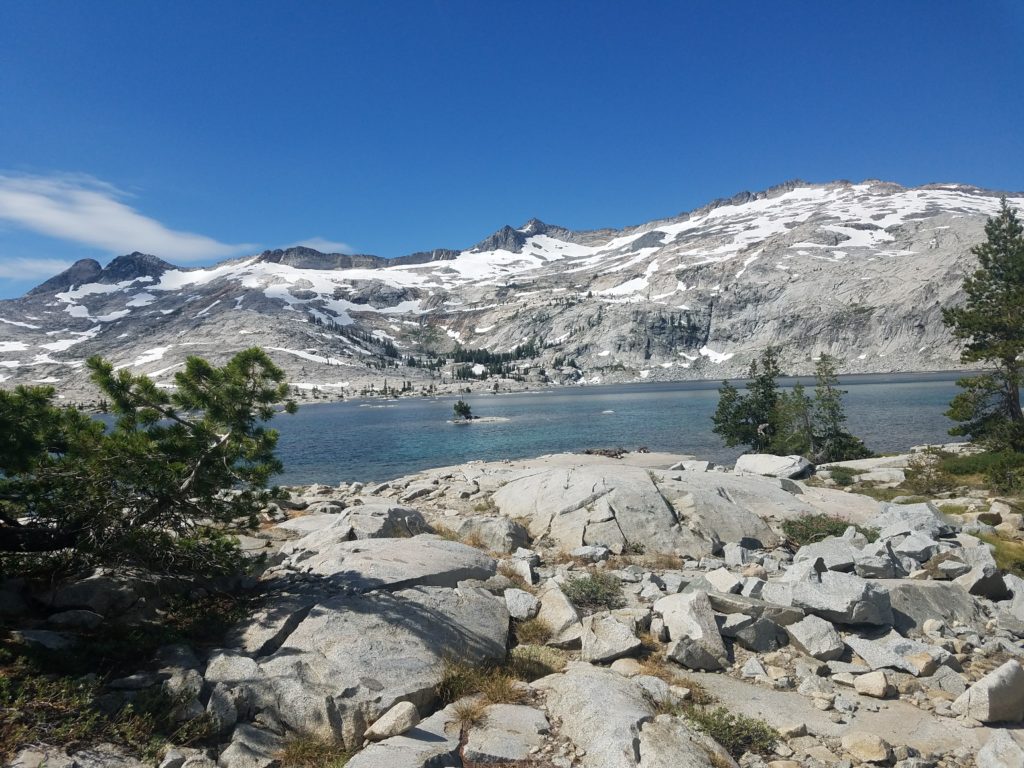
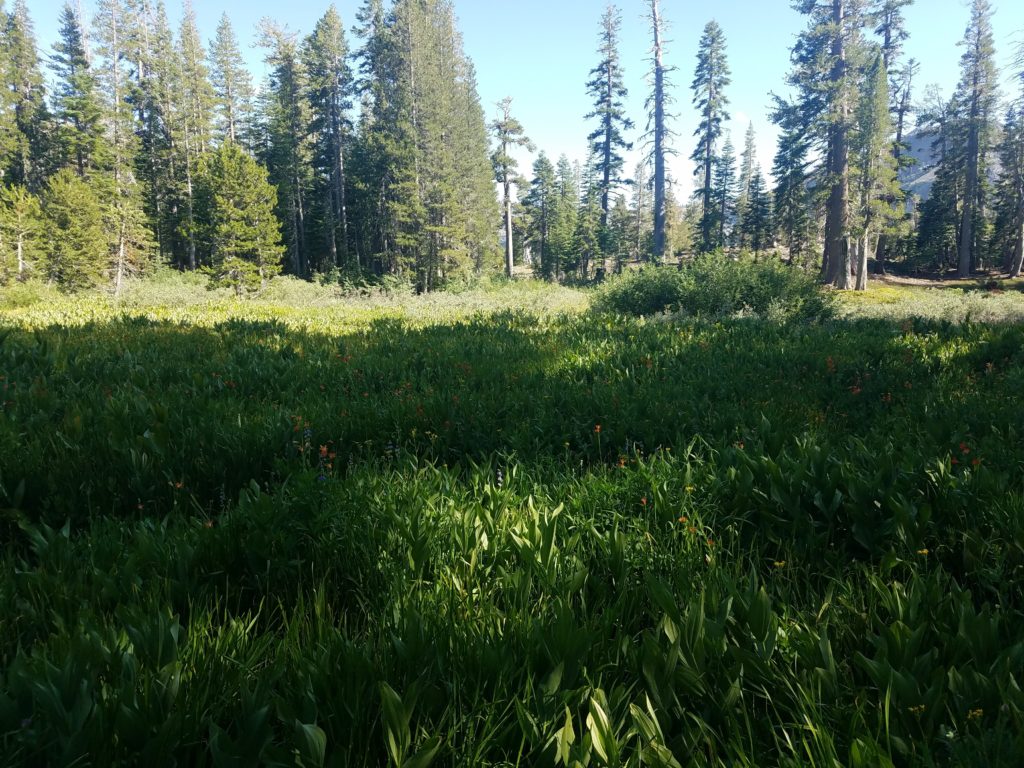
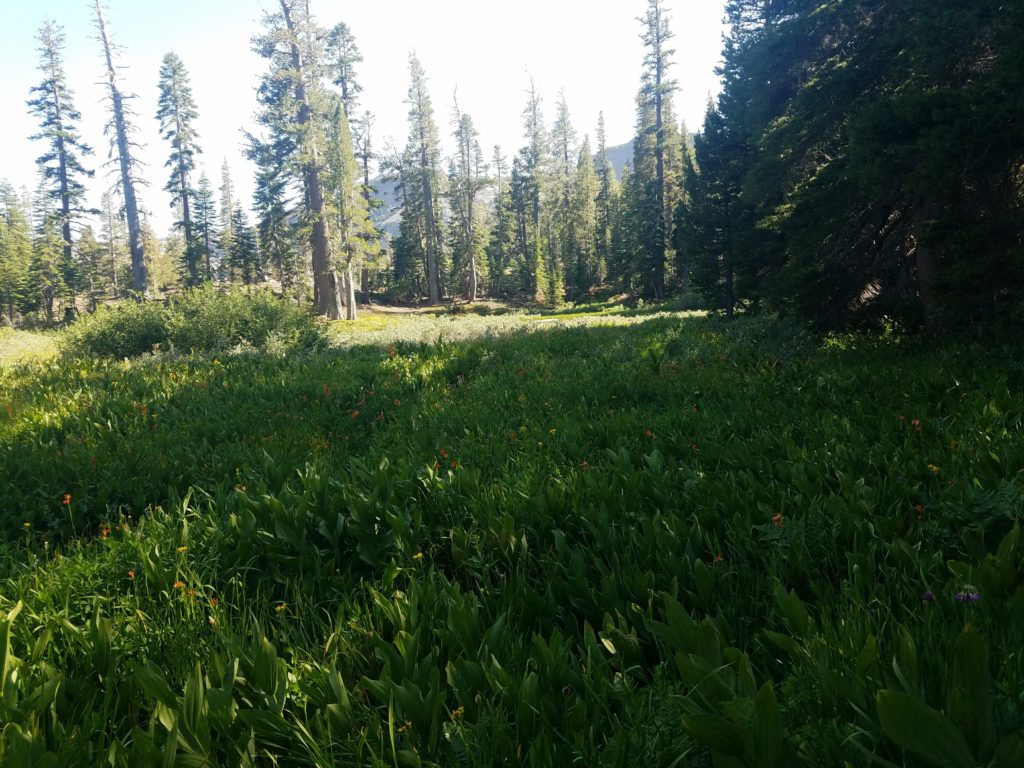
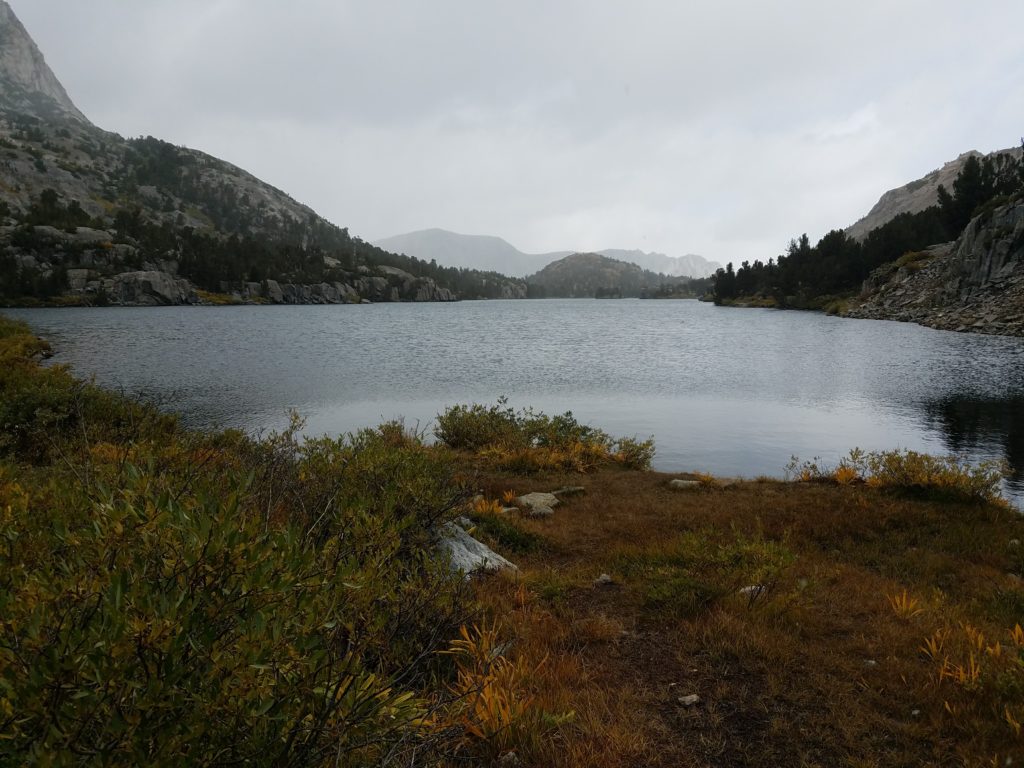
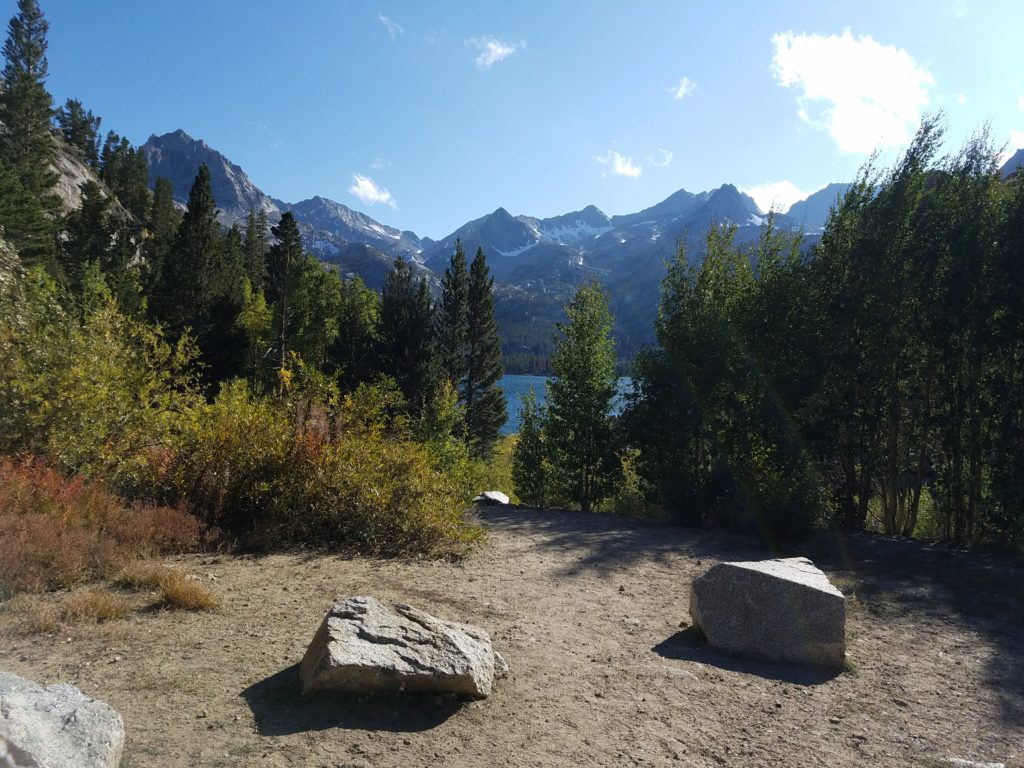
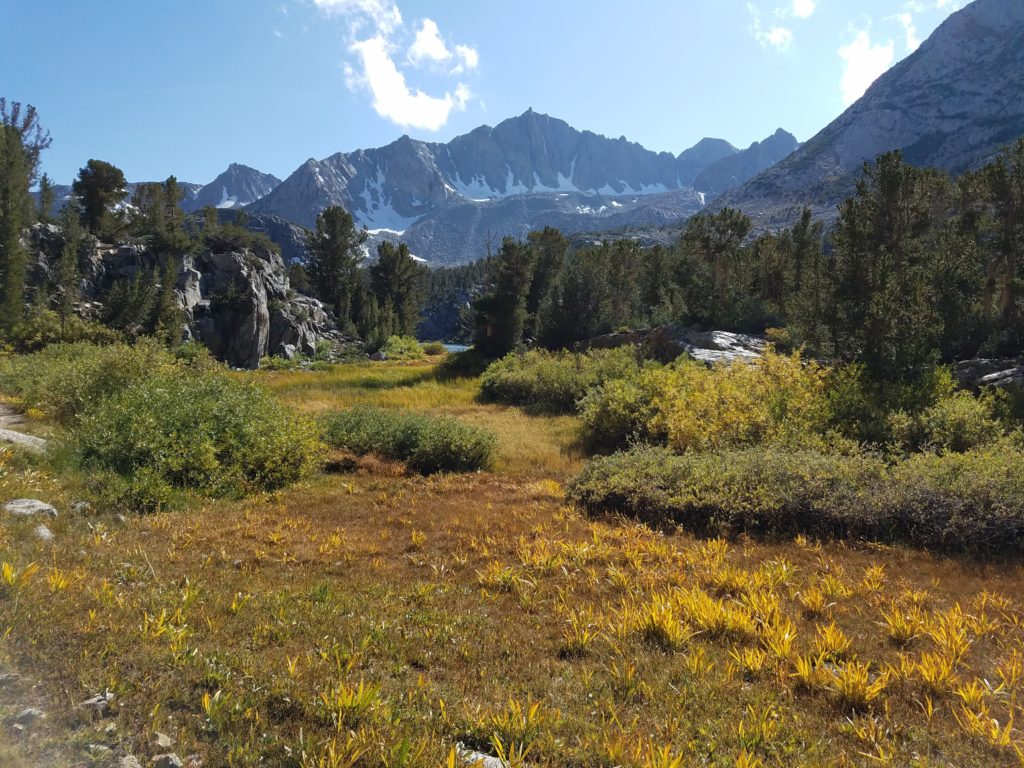
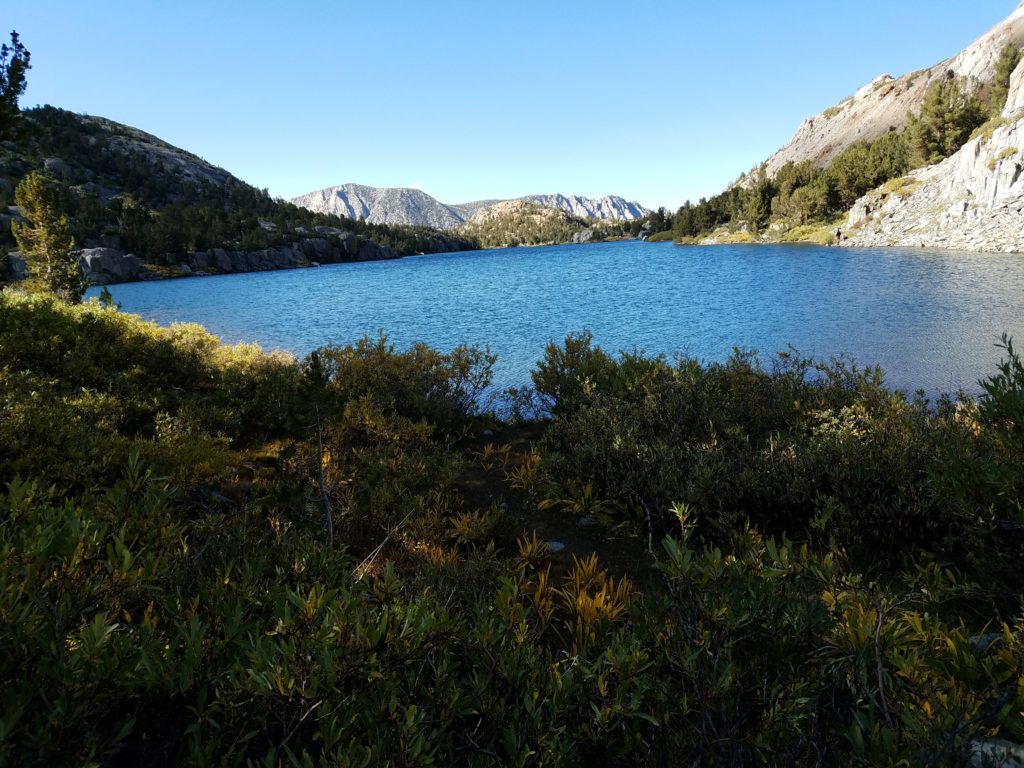
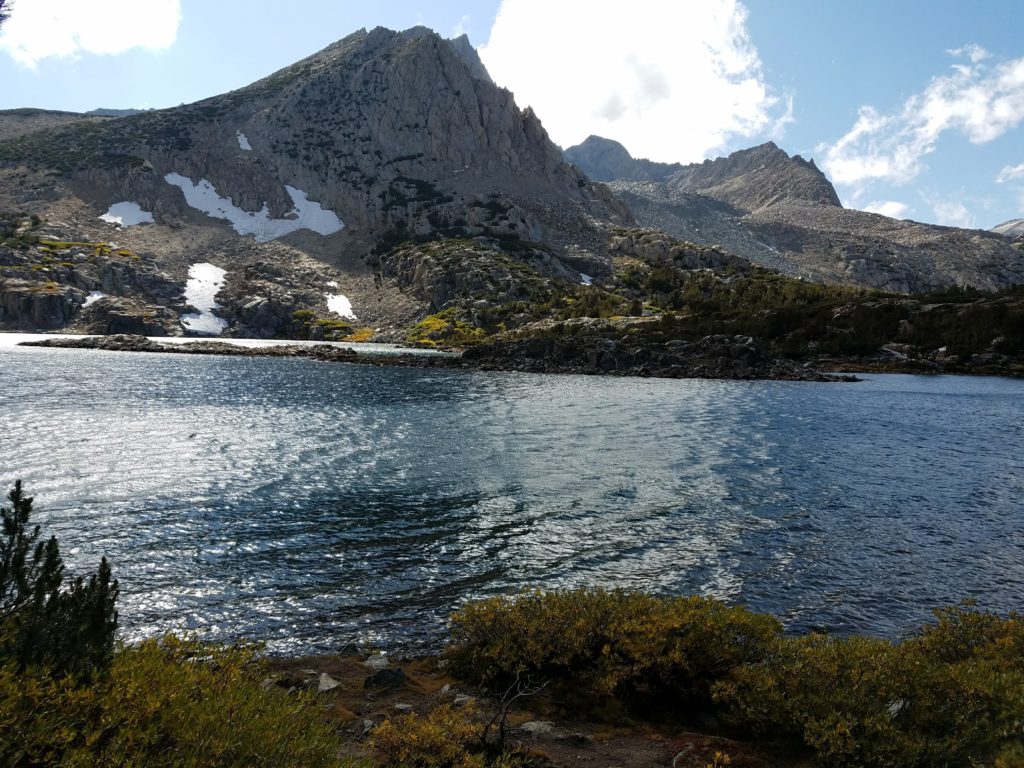
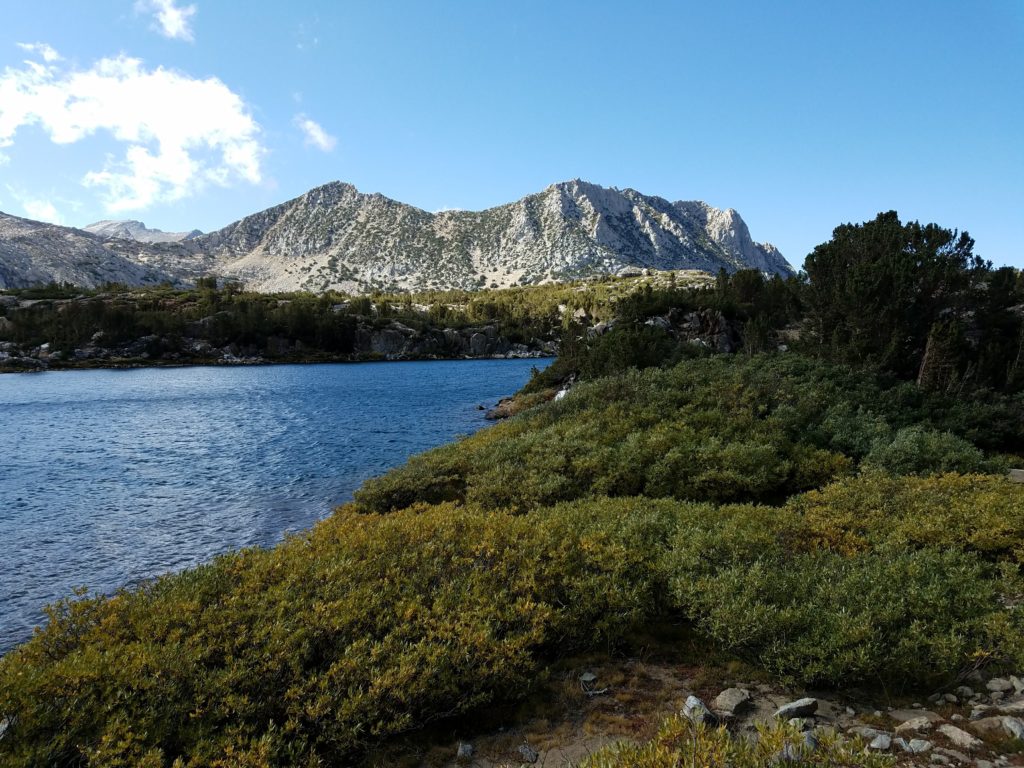
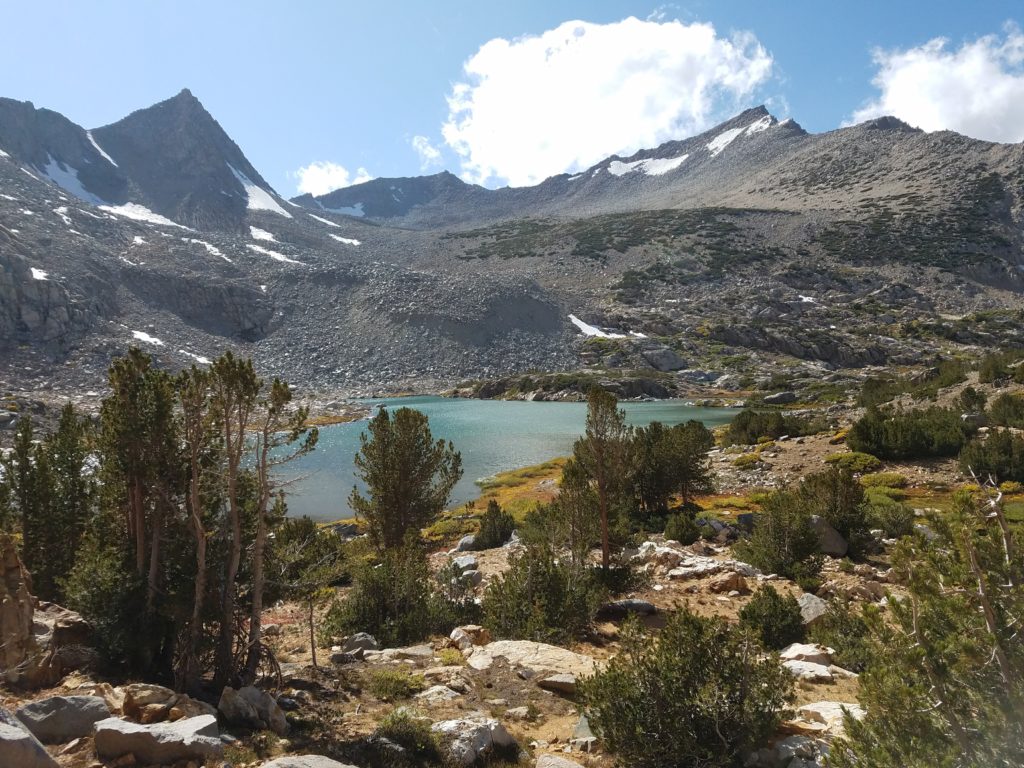
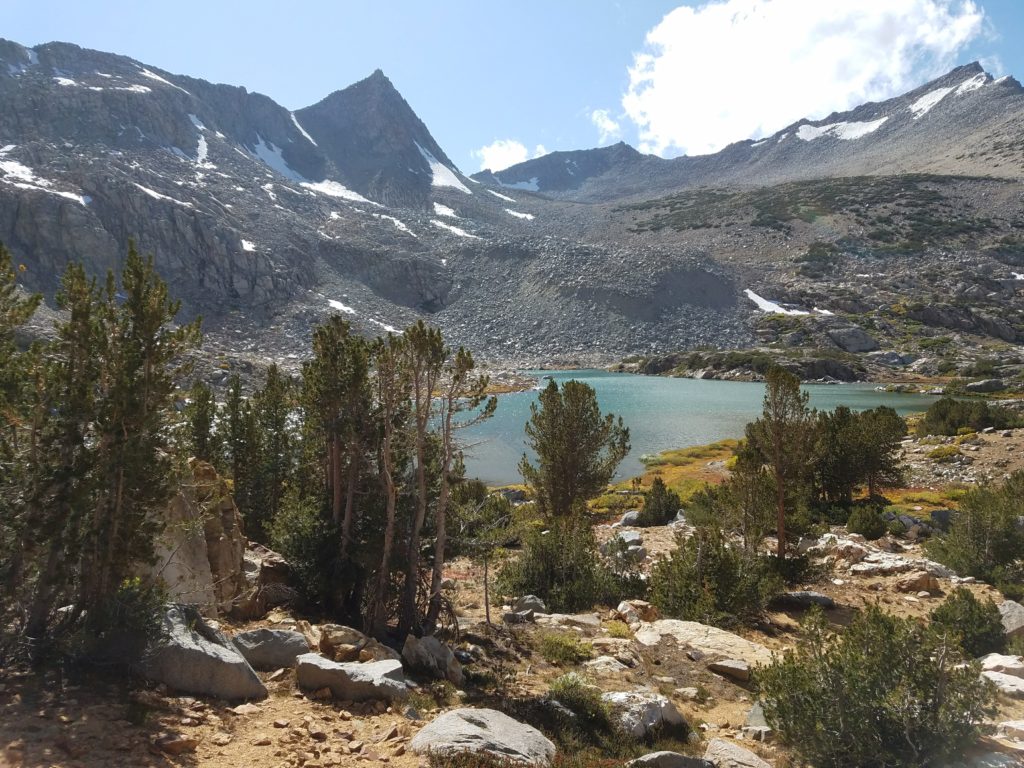
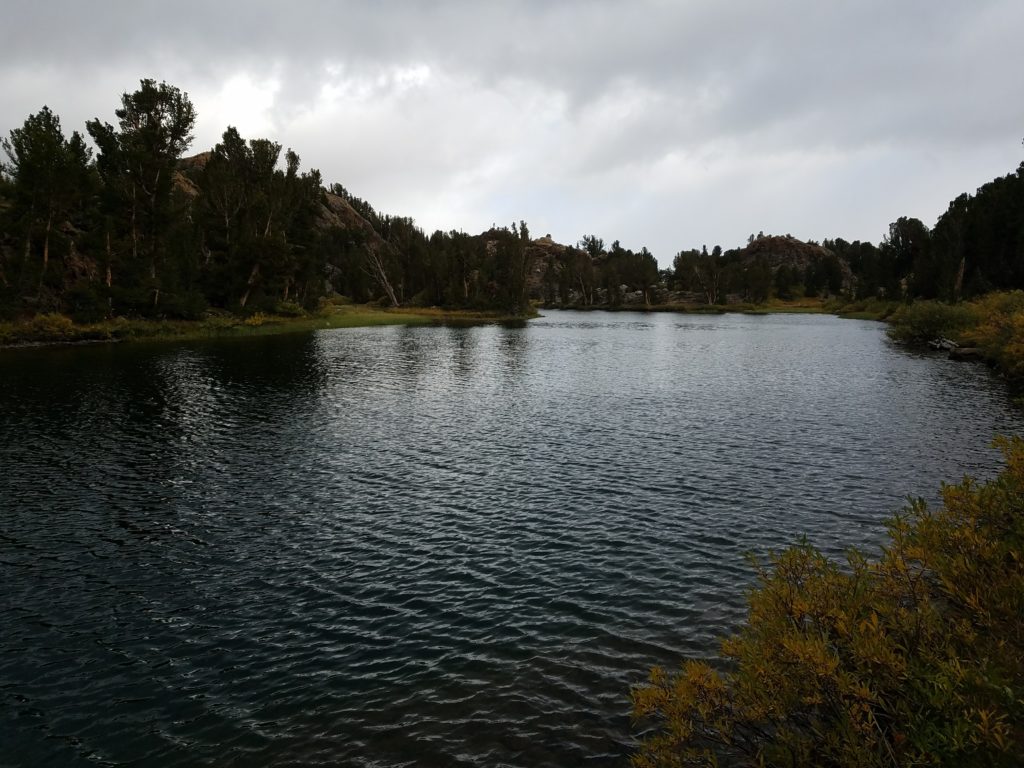
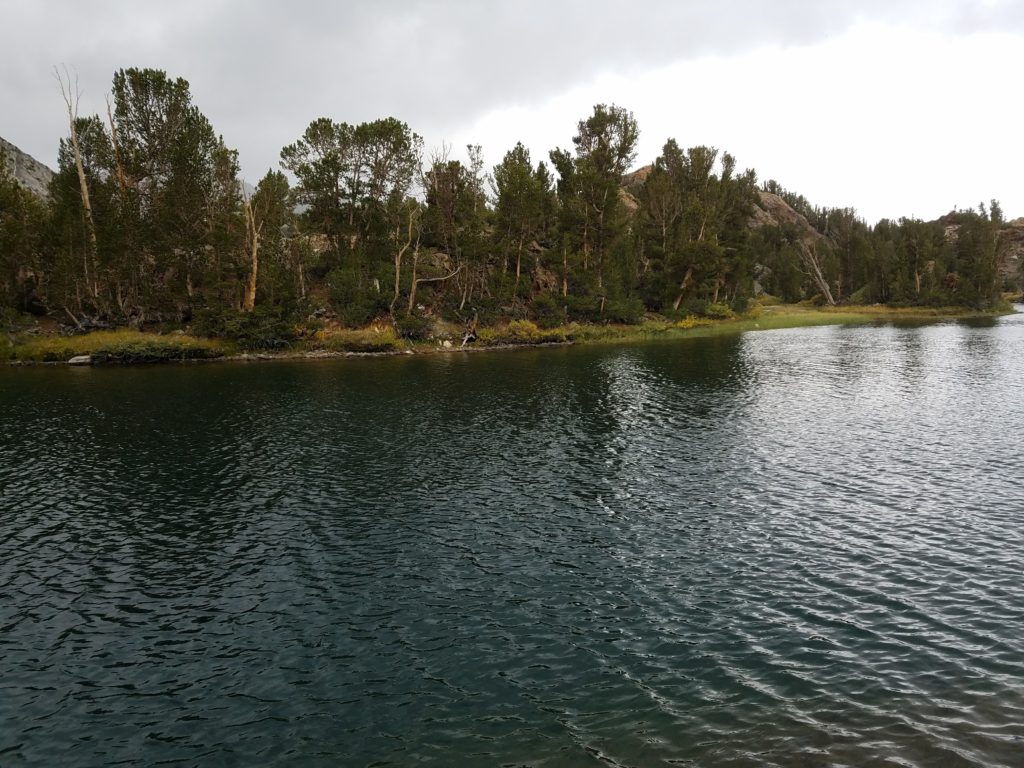
Half Moon Lake
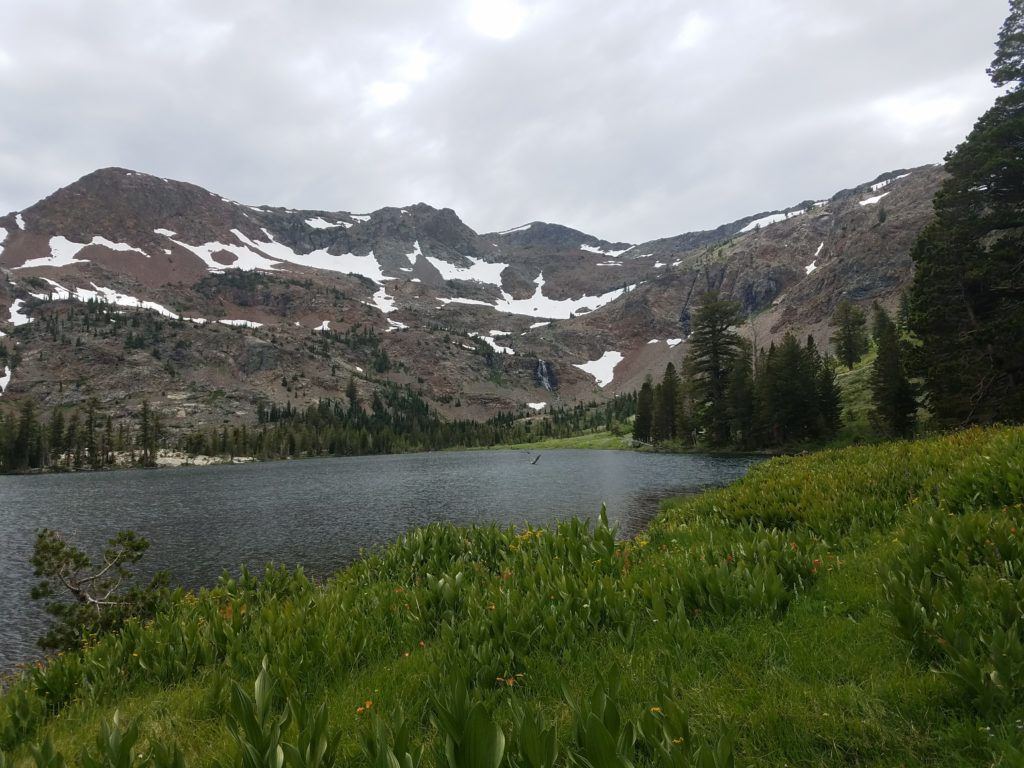
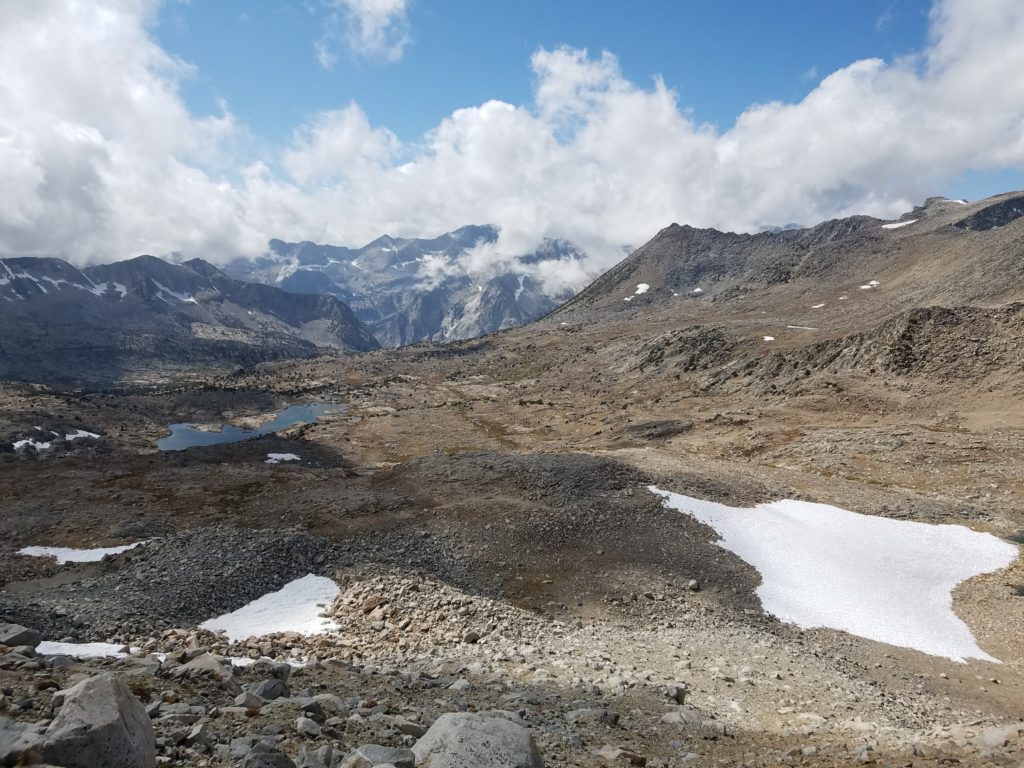
I reached Half Moon Lake around 3:00. Its basin looks up to Jack’s Peak, Dick’s Peak, and Dick’s Pass. A meadow surrounds the lake and transitions to forest away from the headwall from which snow melt falls. Given the high snow year, the meadow was marshy and I hiked through a fair amount of mud on final descent and after leaving my snack spot.
No one else was there – I hadn’t seen anyone in the four hours since I left the PCT. The sun had since been subsumed by clouds and the breeze increased a bit. As I hiked back, the sun would emerge again and I didn’t experience any weather. To the far southeast, though, a lightning storm flowed through and lingered into the evening hours.
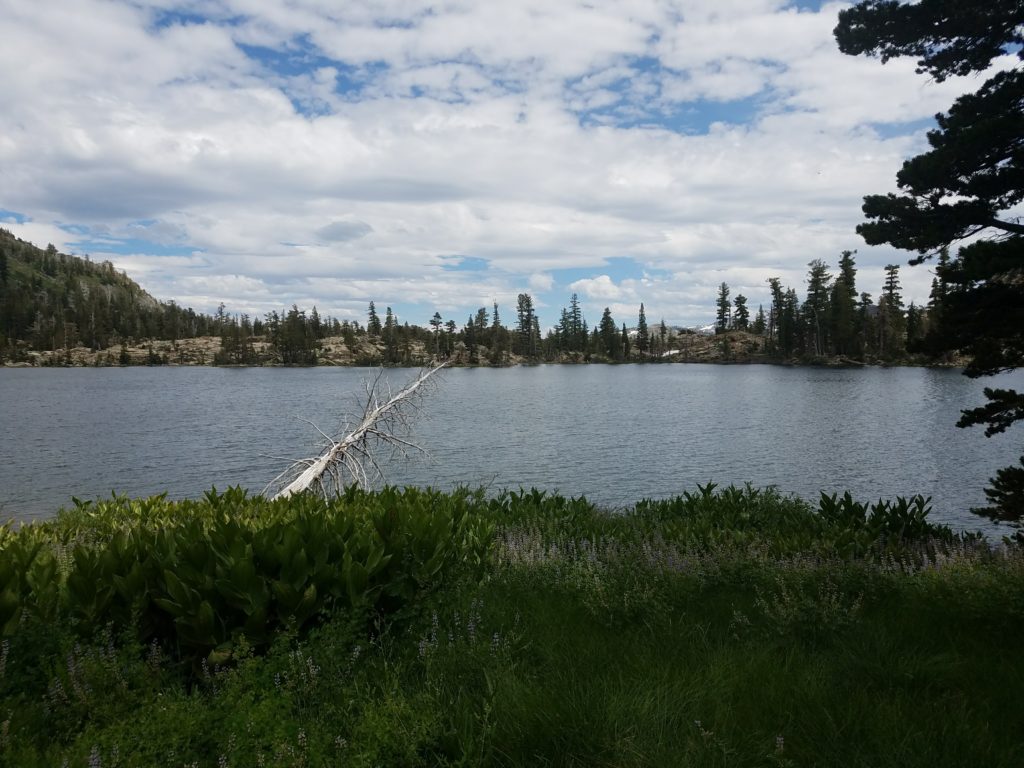
The hike along Half Moon Lake isn’t particularly pleasant. Overgrown in many places, muddy in others, and not well maintained, I ducked under-branches or plowed through shrubbery until the expansive entrails of the lake disappeared from view and I reunited with the PCT and Glen Alpine trail.
Returning via Glen Alpine
I had opted against hiking to the Lake Aloha basin to tag Jabu. The descent had worn down my legs and as time crept on, I didn’t want to hike the dull couple of miles to Lake Aloha. Besides, I would see it in a couple days when I hiked to Mt. Price and Mt. Agassiz.
I zipped along the Glen Alpine Trail as fast as I could and returned to Fallen Leaf Lake around 4:15 after 4,000 feet of climbing and 16-ish miles. (I really have nothing to report on the return hike. Glen Alpine is boring and my work-related thoughts on the trail not worth sharing.)

What I Learned on Dick’s Peak and Jack’s Peak
- Do a better job of reading beta across the entire route
- Don’t assume a climb is doable/smart on the way down because it’s easy on the way up
- Hydration matters a lot when climbing as the lethargy that can come from dehydration makes everything slower
- Find a better hiking shirt
Aside from those lessons, this was a good opportunity to get better at ridge traverses and cross-country descents. I will definitely be faster on it going forward and approach with less weariness.
Time Splits
Trailhead: 8:30a
Susie Lake: 9:30
Heather Lake: 10:00
Lake Aloha: 10:30
Slabs of Insanity: 11:05
Mt. Price notch: 11:50
Mt. Price summit: 12:15
Mt. Agassiz summit: 12:45 (I spent 15 minutes or so on Mt. Price)
Turned around: 1:30
Mt. Price ridge: 2:00
Slabs of Insanity: 2:45
Mosquito Pass: 3:15
Fallen Leaf Lake: 6:05
Equipment
None
More Pictures


Lake Aloha to Mt. Price and Mt. Agassiz: Partial Crystal Range Traverse
Result: Summited Mt. Price and Mt. Agassiz
Class: 3-4 on the upper approach; 2 on the Slabs of Insanity and ridge; 1 elsewhere
The Plan
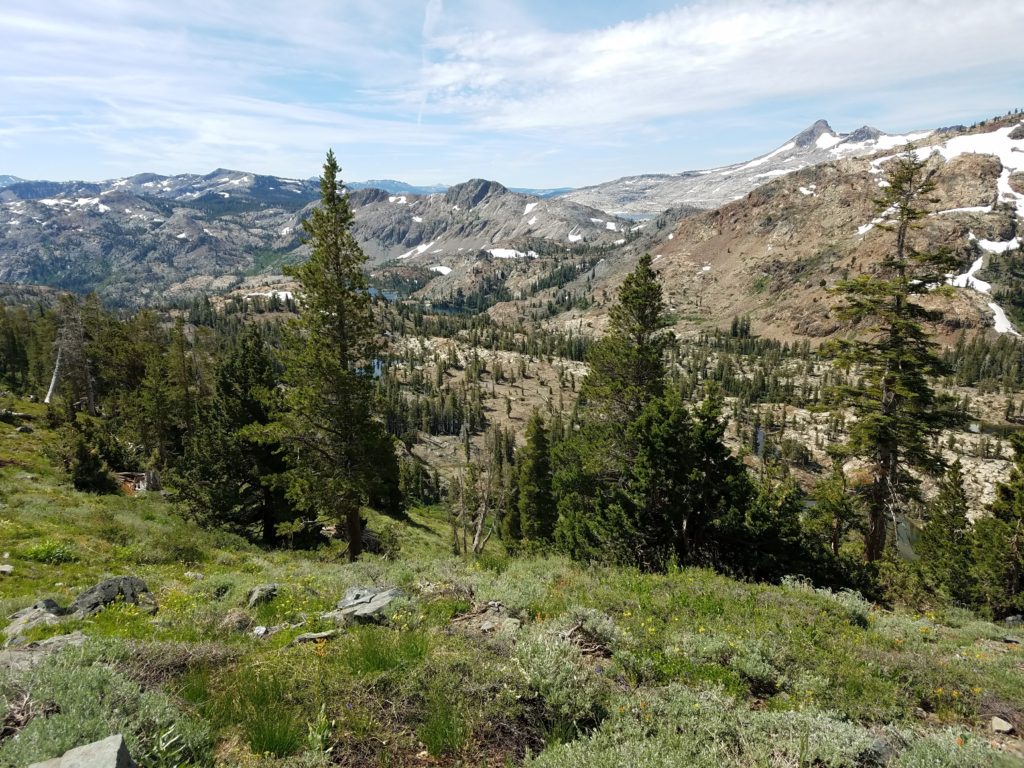
Sometimes familiarity breeds not contempt but undying love. Such I have for the Crystal Range, which for years loomed beyond my reach – and interest – as the unattainable backdrop to Desolation Wilderness.
That had changed in recent years as I began hiking and this year I hoped to make a traverse of the three main peaks, hiking to Mt. Price from Lake Aloha, crossing to Mt. Agassiz (not to be confused with the Mt. Agassiz in the Palisades), and then gaining Pyramid Peak before looping back and returning to Fallen Leaf Lake.
This would be an audacious day hike and on the previous day as well as morning of I rather lost interest in the full hike. Waking late and not hitting the road leading to Lily Lake and the Glen Alpine trailhead until 8:30 solidified my decision to take Pyramid Peak off the list. I had to return to Fallen Leaf Lake no later than 6:45 if I wanted to eat that night, so I couldn’t make up the late start by finishing at dusk or night.
My amended plan would take me from Fallen Leaf Lake’s shores to Lake Aloha, up the so-called Slabs of Insanity to Mt. Price, from which I would make the easy traverse to Mt. Agassiz before descending back to Mosquito Pass and Lake Aloha and hiking the 7-8 miles back to camp.
Glen Alpine
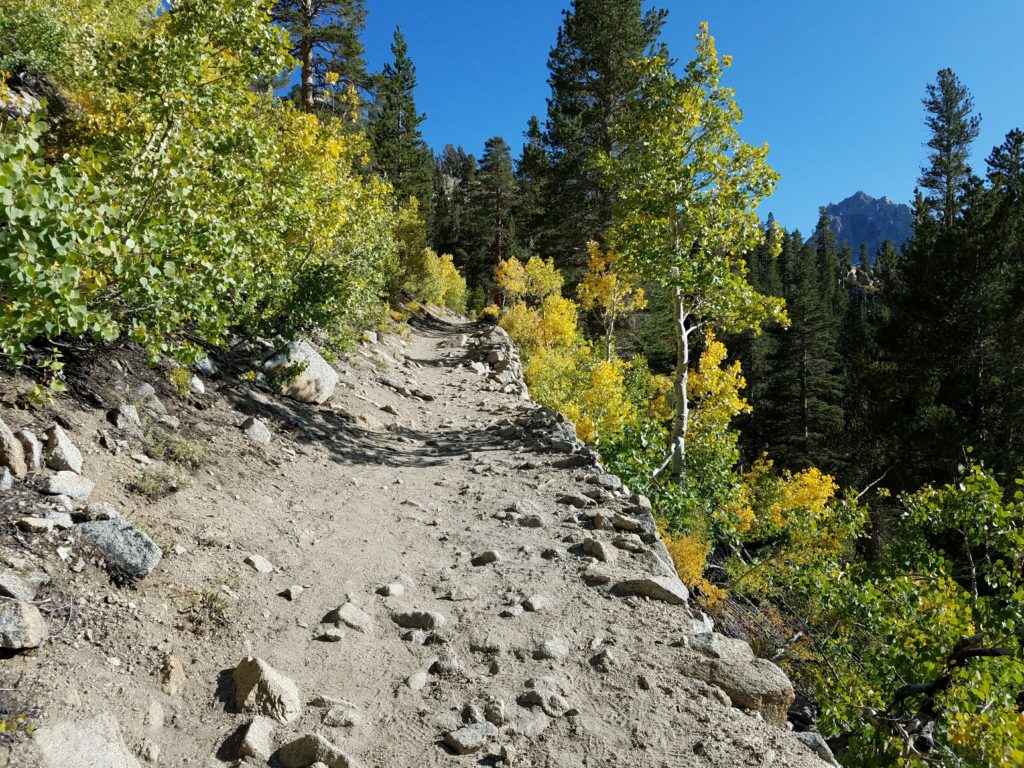
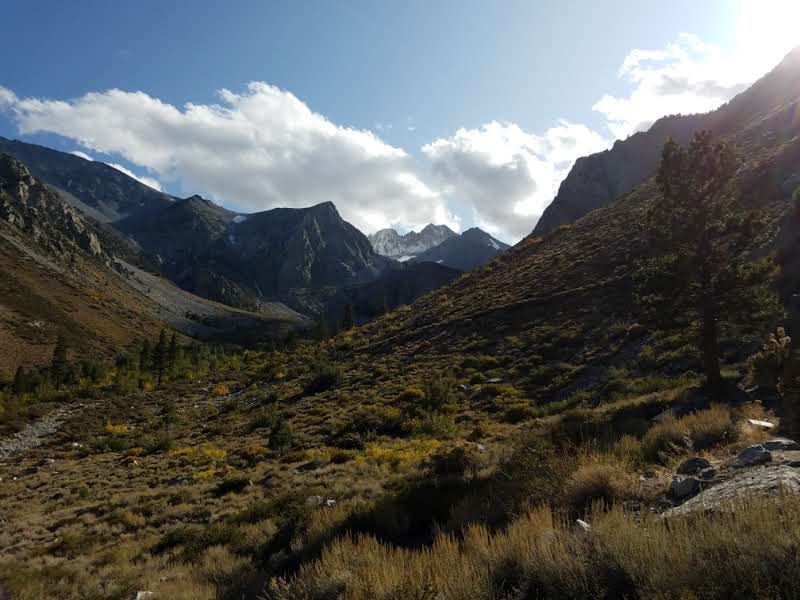
As mentioned, I began hiking at 8:30 and reached Glen Alpine some 15 minutes later. Glen Alpine is a bore. I’ve hiked it more than a dozen times and know it better than I care to know any trail.
It meanders through the ravine bordered on one side by a soft line of low peaks that lead to the Cracked Crag and the eastern flank of Desolation Wilderness and, on the other, by Cathedral Ridge and Mt. Tallac. Naturally enough, the trail follows the Glen Alpine Creek, which collects much of Desolation Wilderness’ runoff and deposits it in Fallen Leaf Lake.
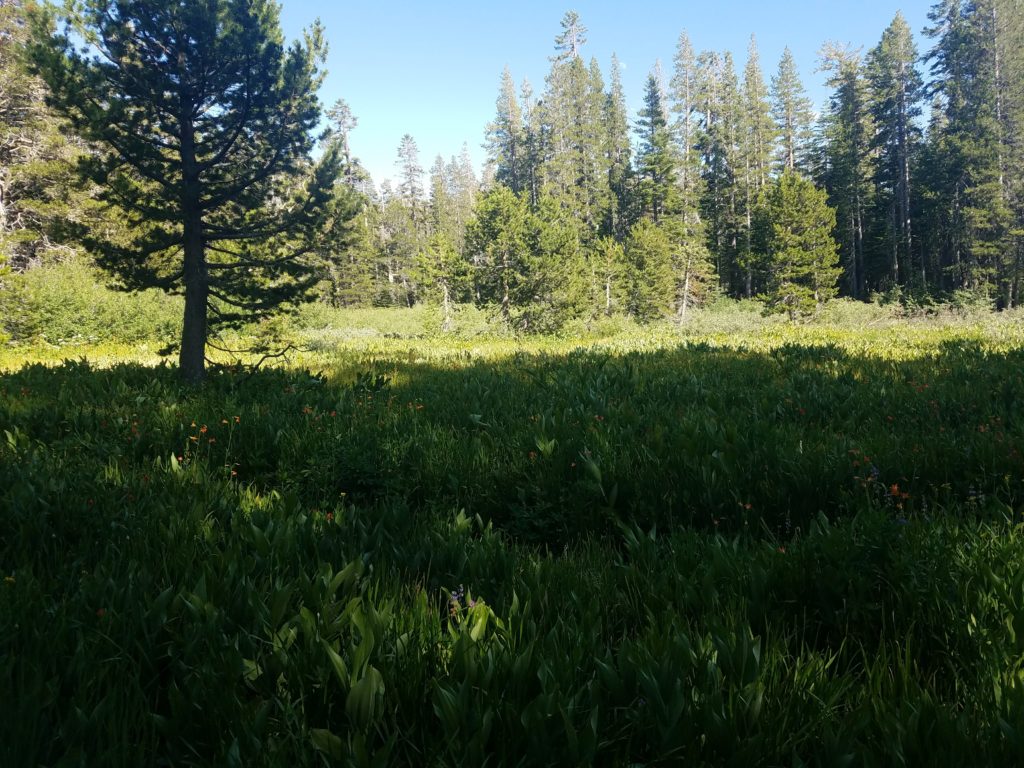
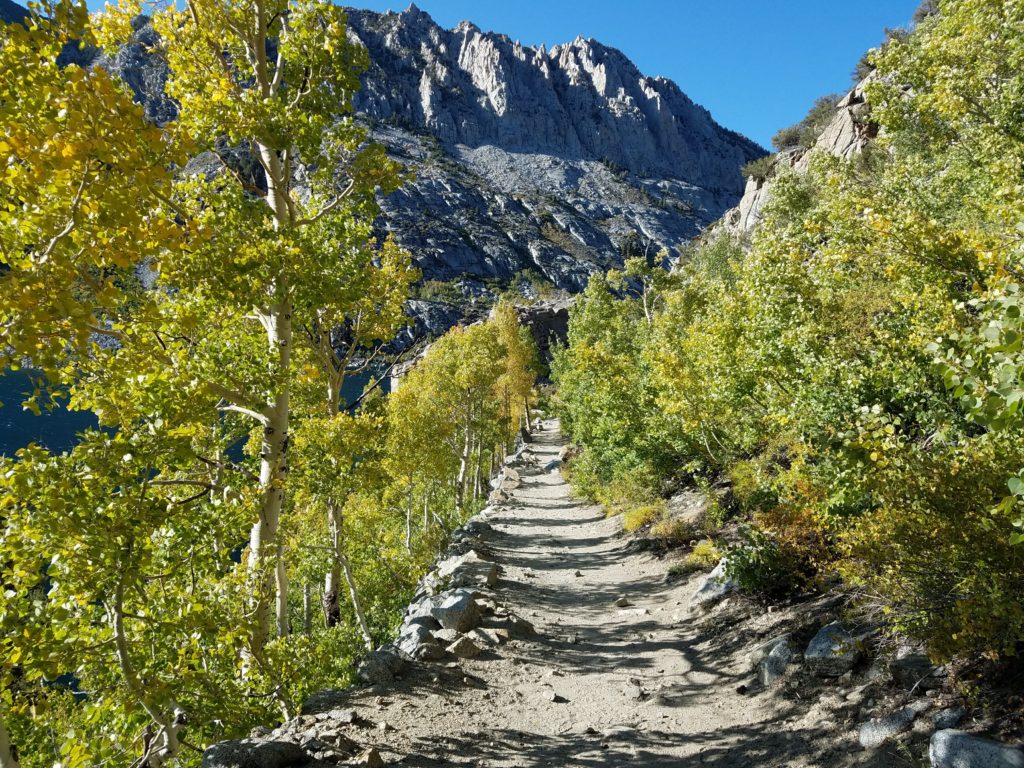
Thankfully, the trail is fast. It gains little elevation and has no challenges whatsoever – as easy as Class 1 gets. I made good time, leaving a water bottle in a fallen tree trunk after passing the trail split for Lake Gilmore. Now on the PCT, beauty rapidly increases as lily pad covered ponds, small meadows, and ultimately a line of lakes grace the trails.
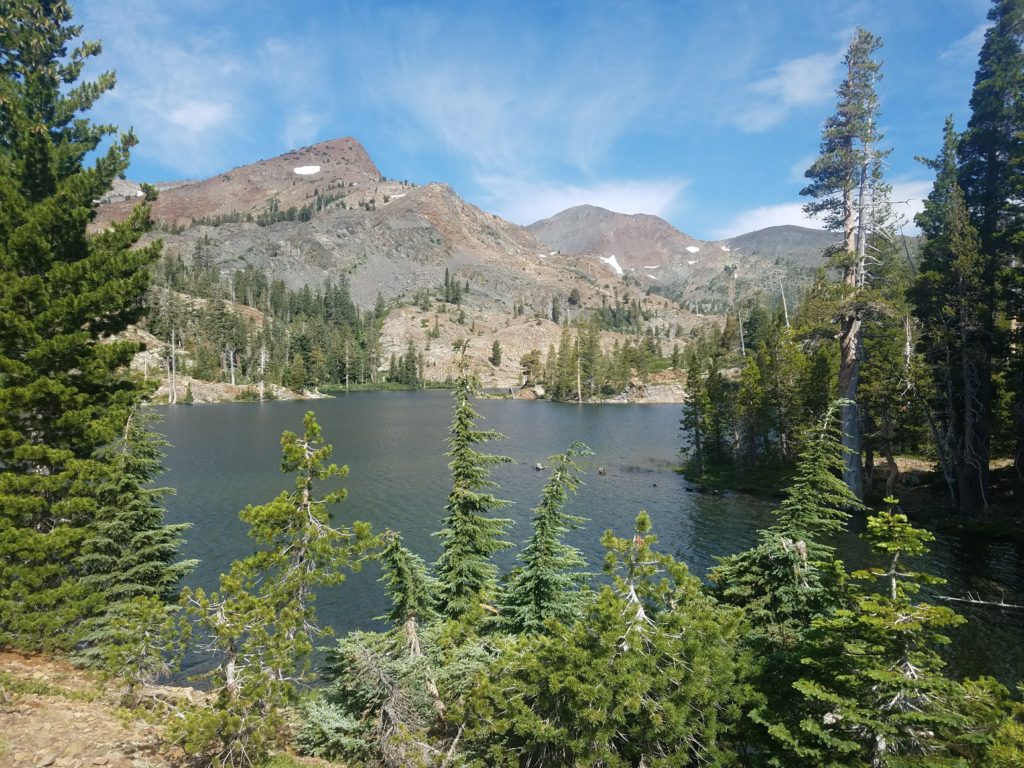
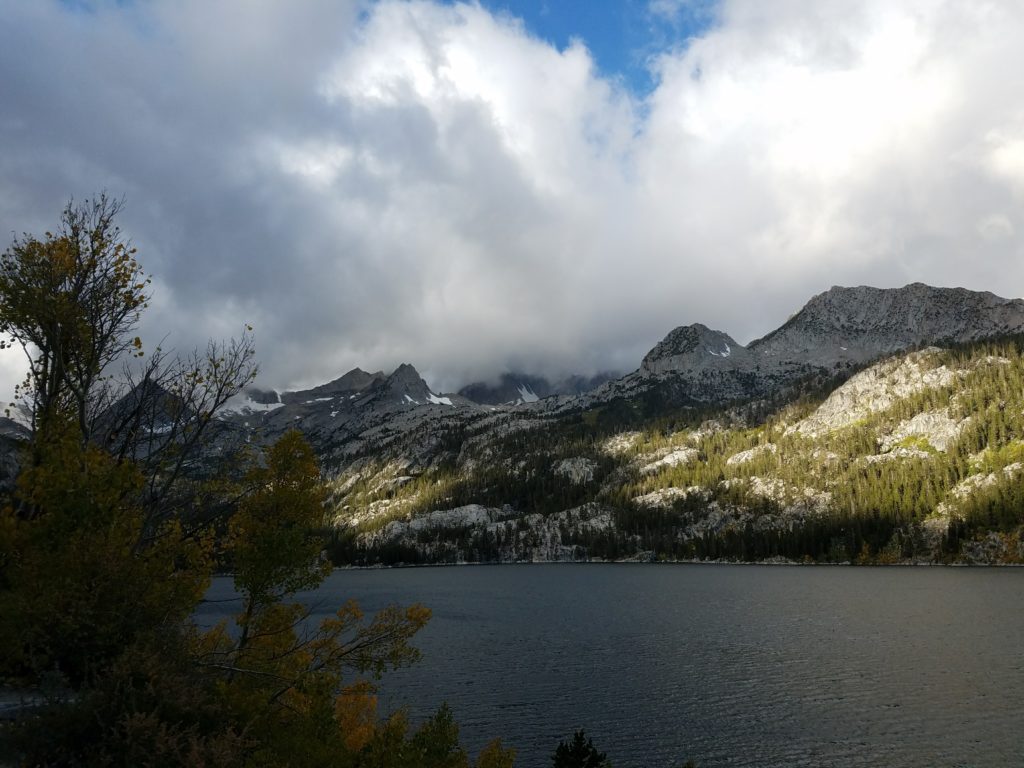
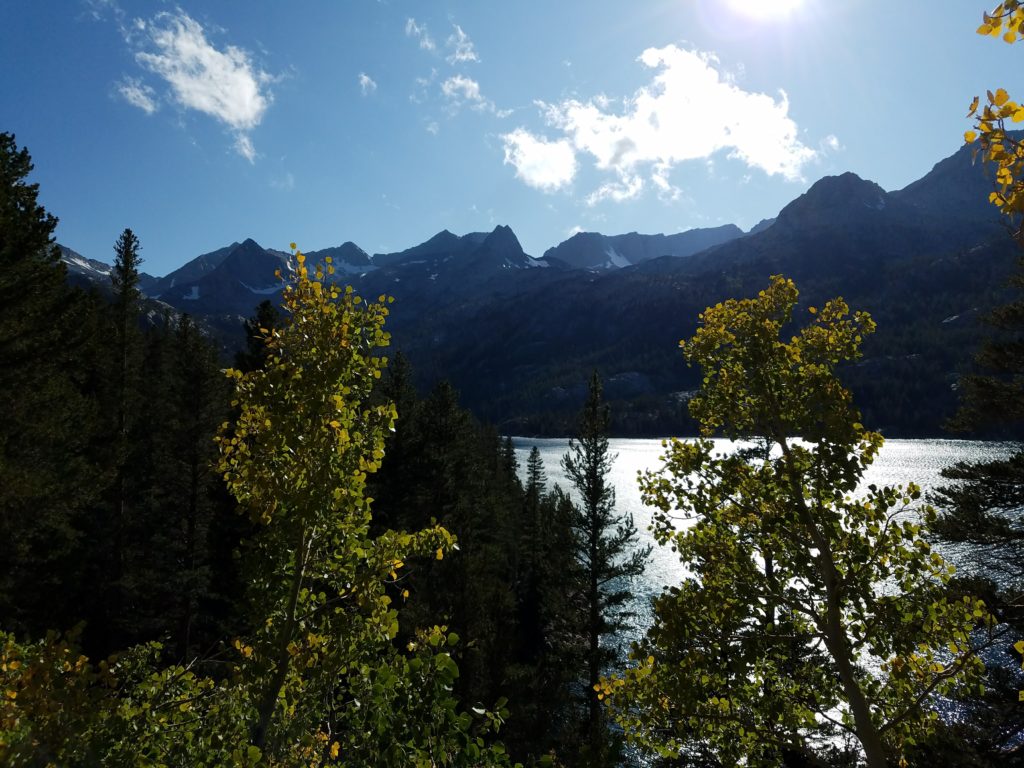
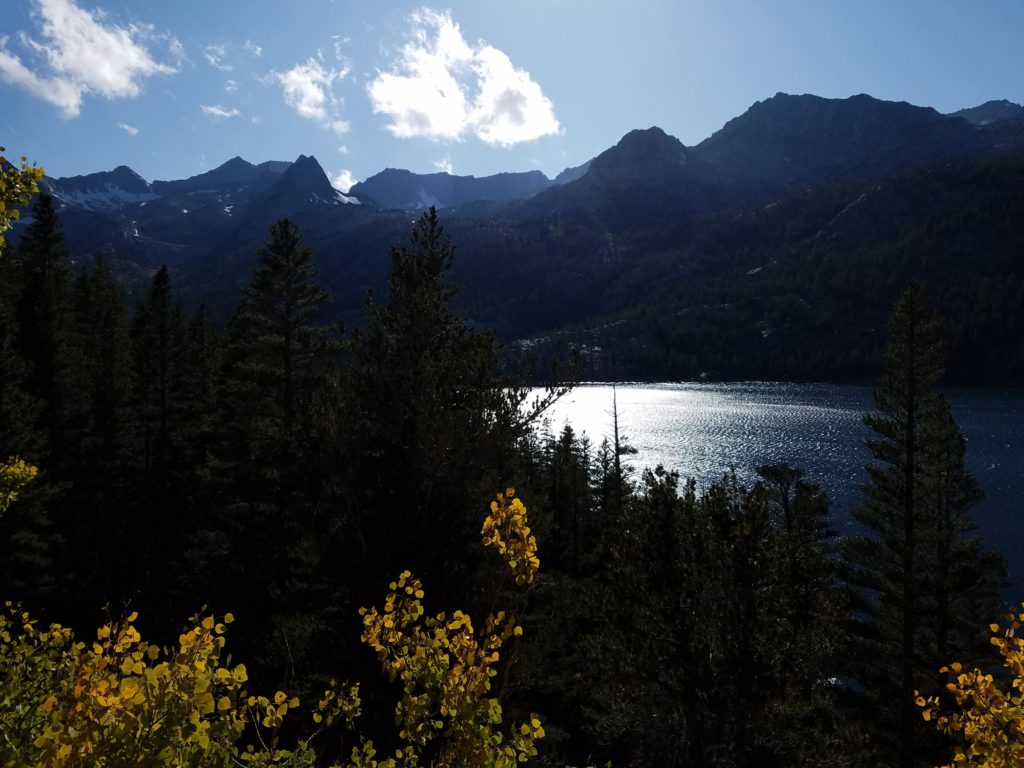
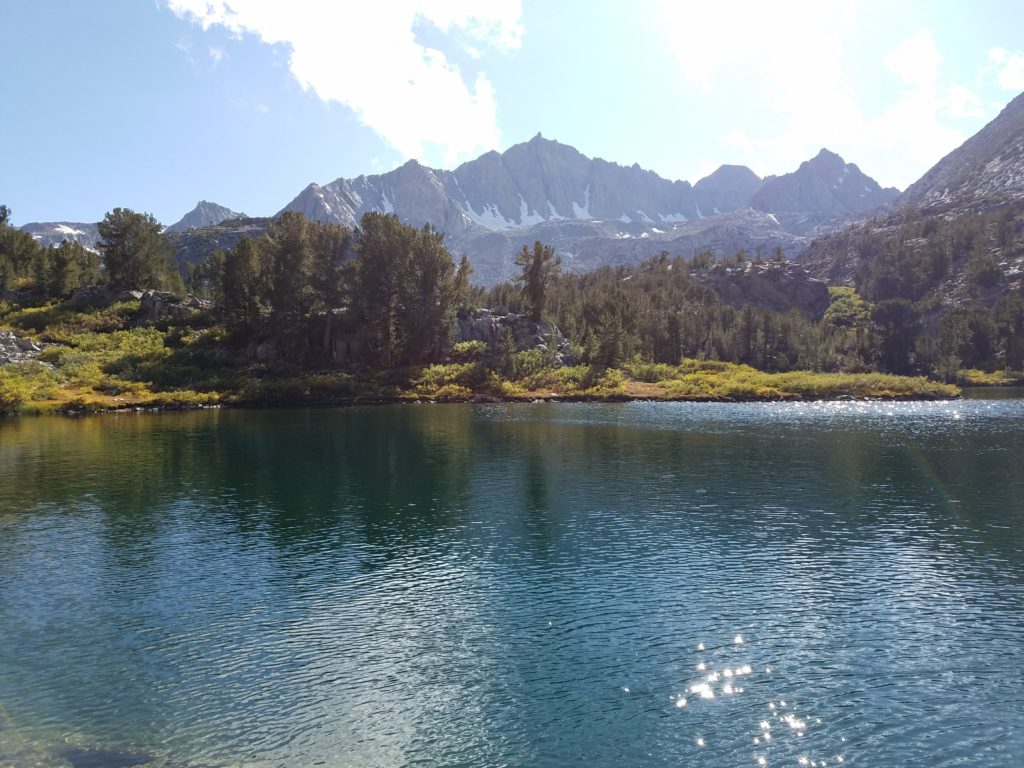
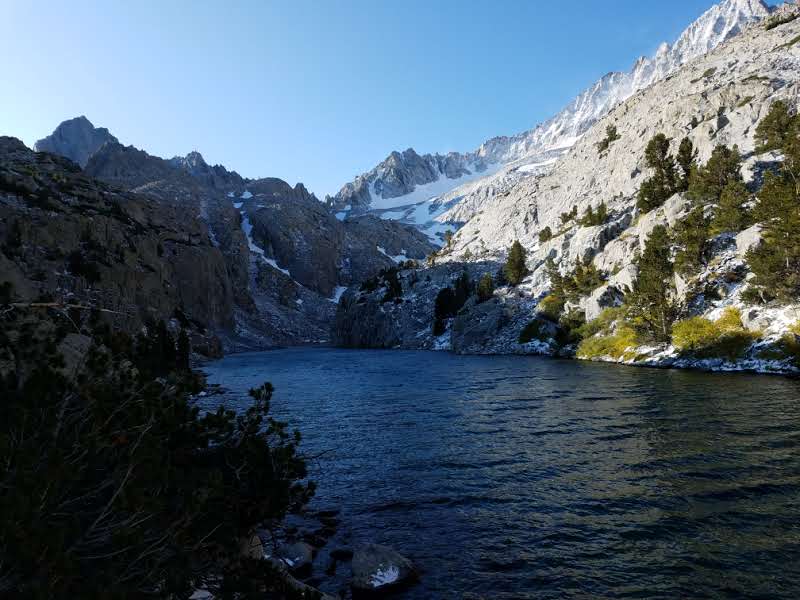
Susie Lake and Heather Lake
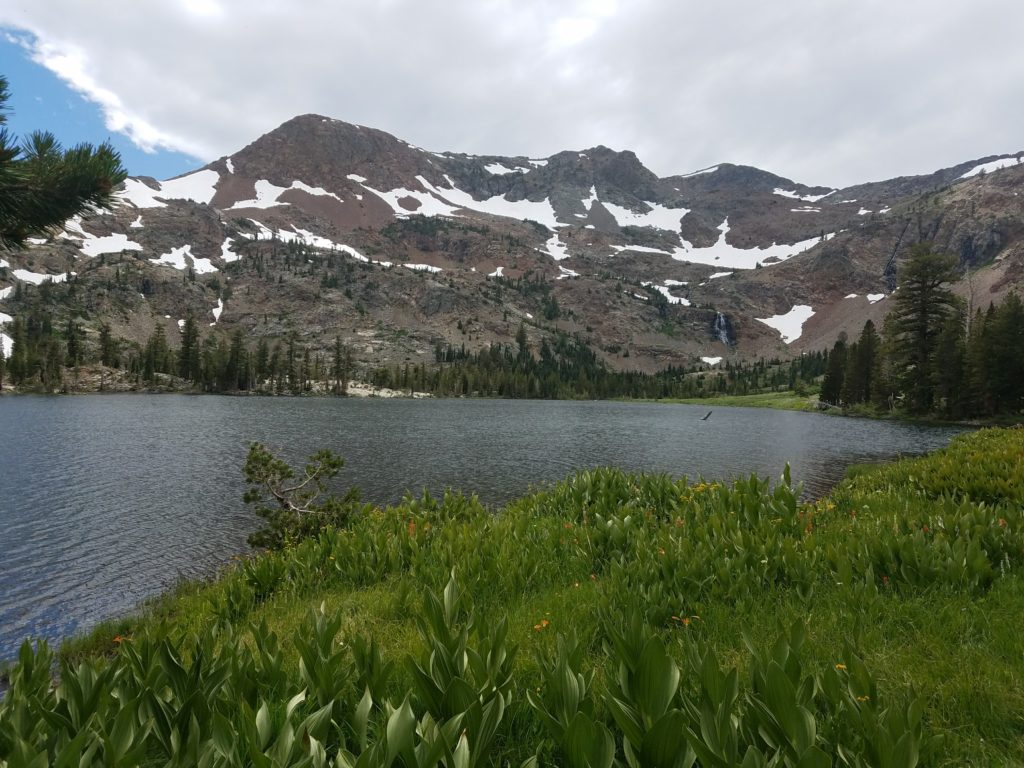
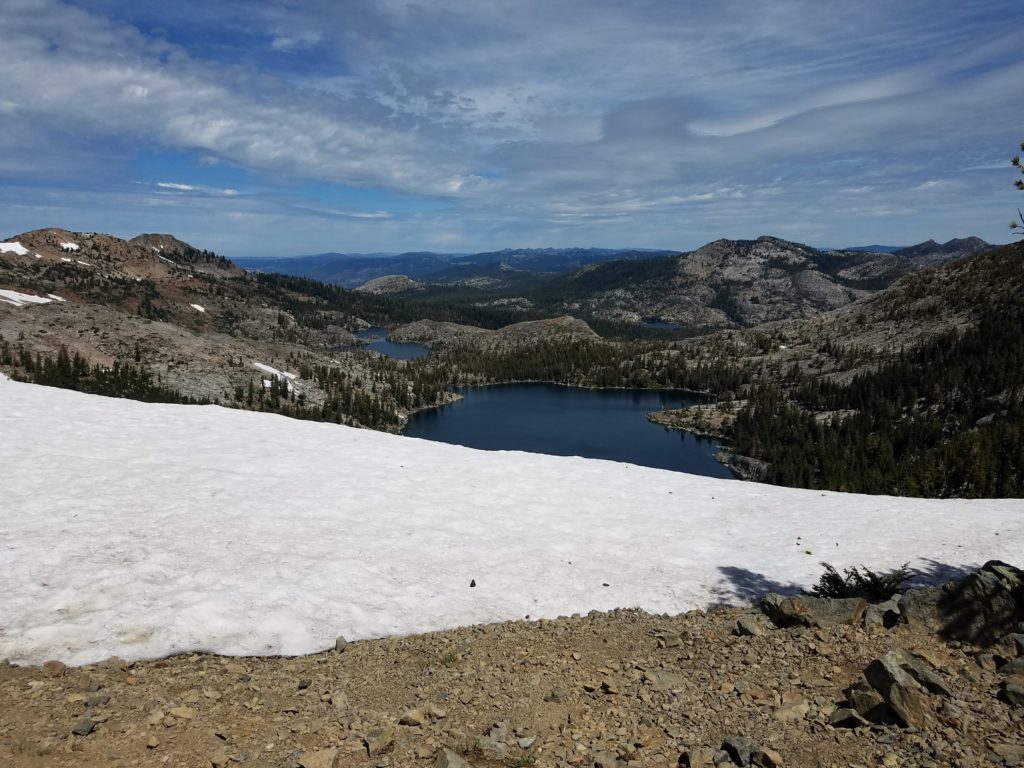
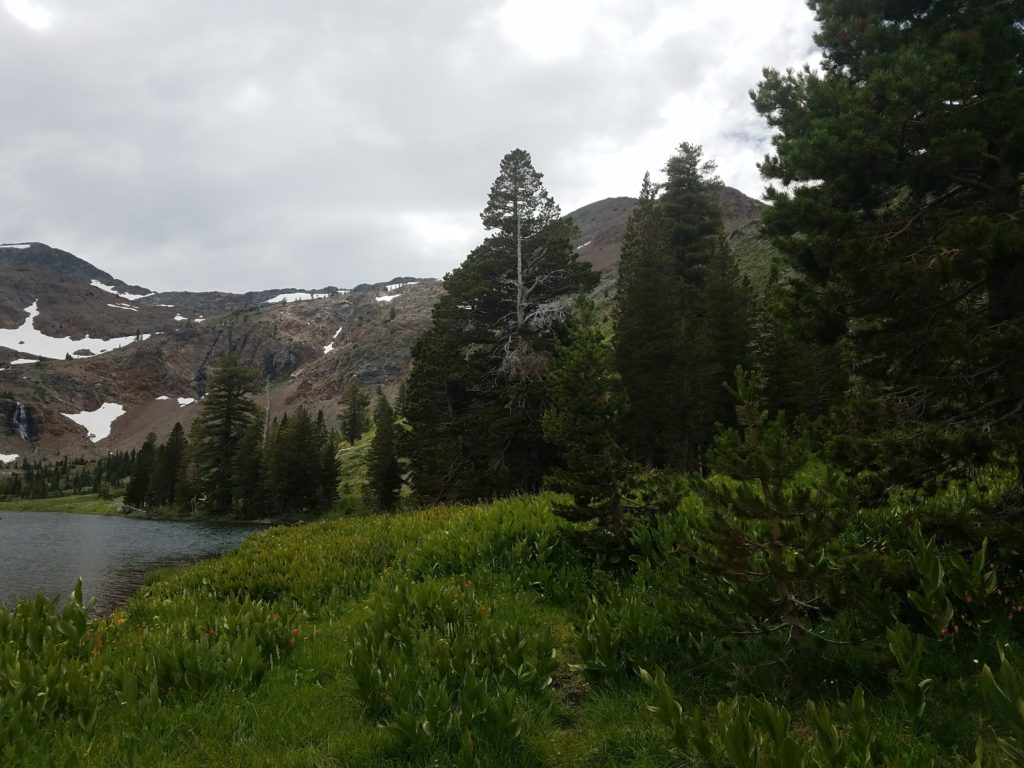
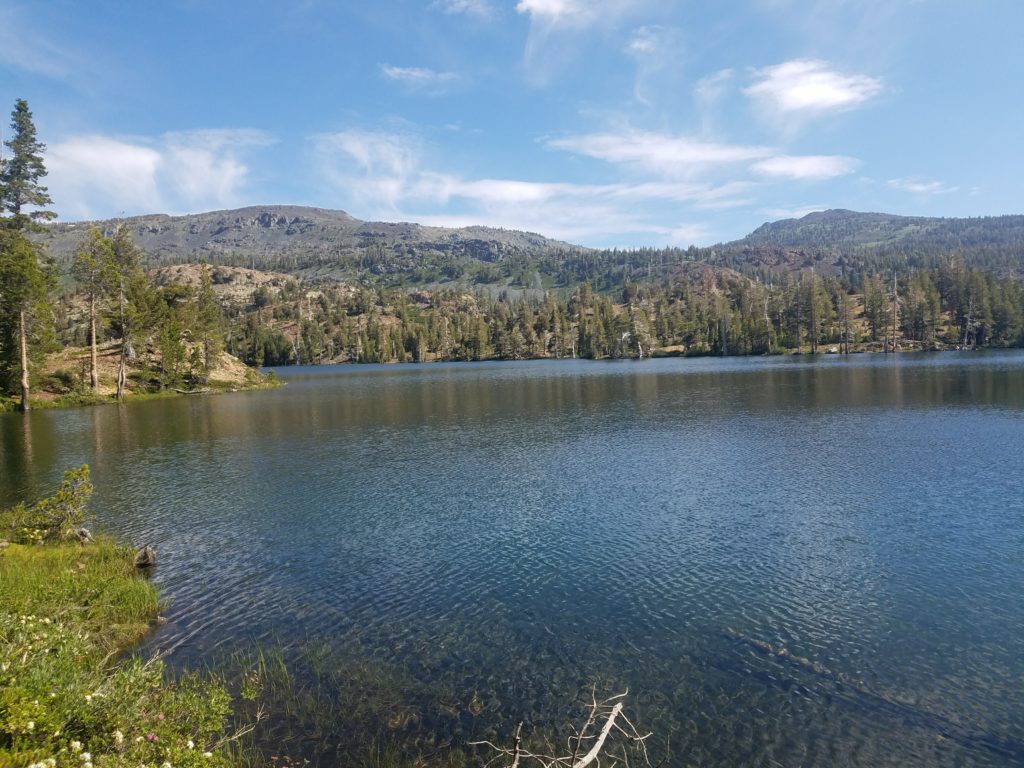
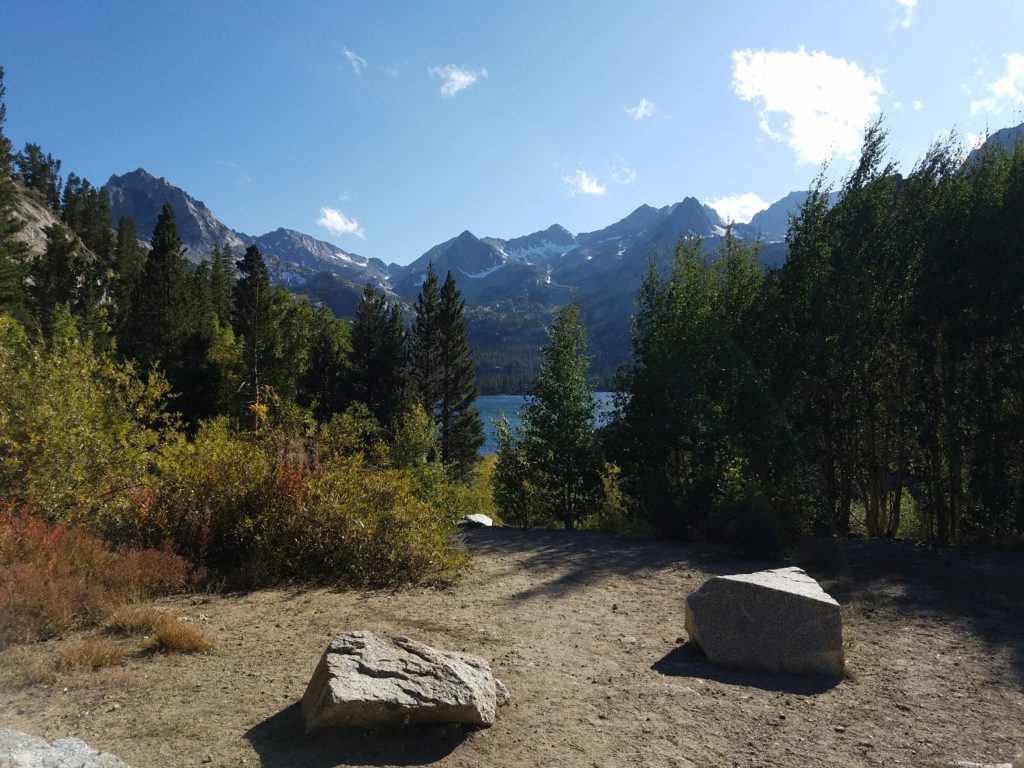
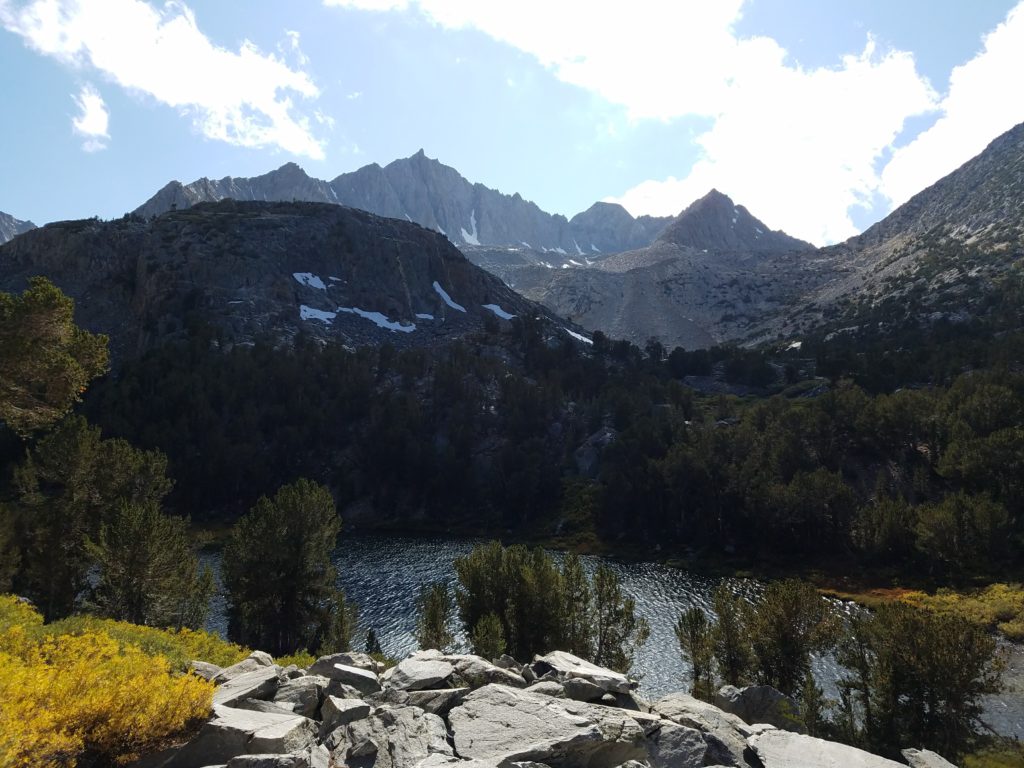
I reached the first, Susie Lake, around 9:45. A beautiful subalpine wonder, Susie Lake boasts a sprawling shoreline with numerous spots to camp and plenty of vistas of the Jack’s Peak, Dick’s Peak, and Dick’s Pass. It’s worth a few minutes to enjoy the Desolation Wilderness’s beauty.
From there the trail continues with ease and a slight downhill to a deep unnamed tarn. Past it the connecting creek pounds after heavy snowfall and forges tunnels through remnant snow fields, a remarkably fun sight. Heather Lake appears after some switchbacks. Less remarkable than Susie Lake, its deep blue waters still lend to nice photography.
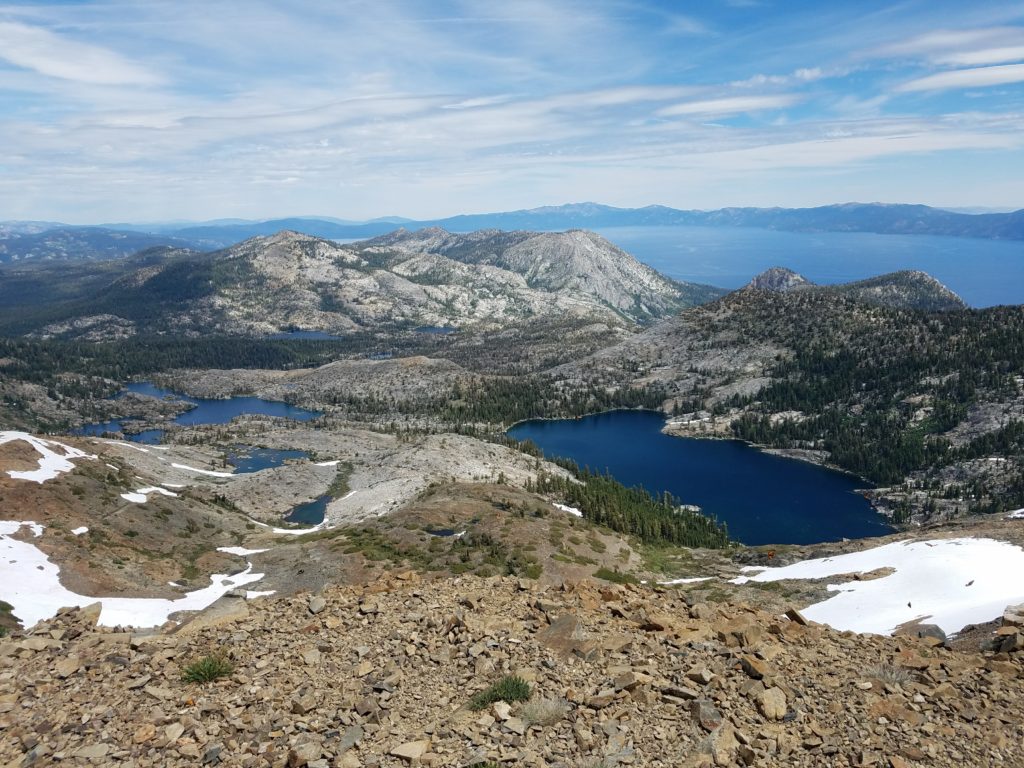
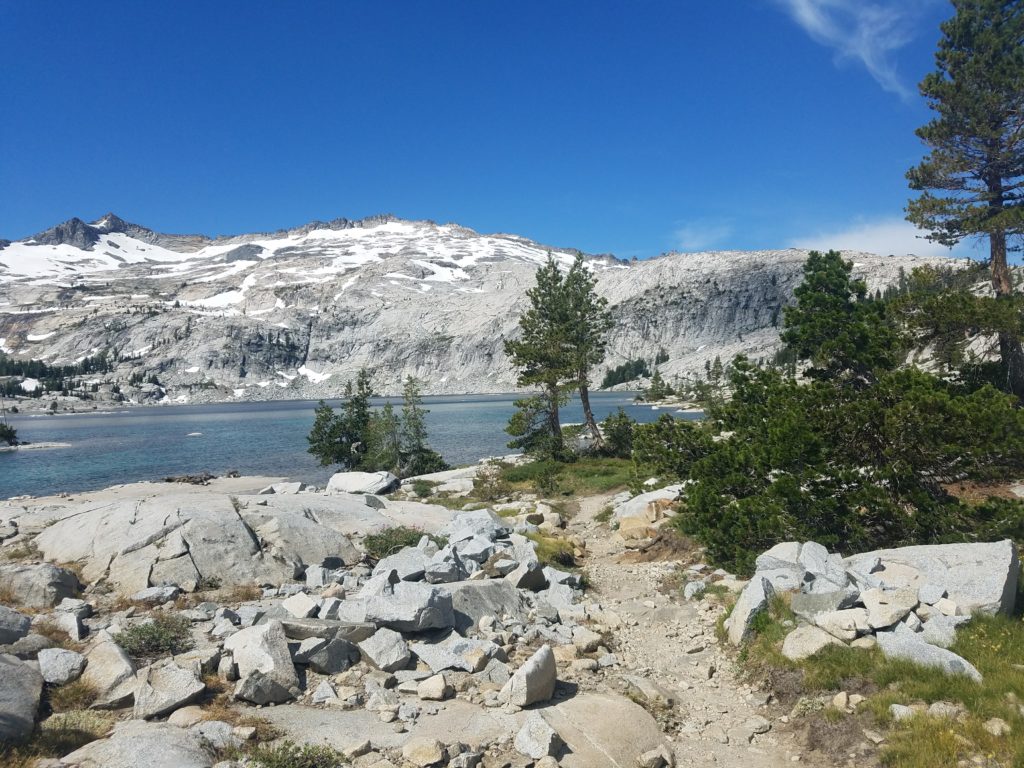
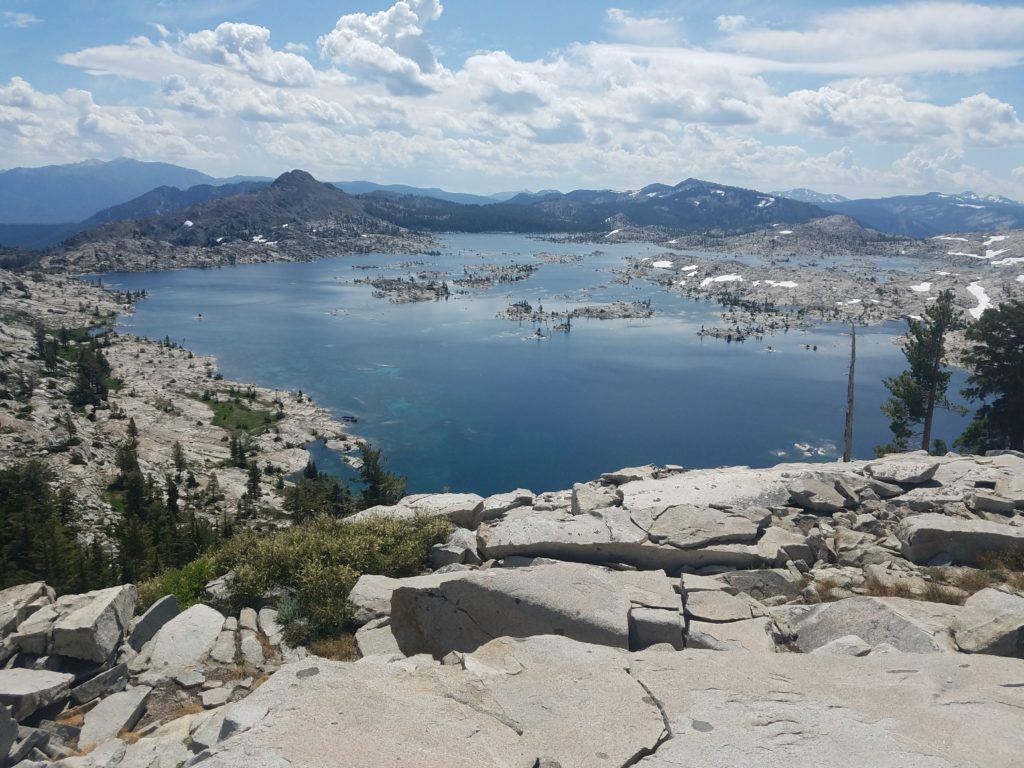
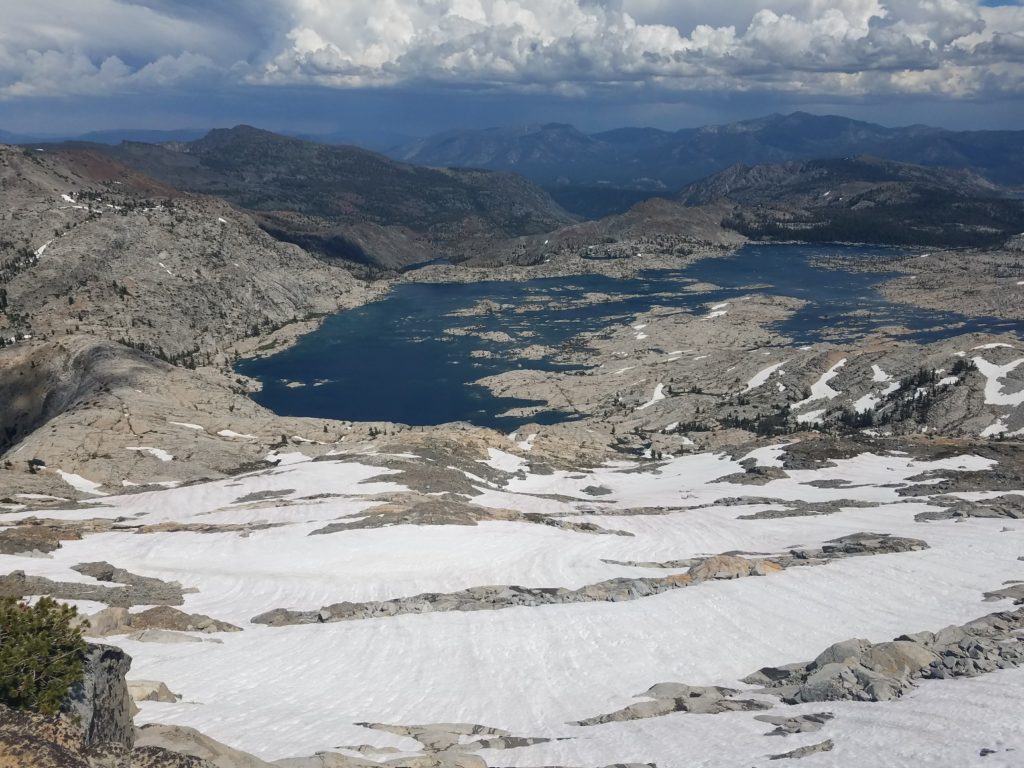
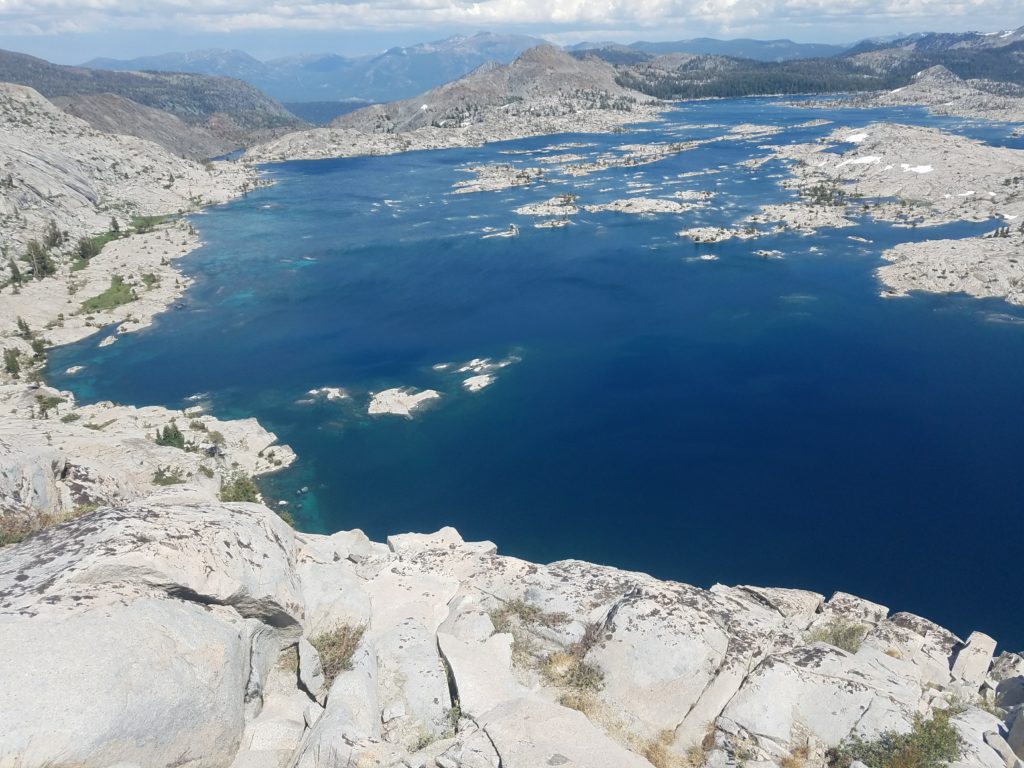
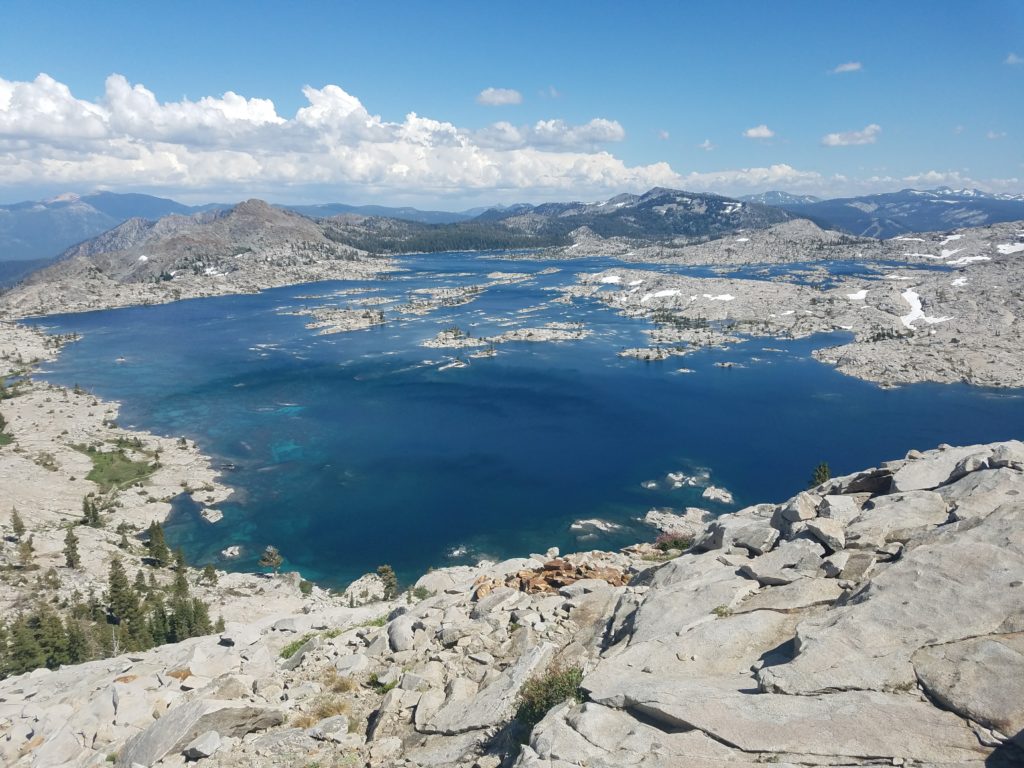
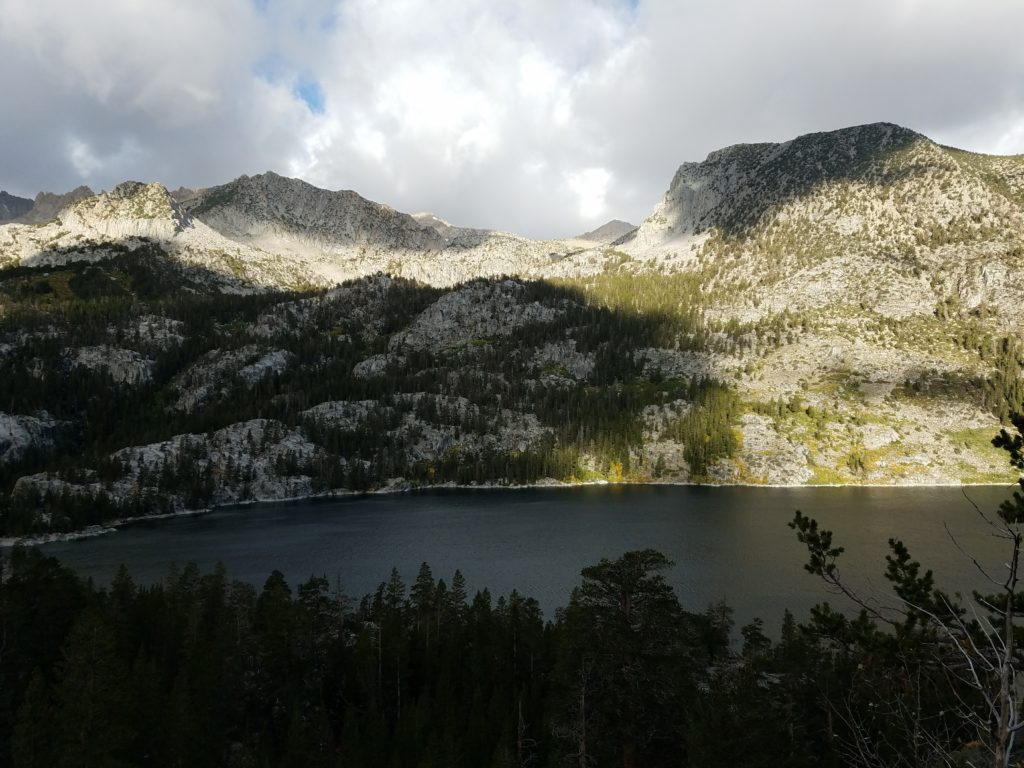
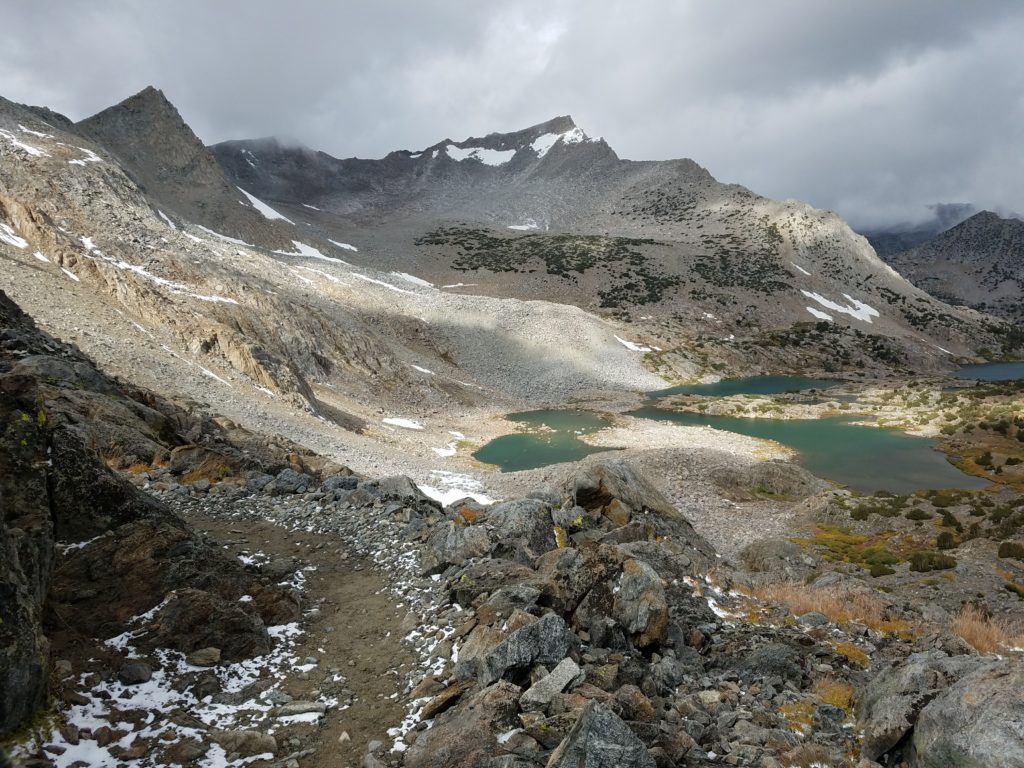
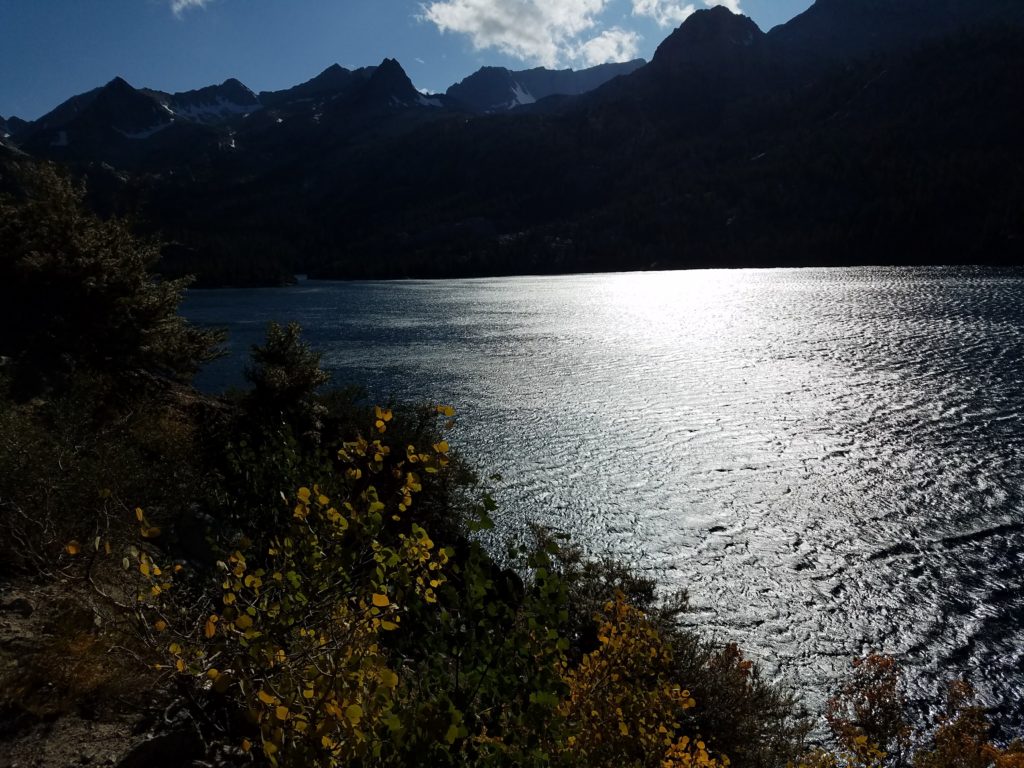
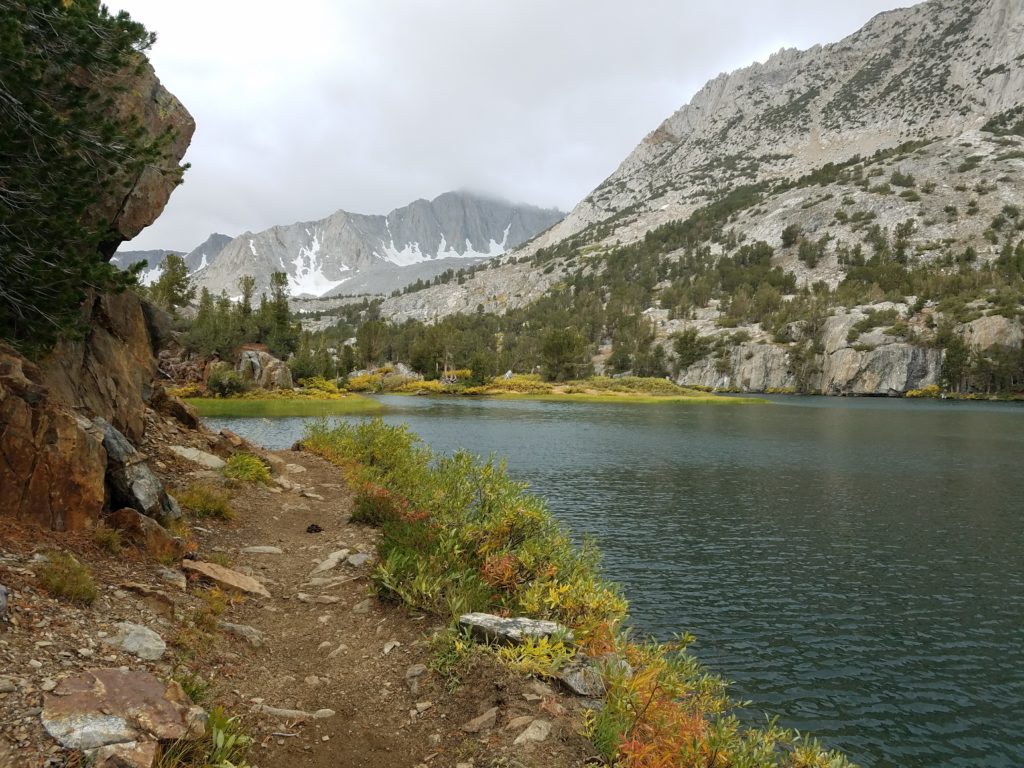
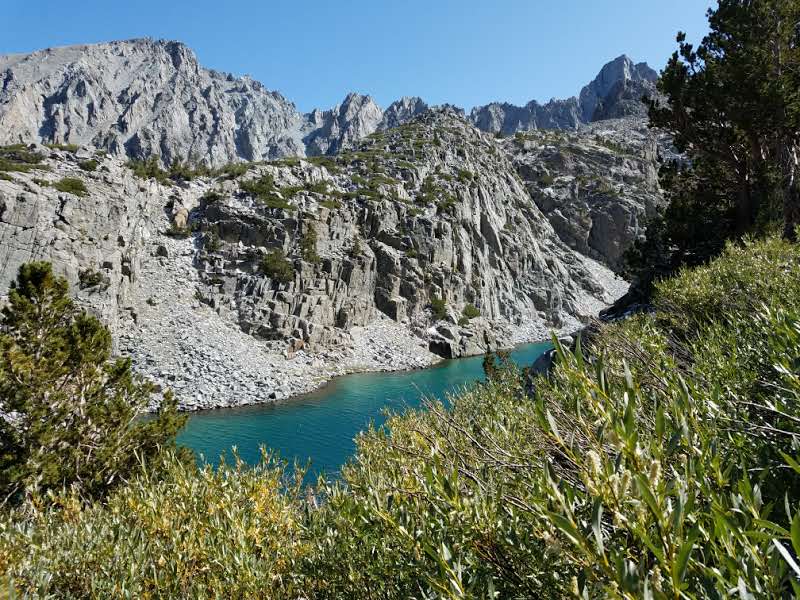
Lake Aloha
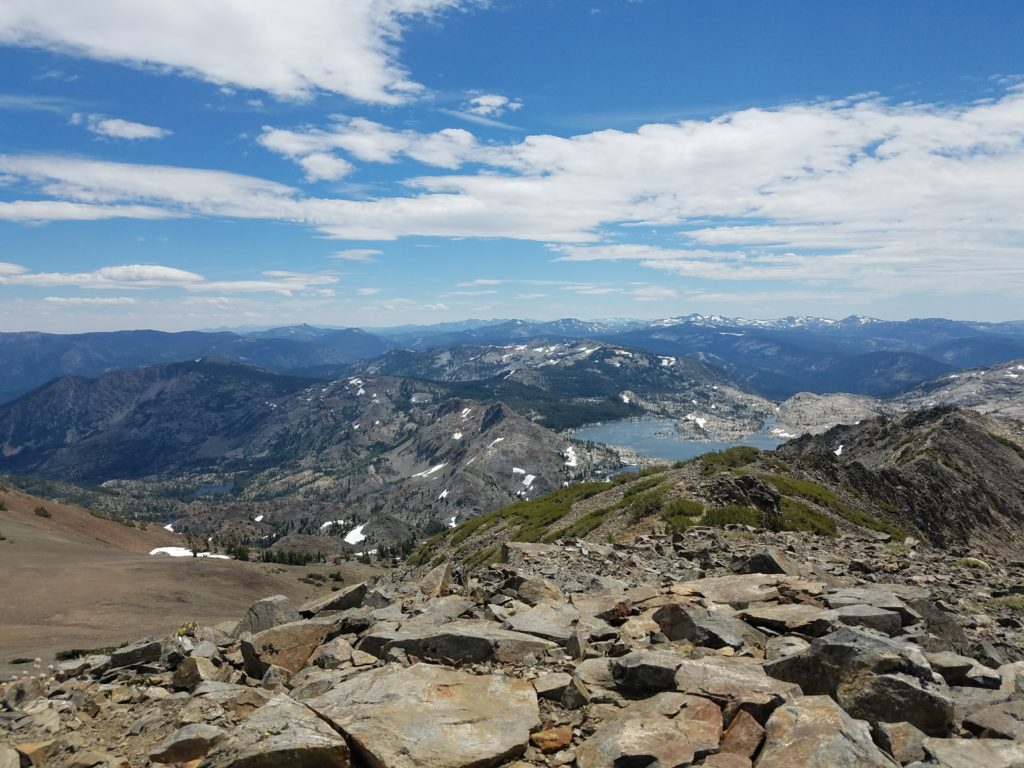
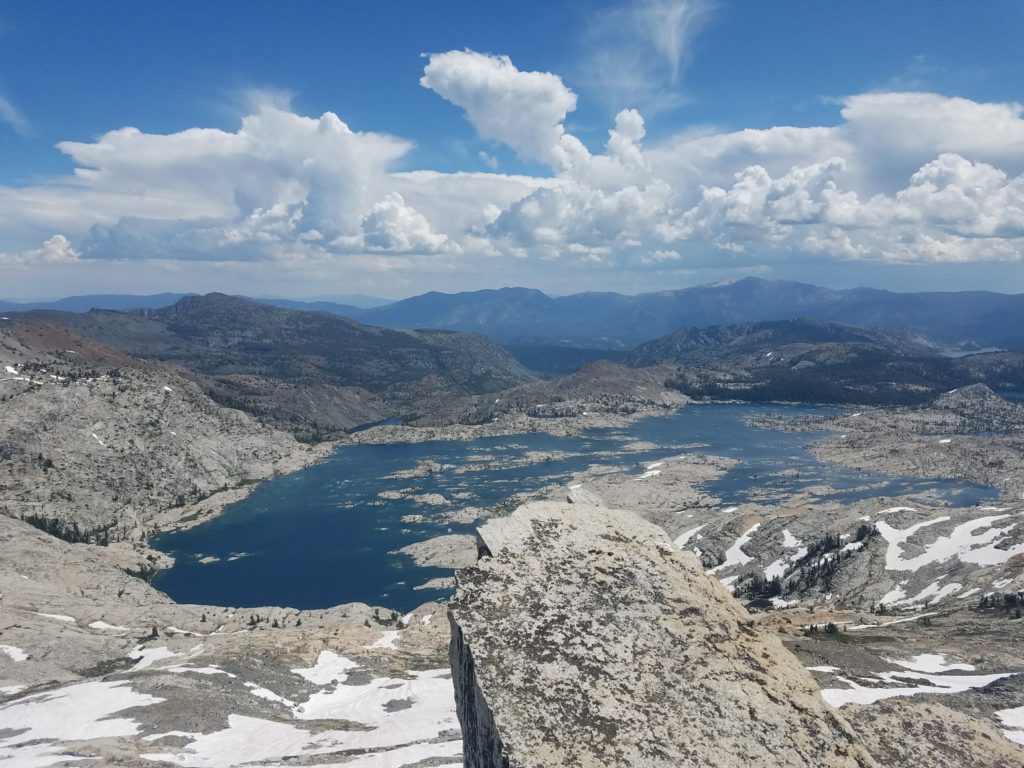
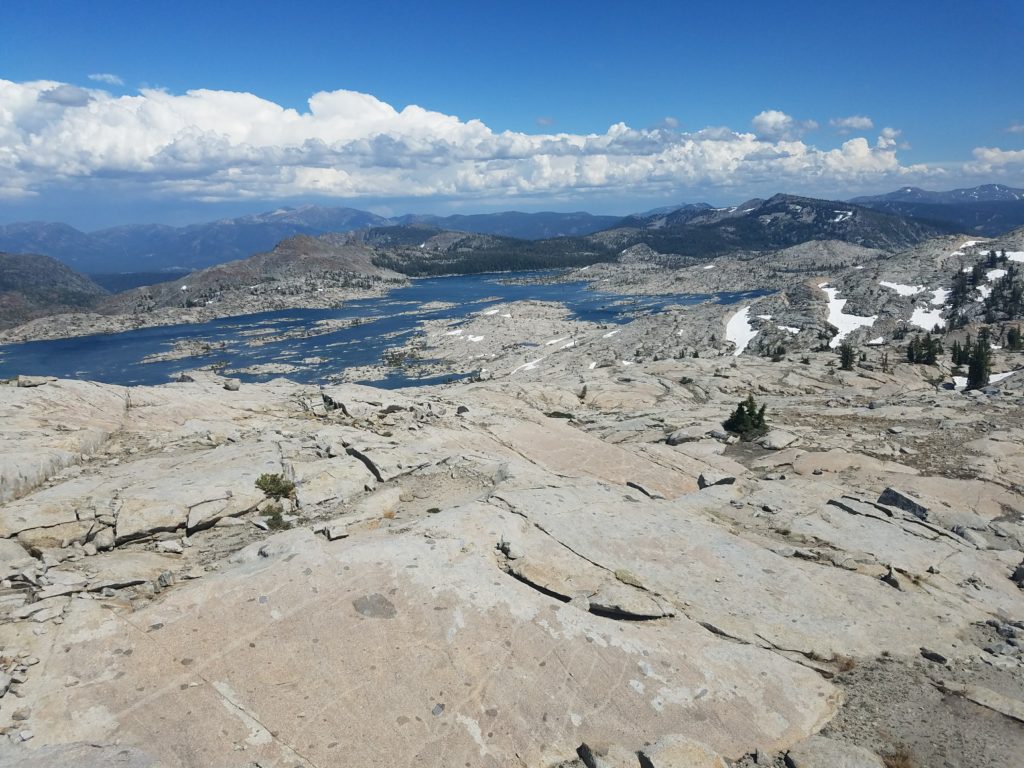
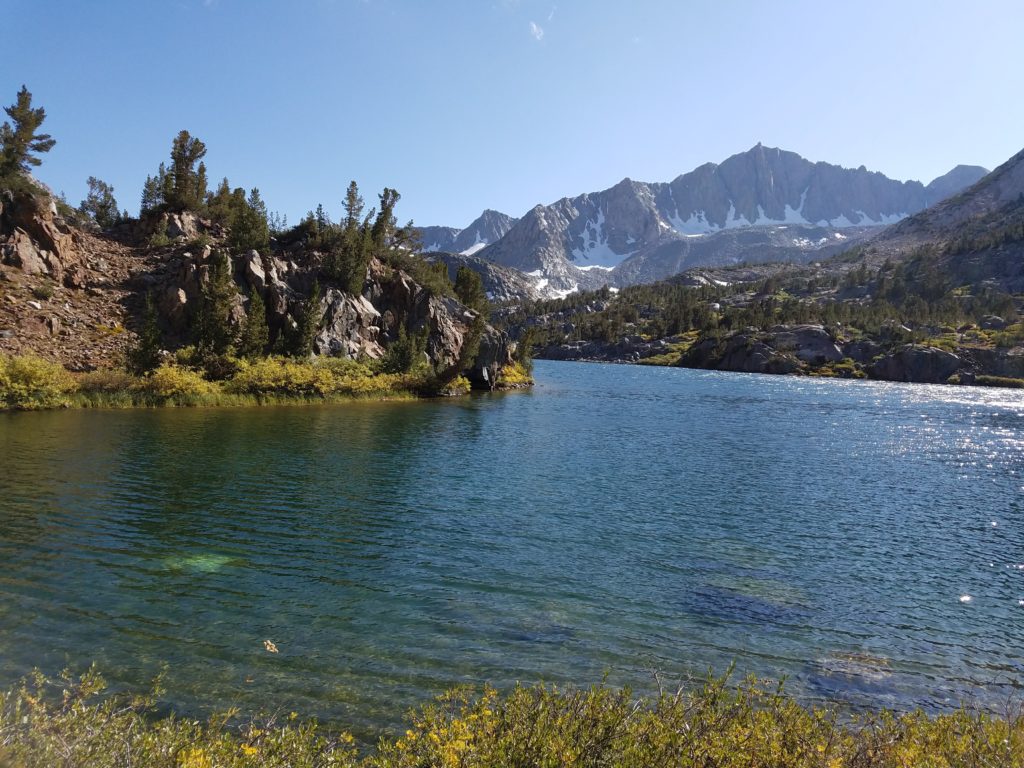
Finally Lake Aloha emerges. Lake Aloha rarely, if ever, looks the same twice. A man-made reservoir drowning desolation valley, the number of visible islands and its shoreline depend on the season and snowfall.
In years like 2017 and 2019, few islands peer above the surface and snow still sits scattered about the rocks. But in drier years, like 2018, islands are a dime a dozen, poking above the shallow waters and creating a fun swim environment.
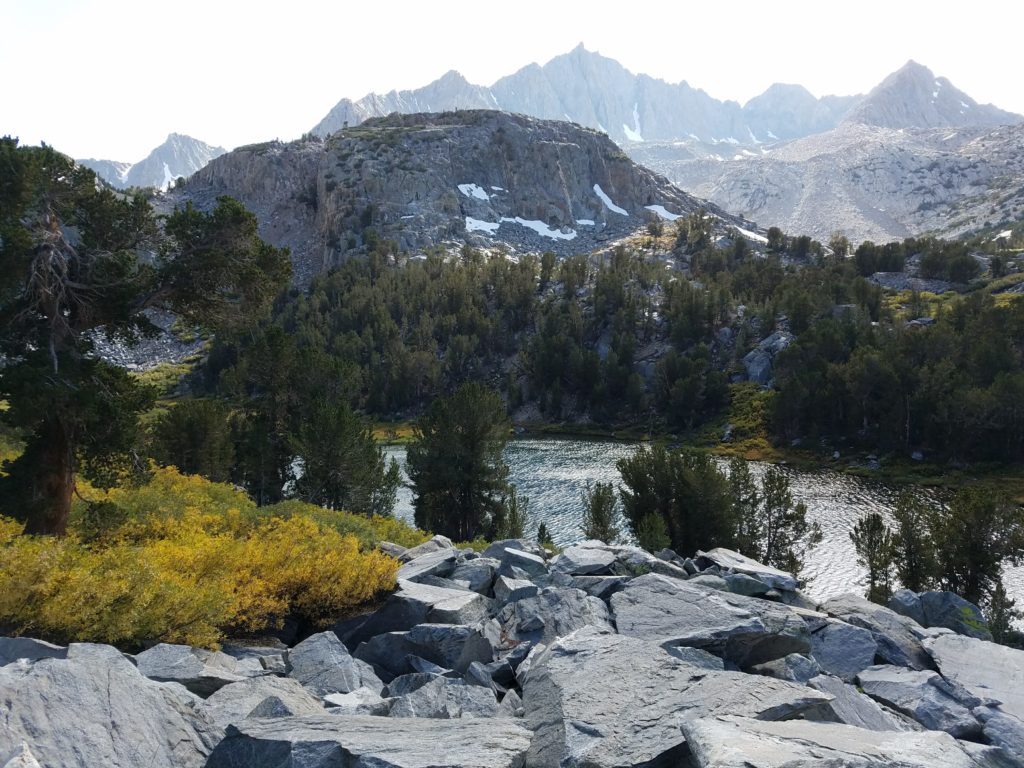
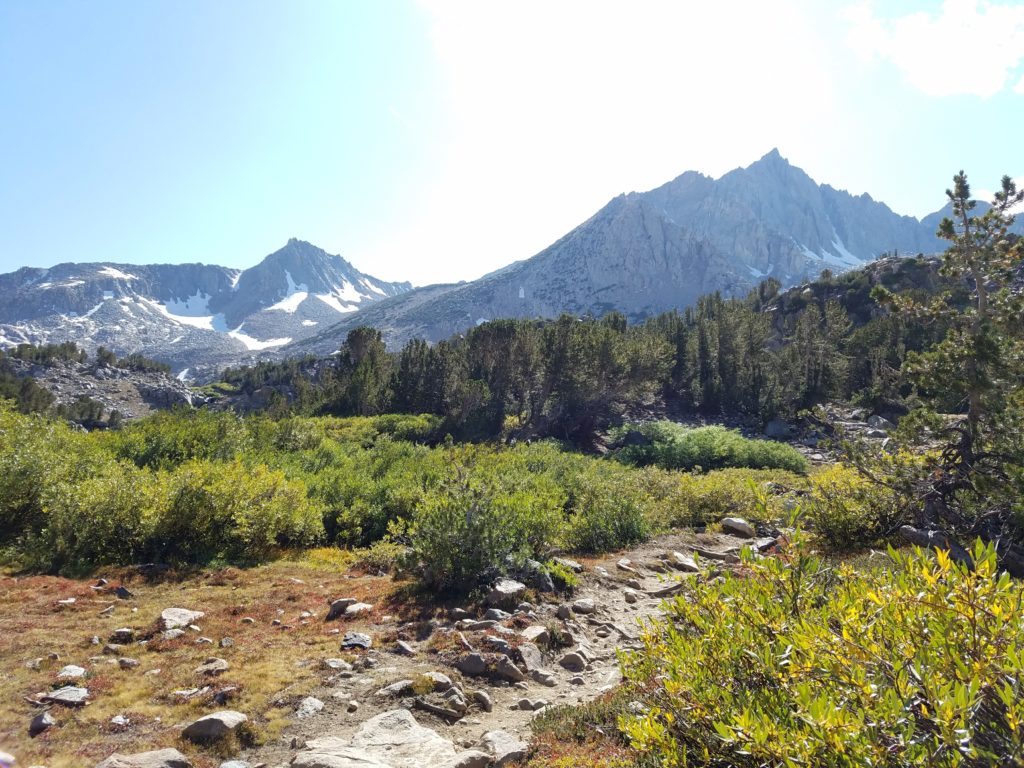
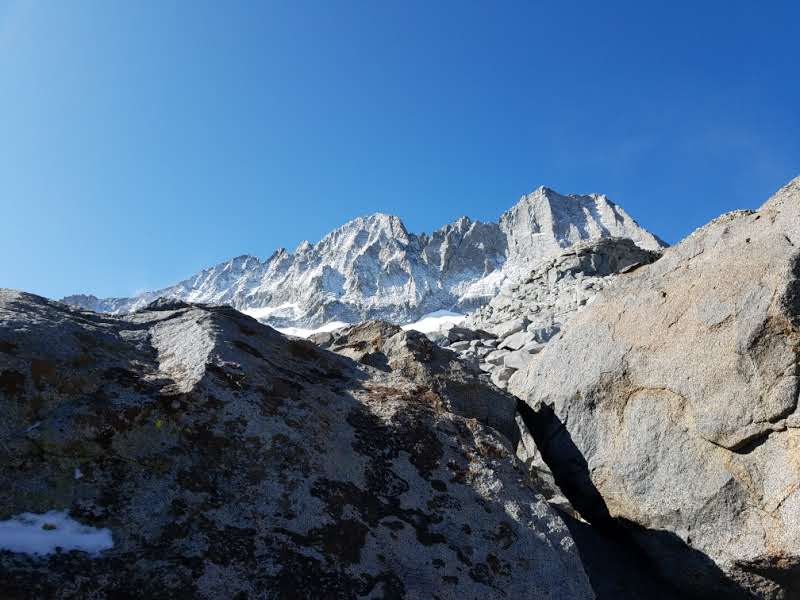
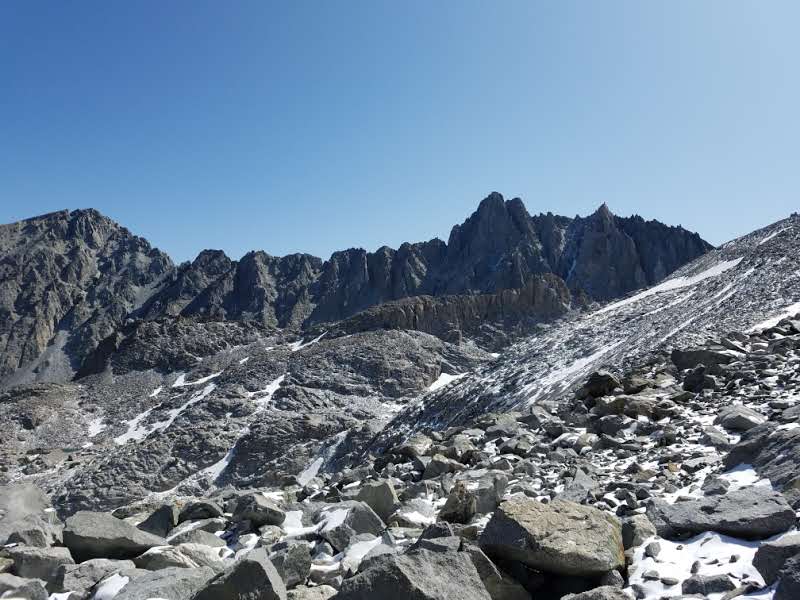
Immediately ahead lies the Crystal Range. Mt. Price looks an imposing behemoth with an unforgiving broad flank protecting its summit from hikers. Agassiz sits as a wave cresting over Desolation Valley. From here, Pyramid Peak looks far and almost small.
The trail then splits – south to continue on the PCT and head towards the Echo Lakes, north to the Rubicon Trail over Mosquito Pass and into Rockbound Valley. I arrived at 10:30 – covering 7.3 miles in 2 hours – stashed a bottle and took a quick snack before continuing towards Mosquito Pass.
Mosquito Pass
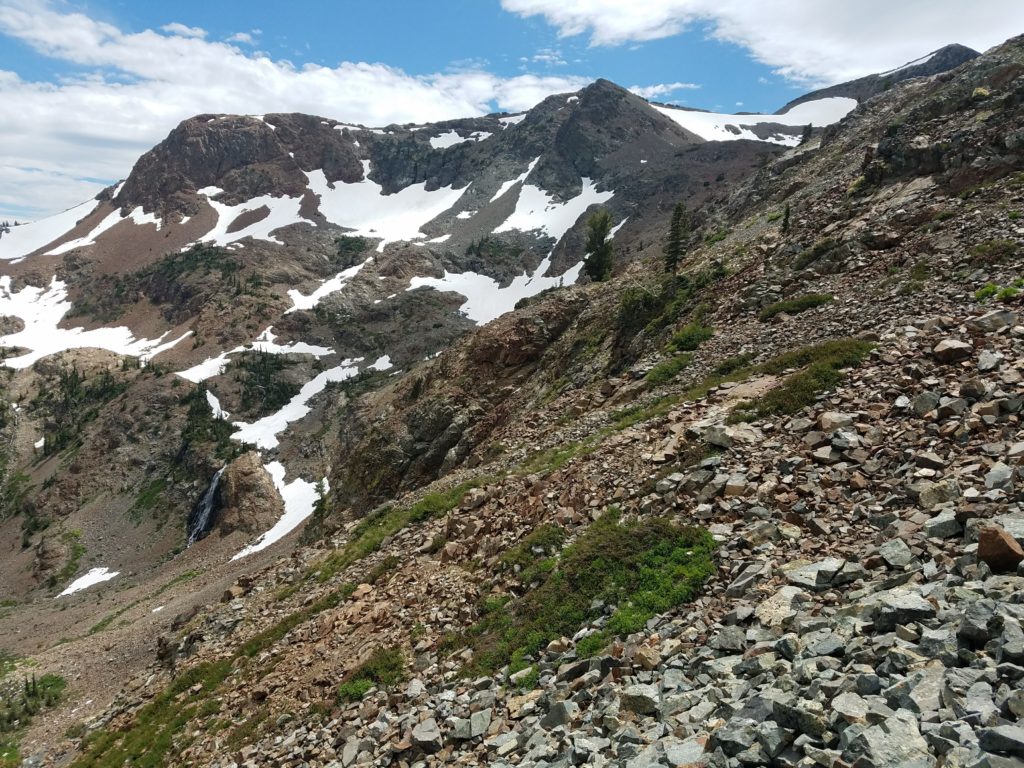
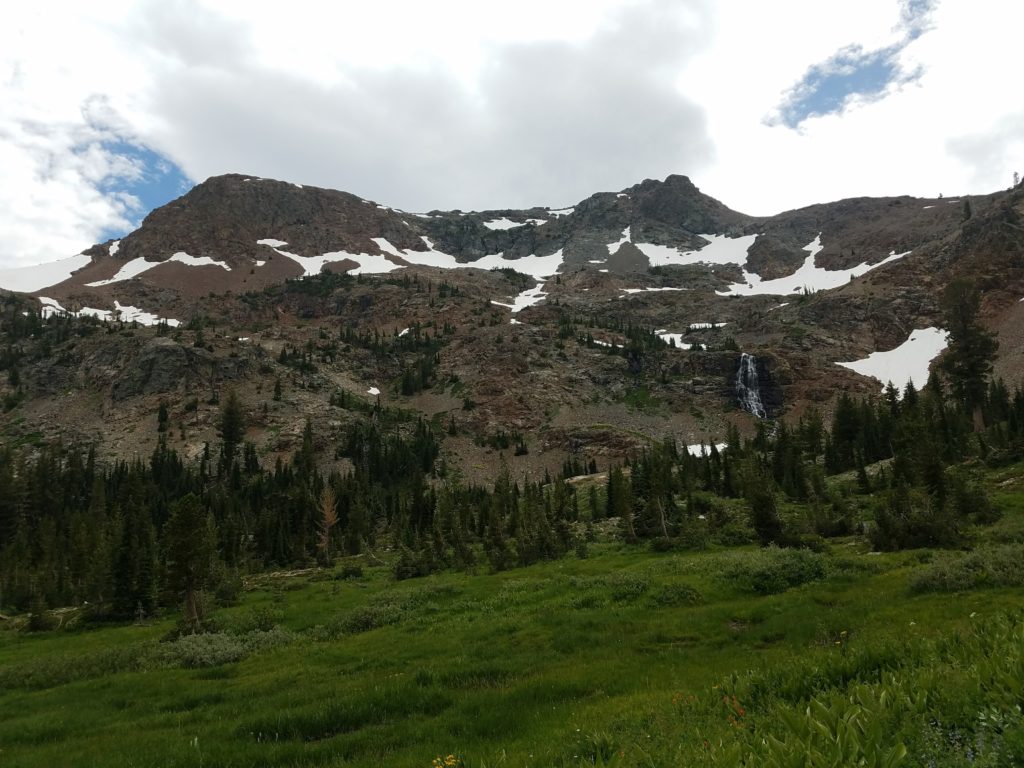
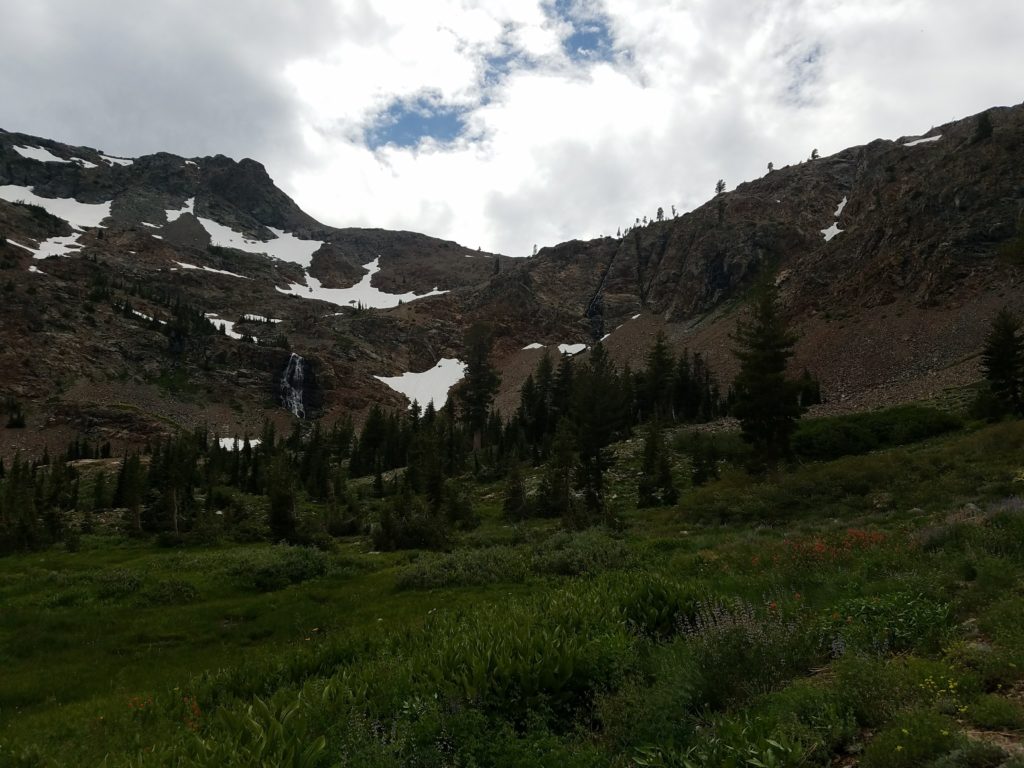
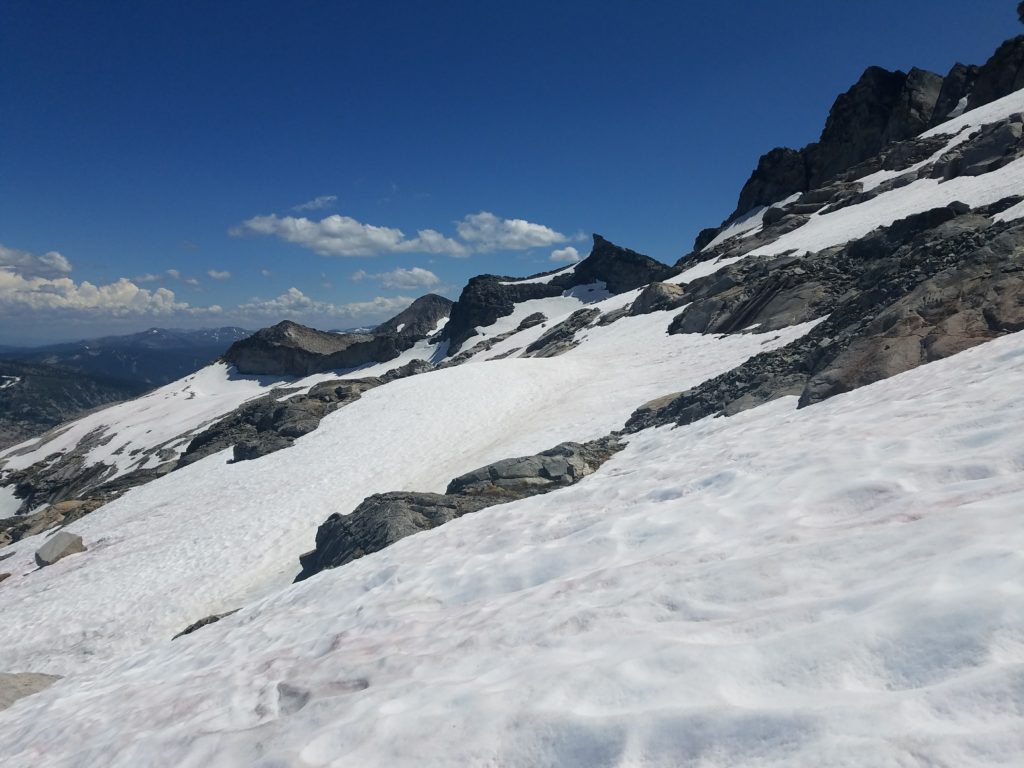
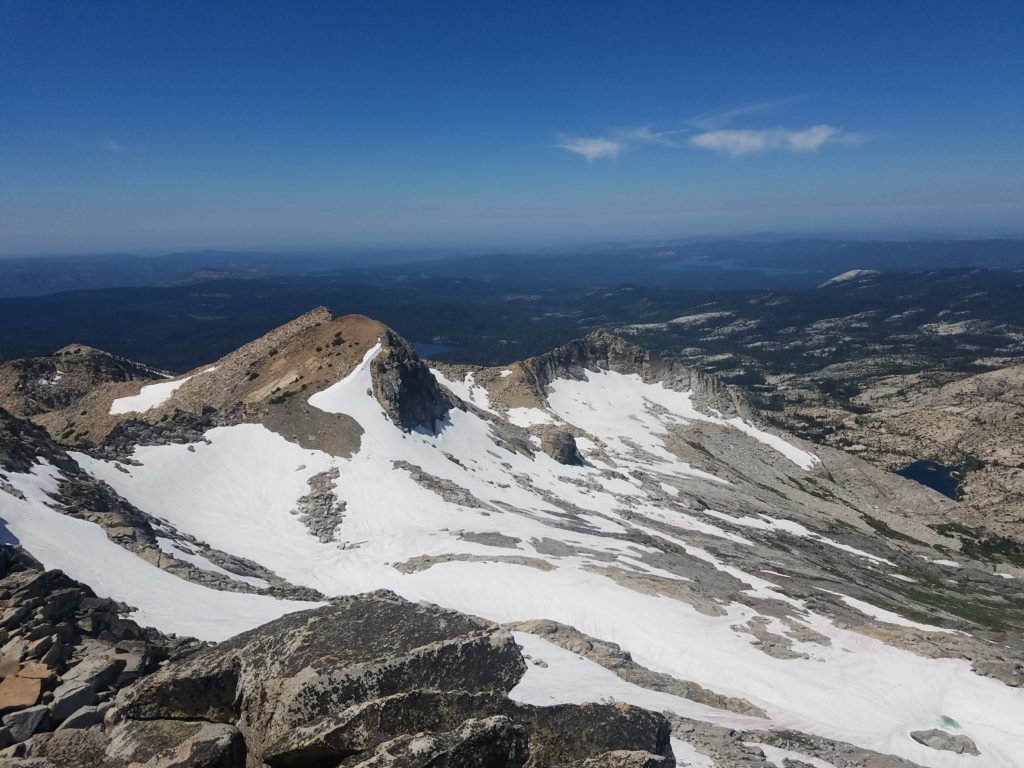
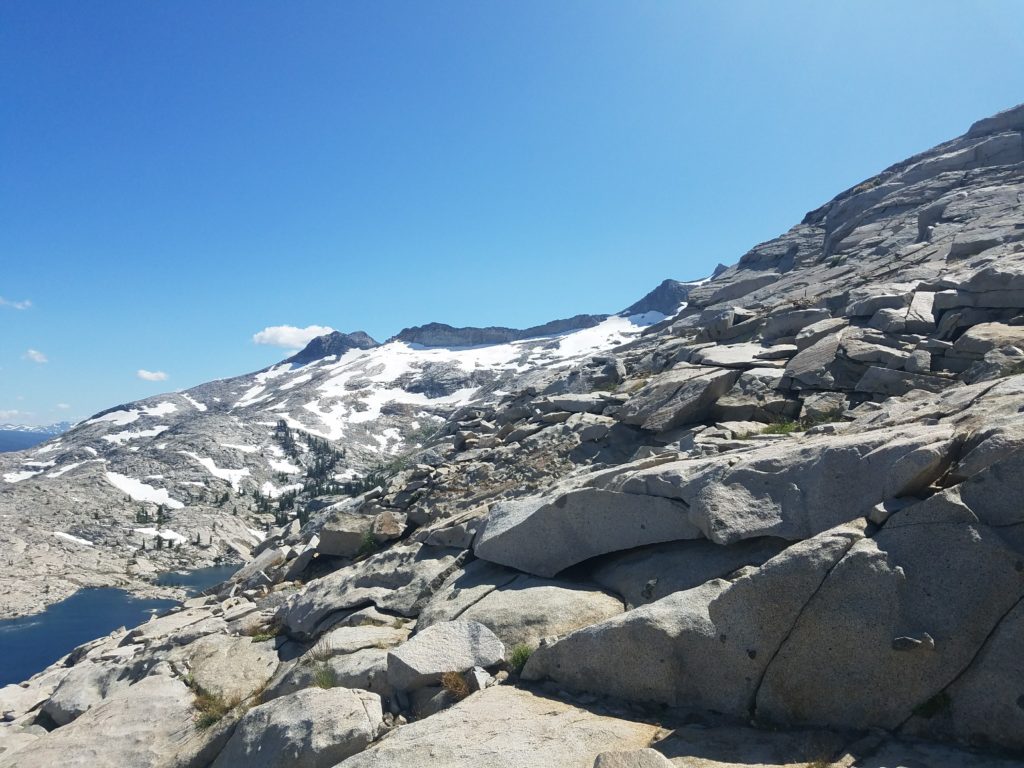
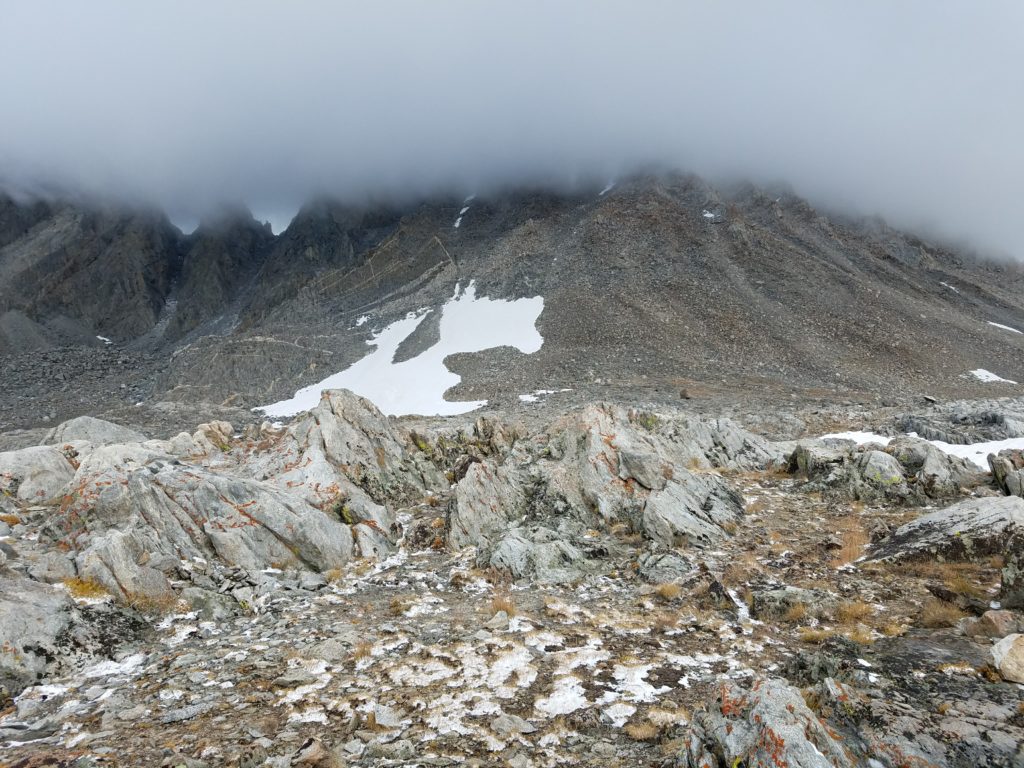
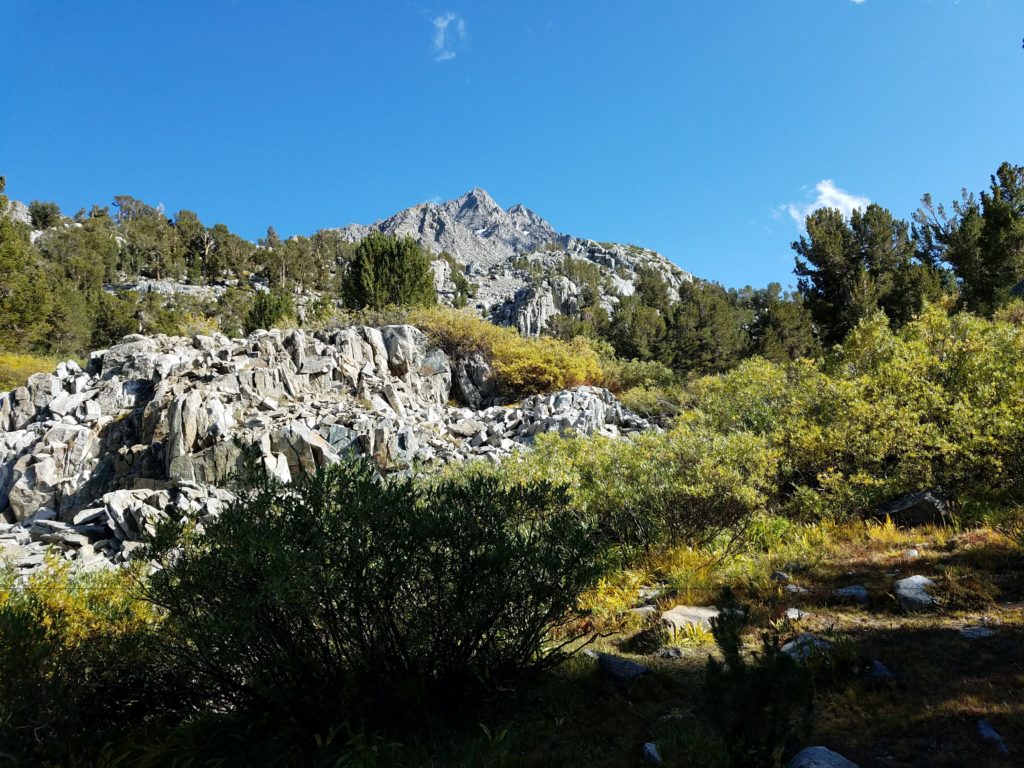
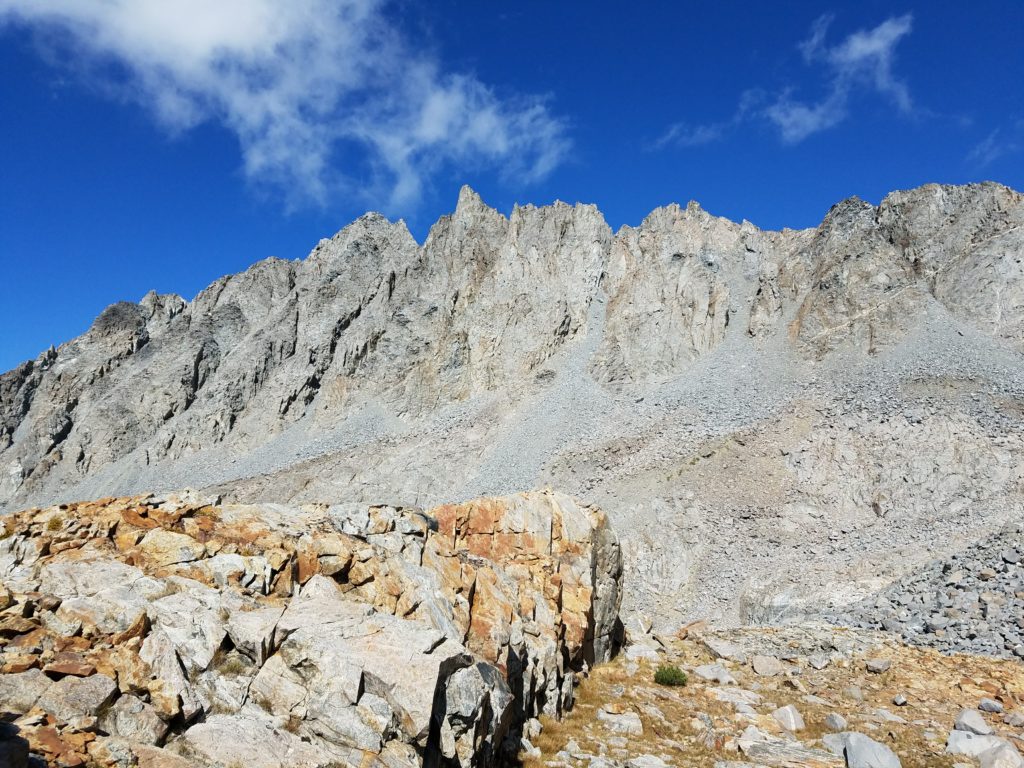
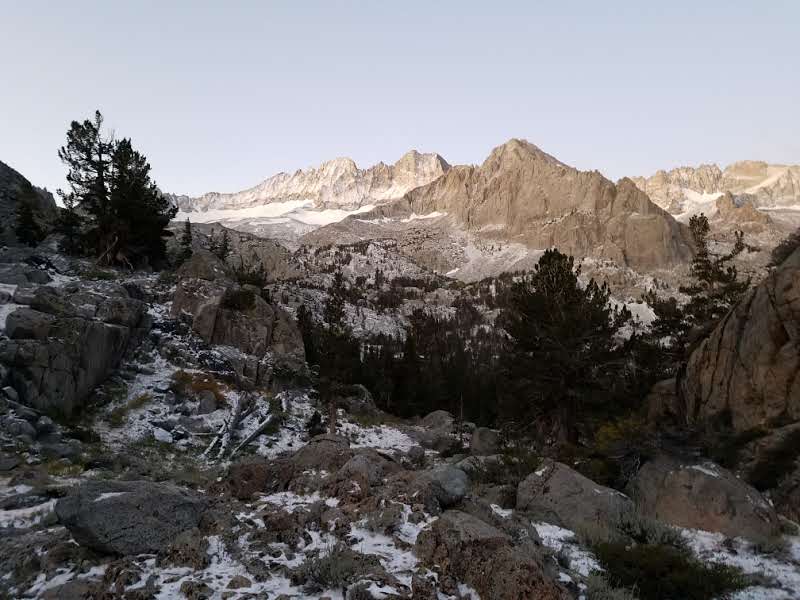
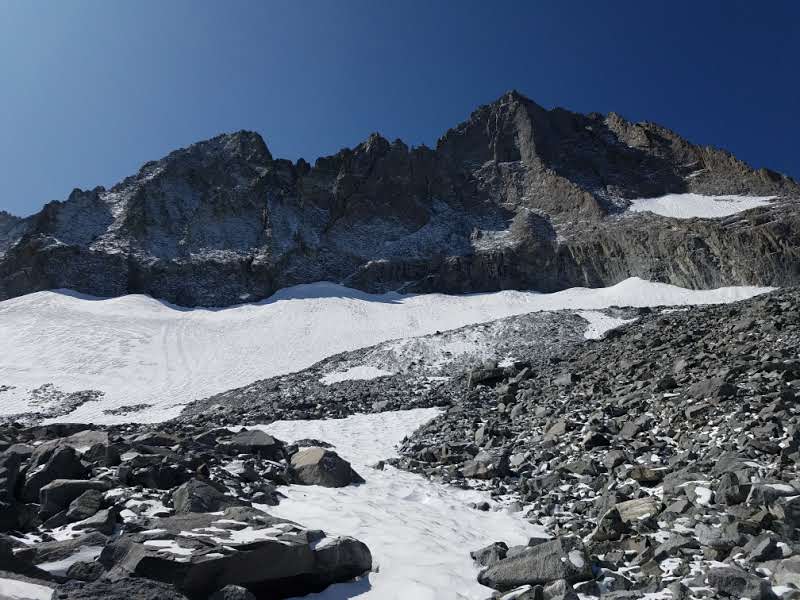
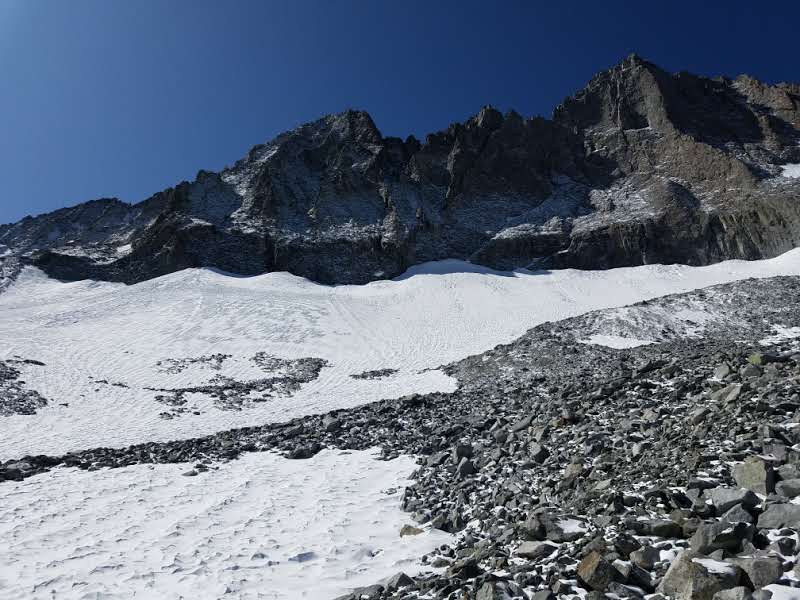
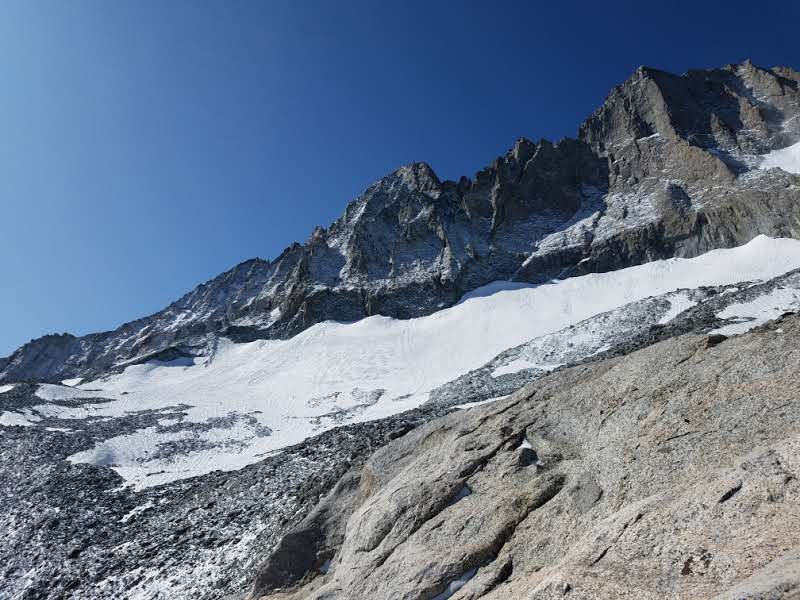
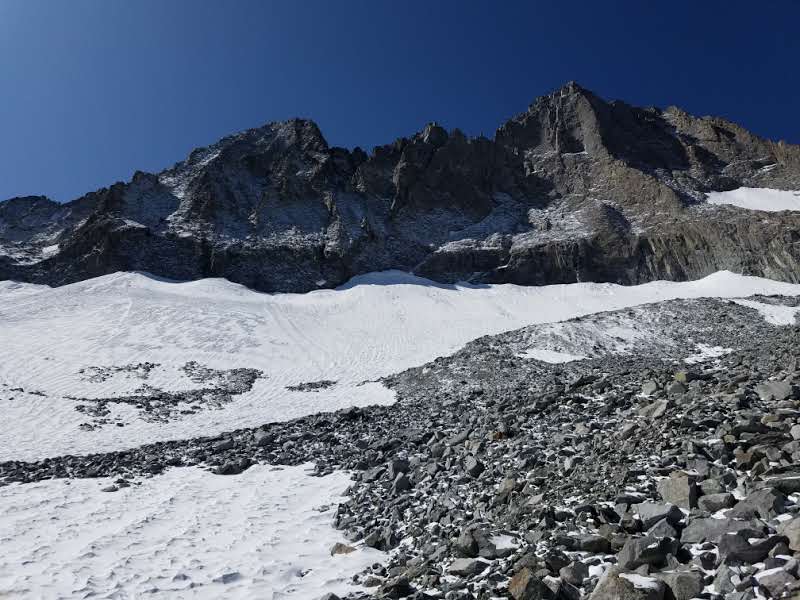
It’s about a mile to Mosquito Pass, all on rock exposed to sun’s heat. Cairns guide hikers over the smoothed granite. A waterfall appears in the distance with snow from the Crystal Range. Like in 2017, much, if not most, of the range still contained steep snow fields.
I had obviously noticed this when climbing Dick’s Peak, Jack’s Peak, and Mt. Tallac on previous days. Beta received from outdoor counselors at camp said no ice equipment would be necessary for climbing. Visual recon caused me to doubt that.
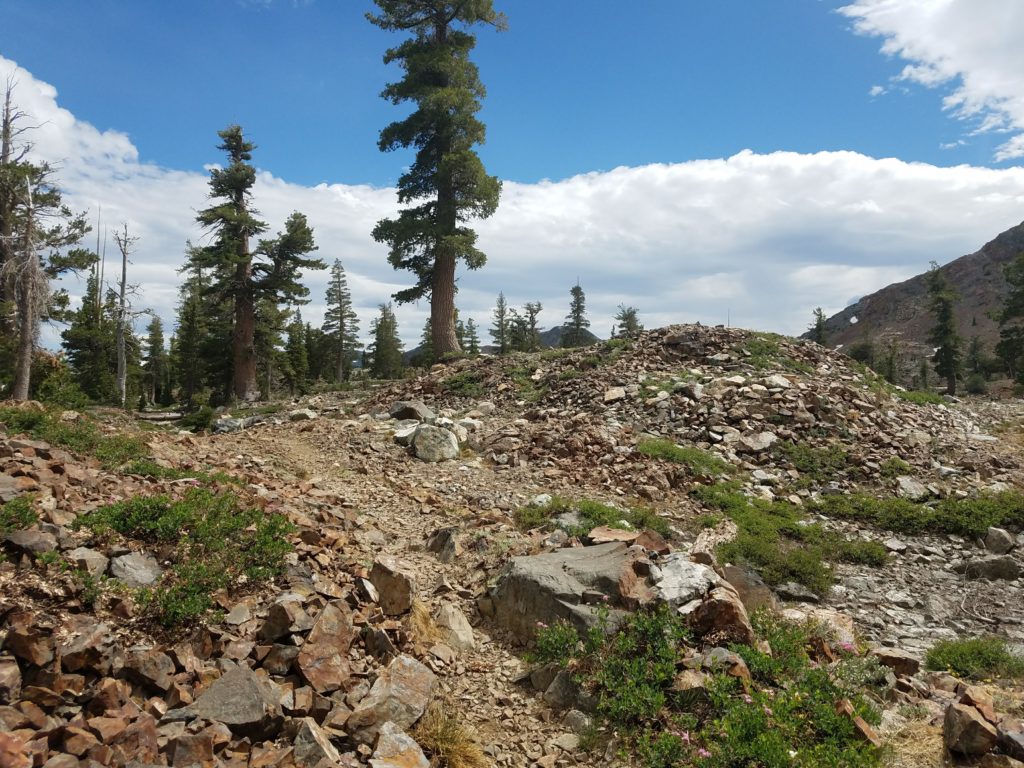
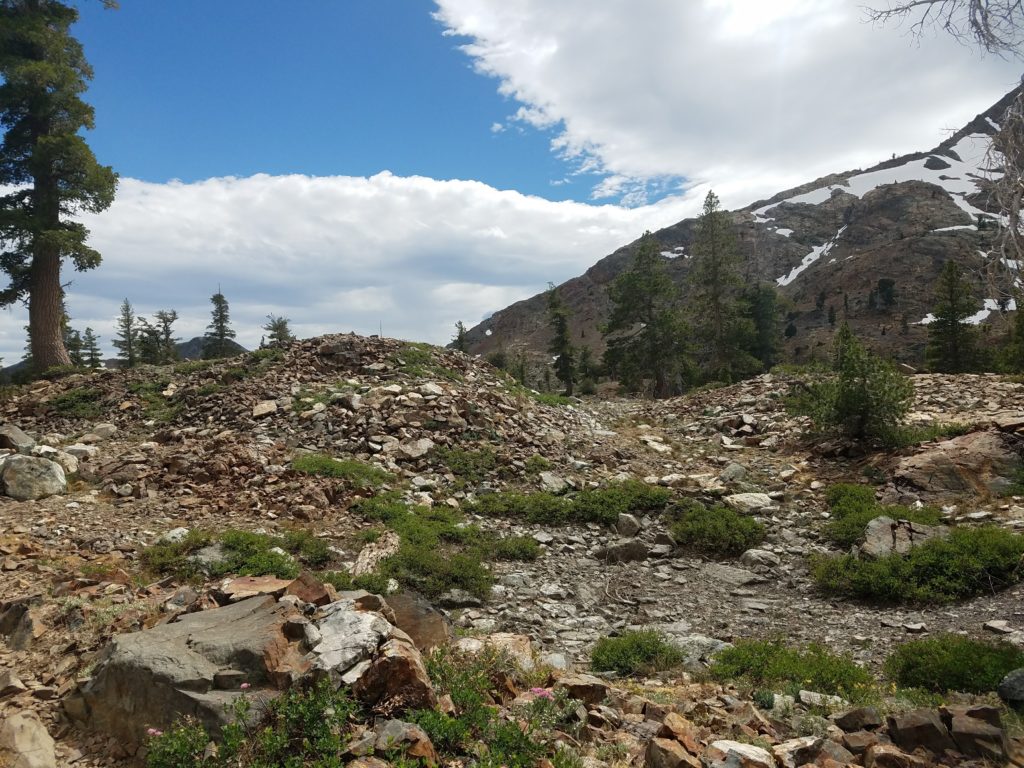
I reached Mosquito Pass 15 or 20 minutes later. There the trail gains elevation pretty quickly from Desolation Valley, jumping a fast 300 feet through an out-of-place forest. At the pass’s height – roughly in the middle, around the sign pointing to China Flats – veer left and begin the off-trail climb.
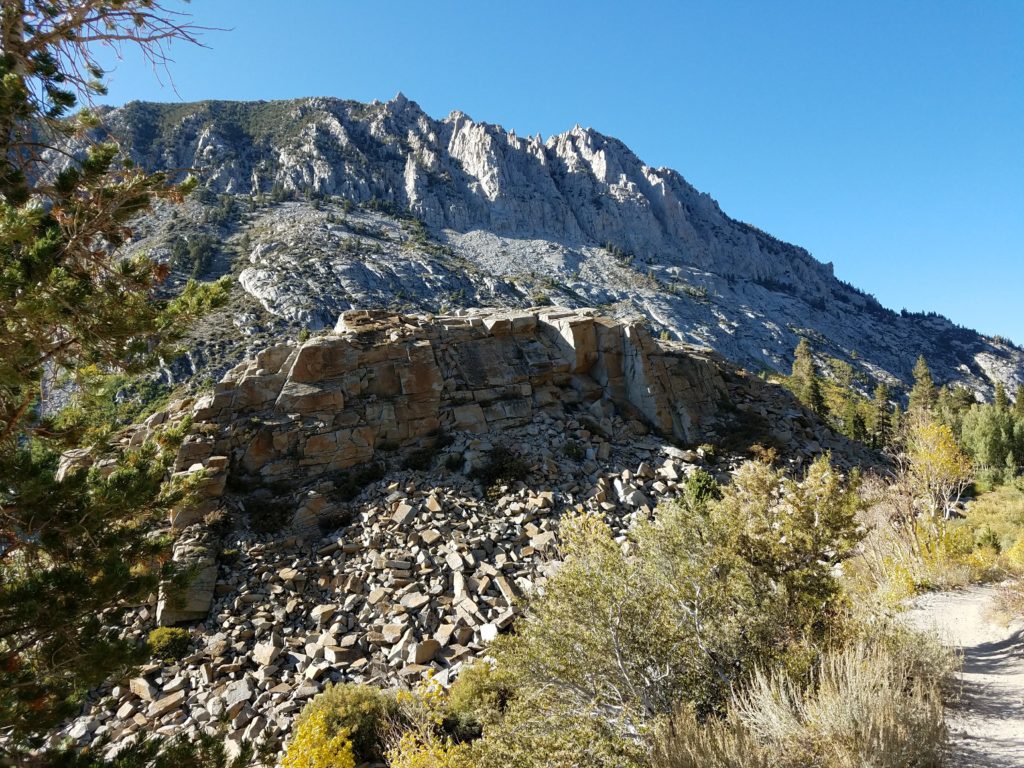
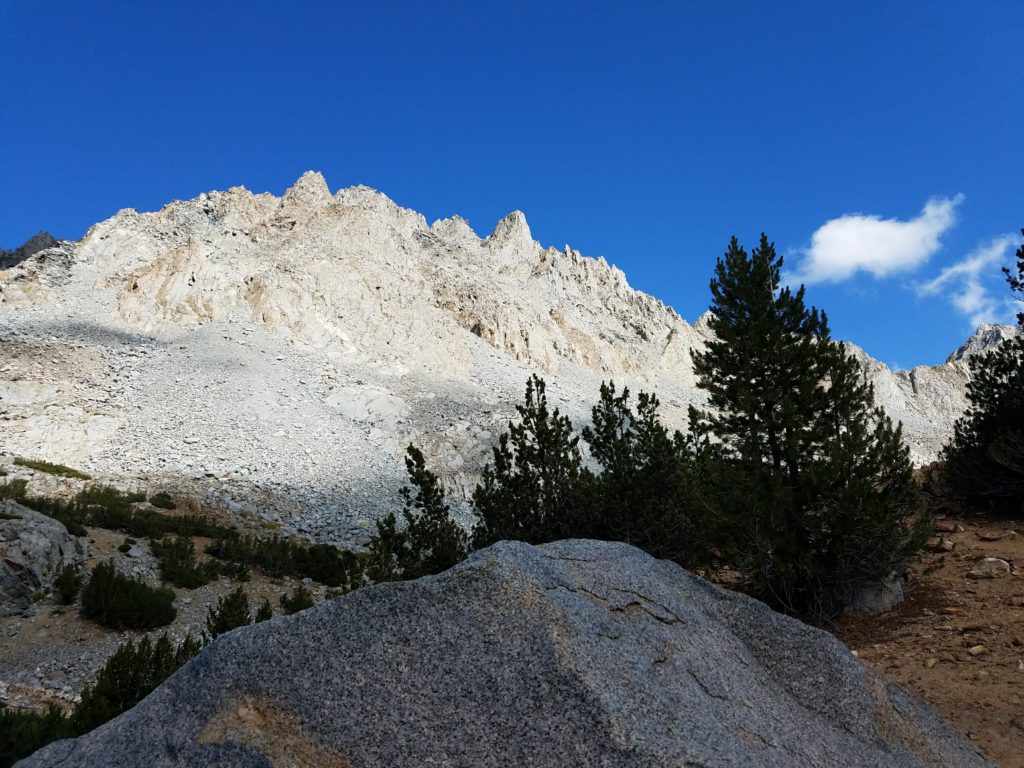
The Slabs of Insanity
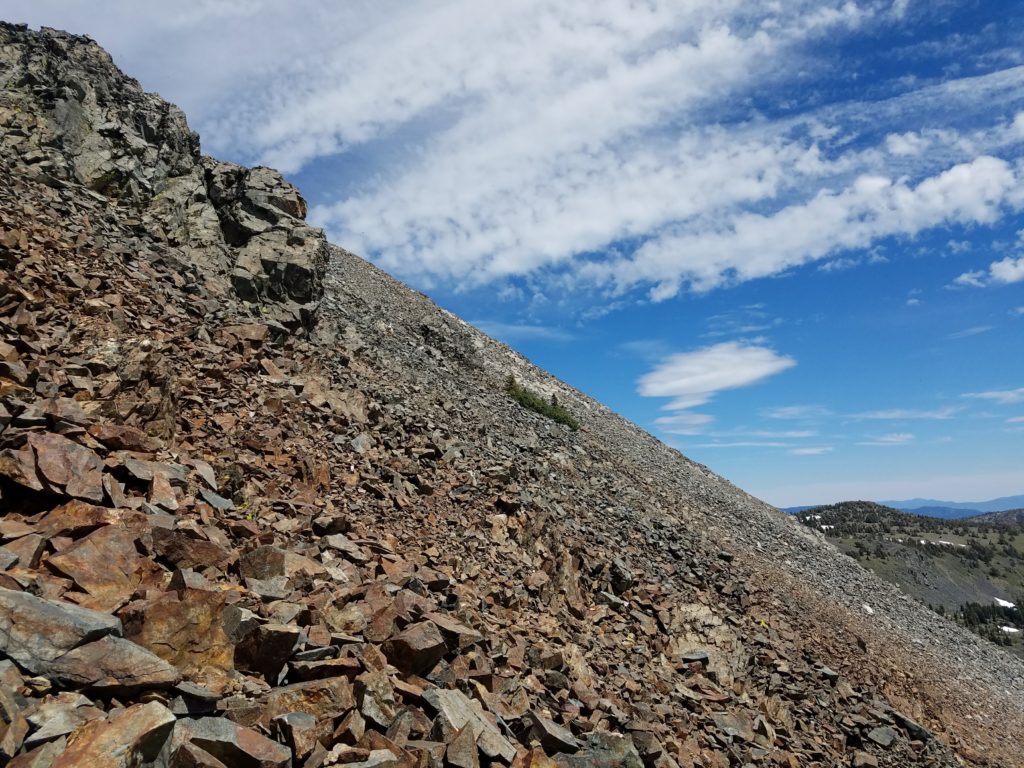
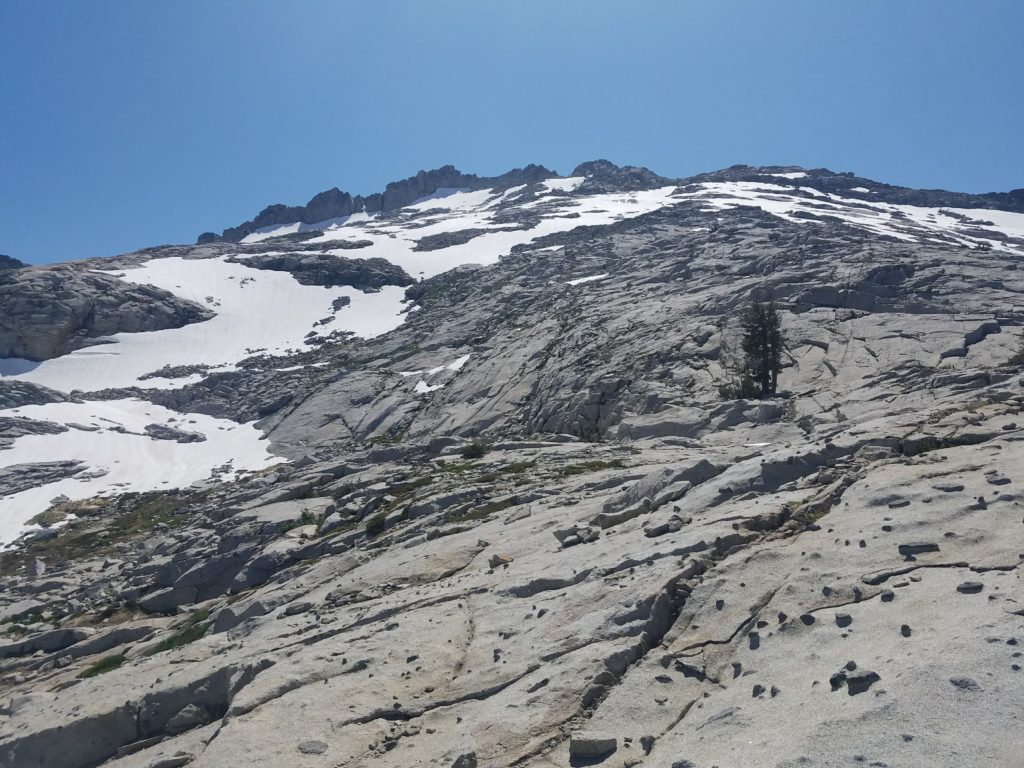
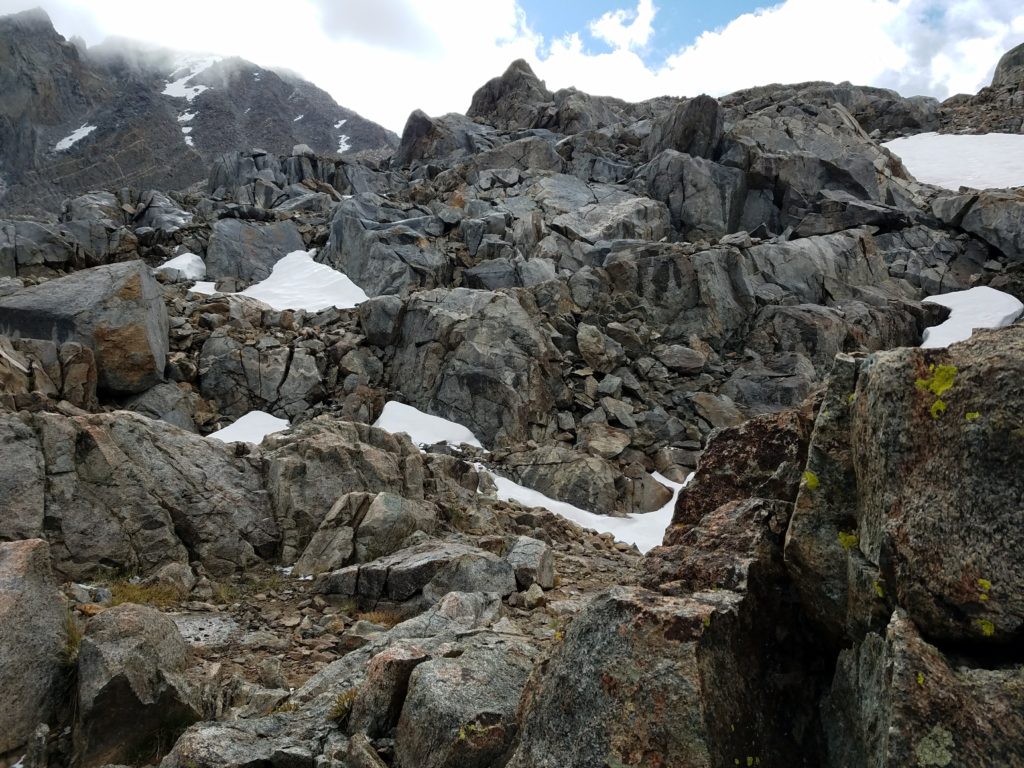
Boulders, boulders, and more boulders. The Slabs of Insanity stretch onto Mt. Price’s flank, itself a rock and boulder scramble up 1000 feet. A few potential paths emerge from the talus.
The rib presents the most obvious. Head straight up from Mosquito Pass and follow it as it works up the mountain, aiming for a notch in the ridge.
Unfortunately, the rib had many snowfields on it this August and I figured I would have an easier time maneuvering to my left and winding from almost directly below the summit and climbing at a rightward diagonal angle to the notch.
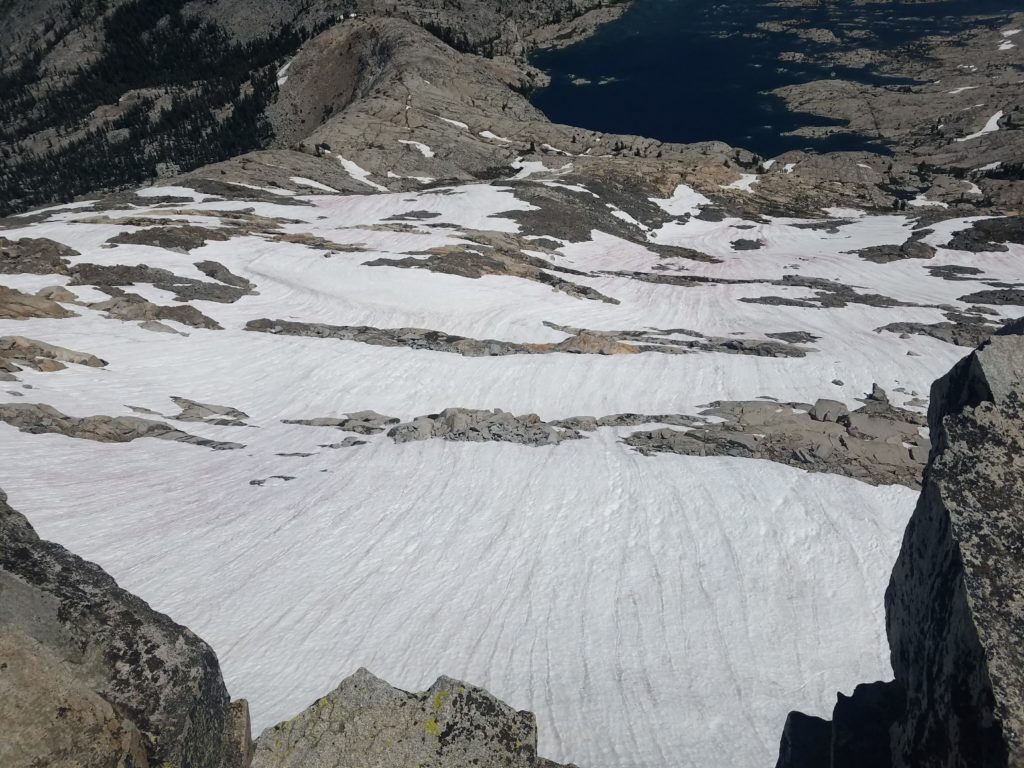
This didn’t work quite as expected. There didn’t emerge an obvious path and I worked my way up slopes steeper than needed, crossing some snow and circling around other. Snow conditions weren’t great – generally icy but with enough suncups to use for traction…and to lose balance.
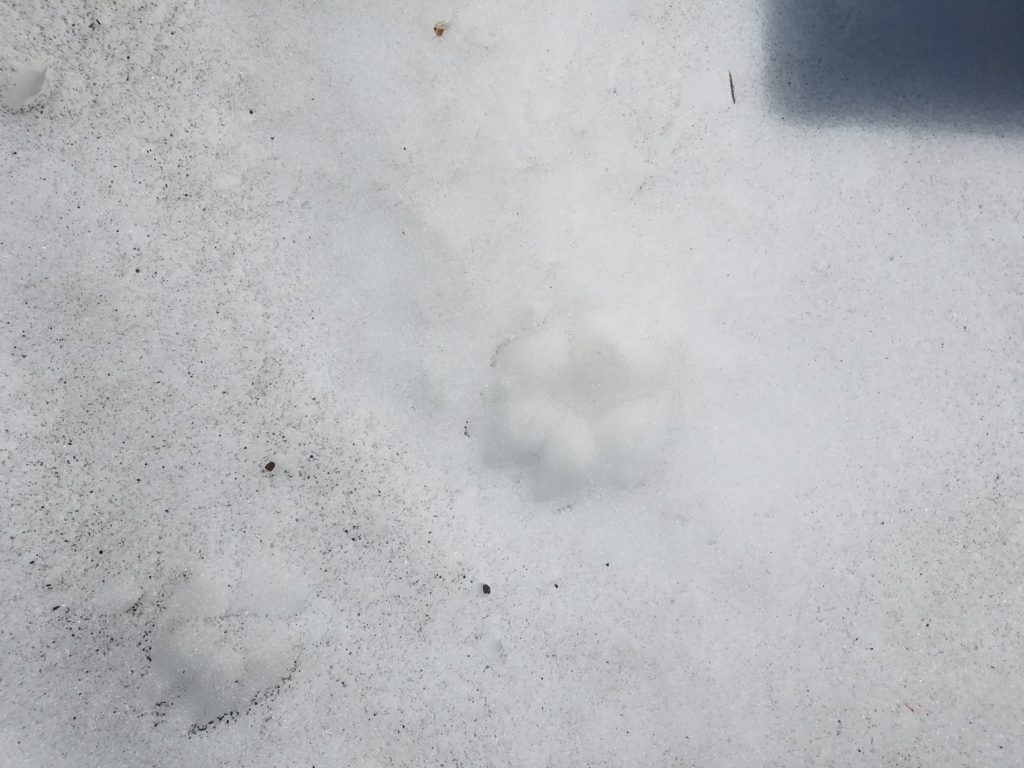
With a start, I came on the footprints below which gave me a quick start. At first I thought they belonged to a mountain lion and I anxiously looked around me for the sulking predator. But the paw prints were obviously too small to belong to a cougar and they had faint nail etchings, something not found with cats. (On the way down, I spotted the fox who left those prints. He quickly darted away from me and traipsed over the snow to some hidden abode.)
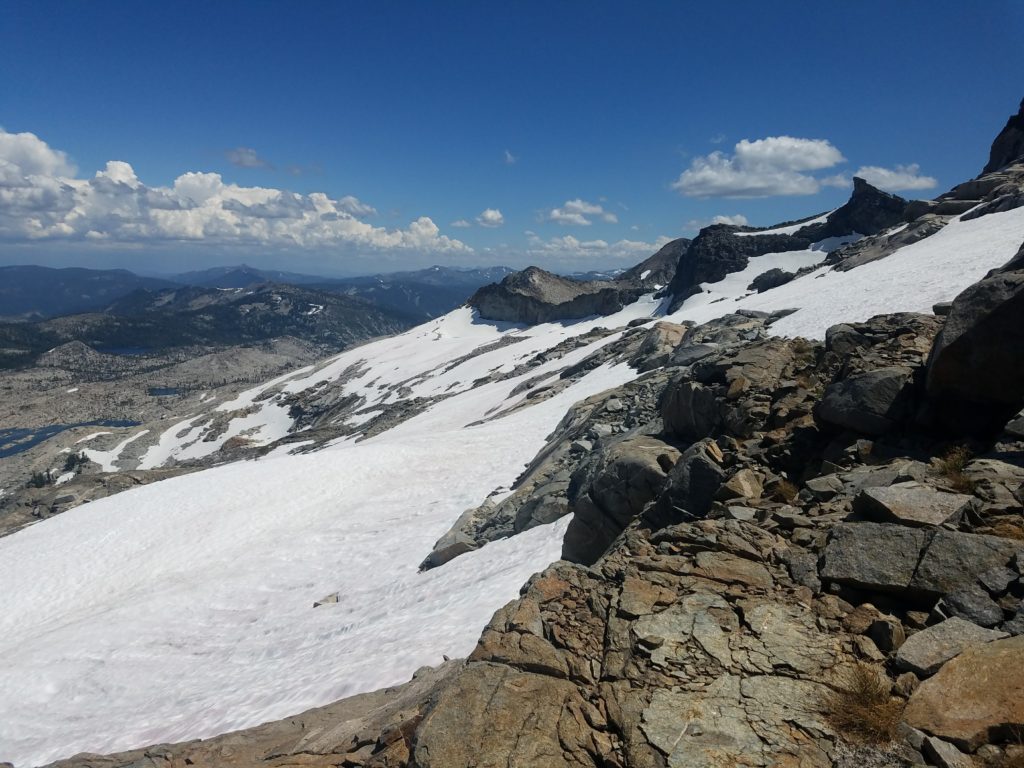
The going got tougher and slower on the upper slopes. Snowfields covered many of the approaches to the ridge. Without equipment, they were steep enough – and with a bad enough run-out – that I didn’t want to venture on them and risk a slip on a fast surface.
Instead I worked my way over the boulders and only crossed relatively flat portions of snow, or where I couldn’t avoid it. The final couple hundred feet – but a scree scramble the year before – had a lot of snow and an almost dicey final ascent to a notch that opened onto the ridge.
At that point, I had to decide if I would climb along the ridge, a solid Class 3, or down climb to what looked like flatter ground. Other trip reports recommend climbing over the ridge to the gentler west side and then downclimbing a bit en route to the summit blocks. I tried to emulate this.
But I hadn’t crossed the typical notch due to my southerly route up the Slabs of Insanity. I also didn’t climb low enough, instead traversing on ledges and across small chutes.
This climbing, I think, would constitute class 4. 20+ feet of exposure beneath ledges, hugging boulders as I worked horizontally with the occasional vertical move. Lack of consistent vertical movement makes me a little hesitant to call it Class 4; however, given that settled Class 3 moves up to the Mt. Agassiz summit (and moves to start climbing Jack’s Peak after the ridge traverse from Dick’s Peak) had much less exposure and presented almost no technical challenge, I feel comfortable in claiming it.
Quite obviously, edging along the narrow ridges and climbing on some Class 4 terrain slowed me and I quickly fell behind desired schedule. It took 15 minutes to go a few hundred feet as I looked for the easiest routes and executed on them.
Mt. Price Summit
After that slow maneuvering, I finally reached the hunk of rubble that leads to Mt. Price from the west. Where had that been all along! It made the last couple dozen of feet very easy and I soon topped out at the summit.
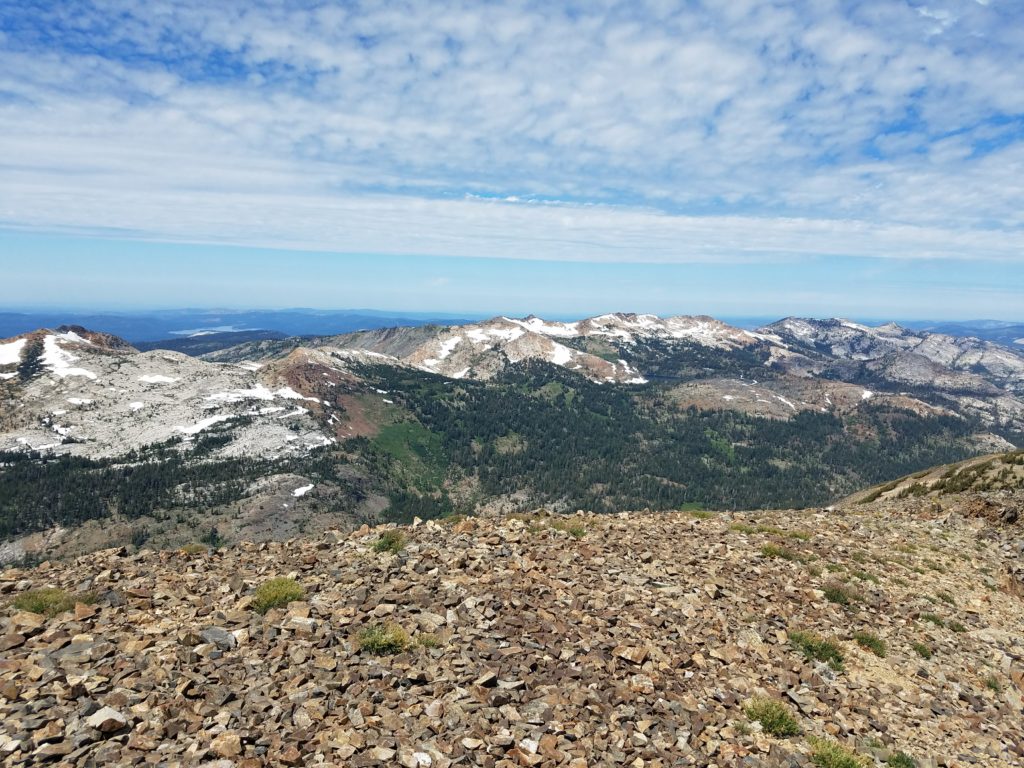
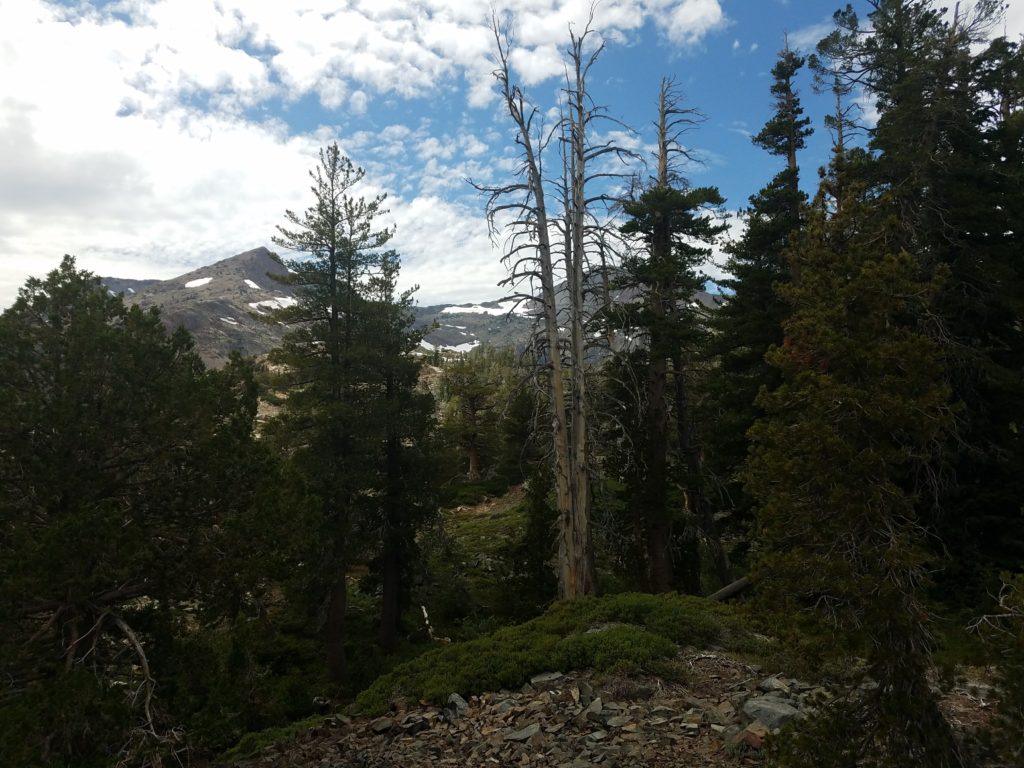
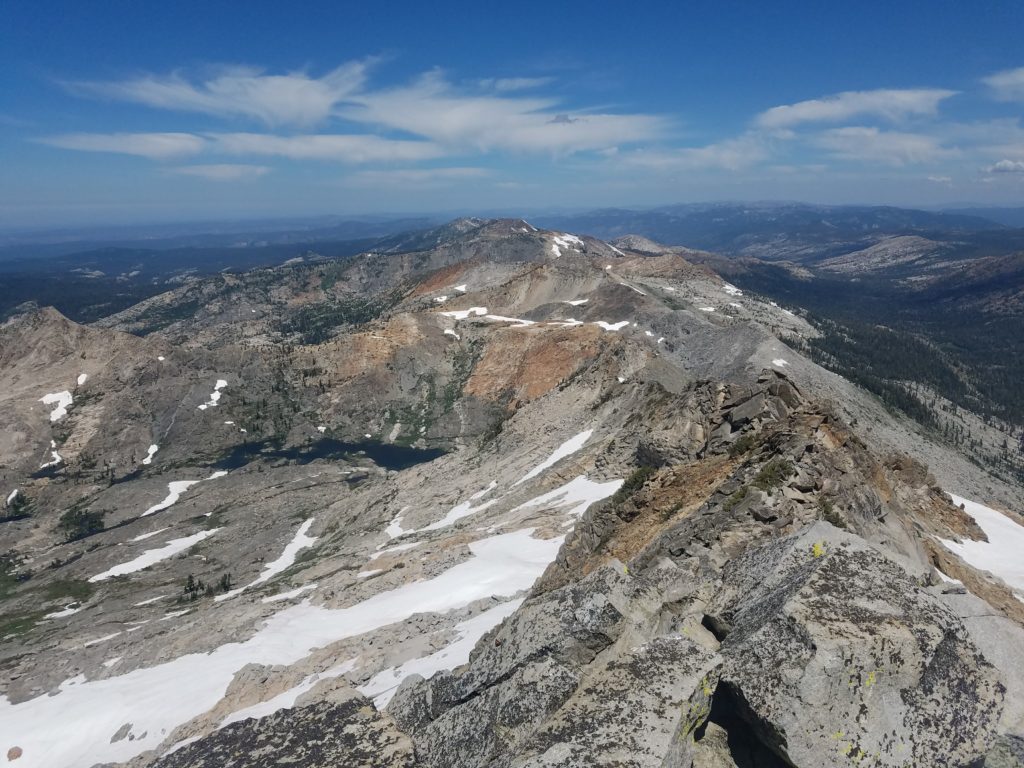
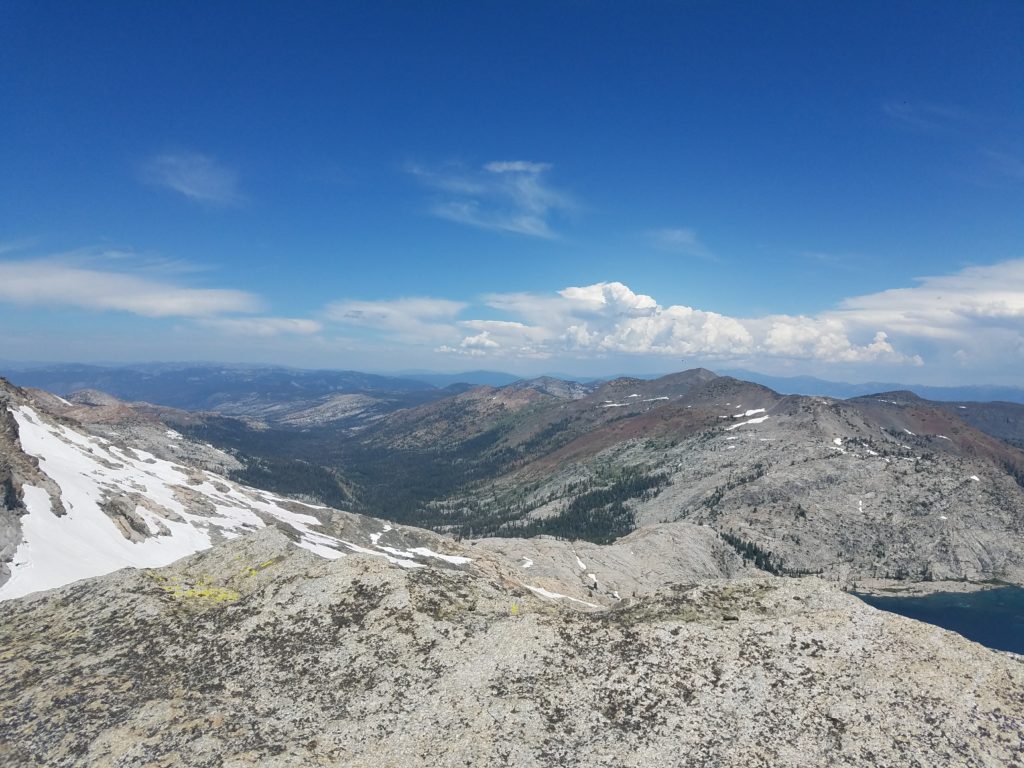
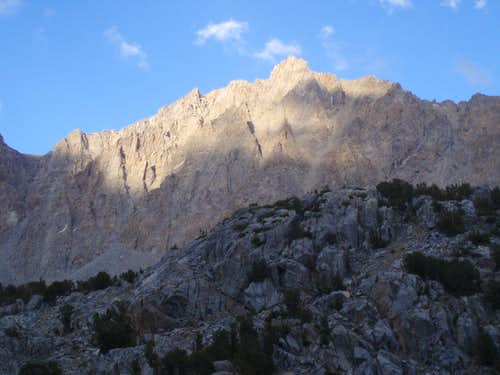
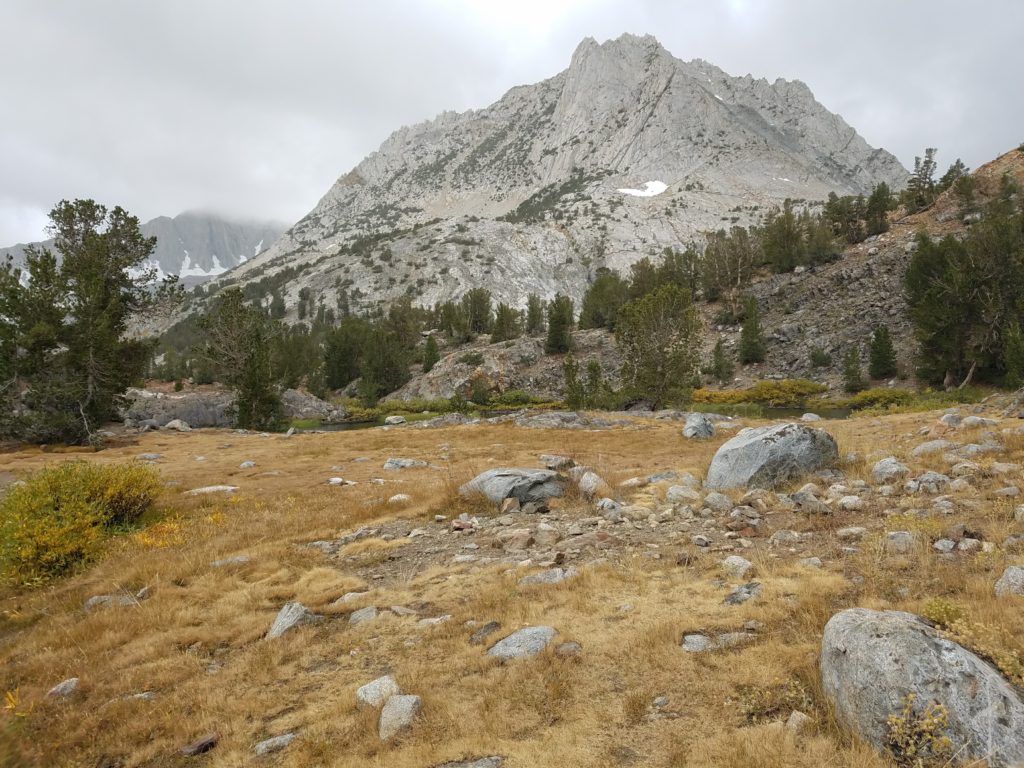
Mt. Price’s summit offers incredible views of Desolation Valley, across to Rockbound Valley, other Crystal Range peaks, and, to the west, rolling peaks down to Central Valley. The Cracked Crag, Mt. Agassiz, Pyramid Peak, Jack and Dick’s Peak, and Mt. Tallac all loom large. Lake Aloha’s various shades of azure water entice 1,600 feet below.
Mt. Agassiz Summit
From Mt. Price, the traverse to Mt. Agassiz takes less than 15 minutes on an easy path. Climbing a bit below the ridge line to the chaparral exposes a use trail with no technical difficulty.
Mt. Agassiz technically doesn’t have enough clean prominence to be considered a peak. It’s Mt. Price’s southern summit, but few hikers in Desolation Wilderness bother with the distinction. There’s even a summit register.
The summit block requires what others consider a Class 3 move to gain the final boulders. I didn’t find it Class 3 – or hard – for want of exposure. Regardless, it takes little effort and in short order you’re on a durable boulder that looms over Crystal Range with a few hundred feet exposure on each side.
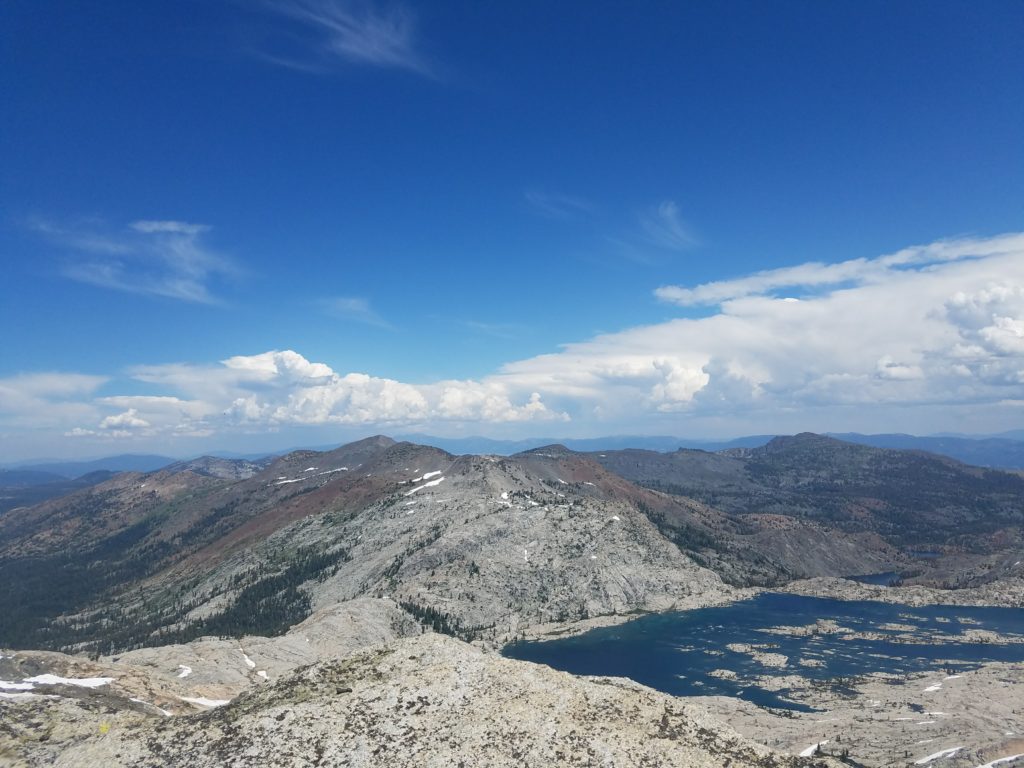
As luck would have it, a marmot had freshly deposited its excrements right on the edge of the summit rock, so I didn’t take the usual overhang picture. Still, a lovely view unfolded. Mt. Price stood regal to the left and Pyramid Peak ever so enticing to the right. The summit register is just off the blocks to the peak’s north.
The traverse to Pyramid Peak presents some technical challenges. The ridge ovulates and, unlike earlier, dropping to the west doesn’t solve all problems. There are a few areas where you have to climb across to the eastern part of the ridge, typically the steepest. On final ascent to Pyramid Peak, climbers overcome a few Class 3-4 moves that may require spotting, but no ropes. It’s taken others 45-60 minutes on way.
I poked around a little bit on the far side of Mt. Agassiz to see whether I had a chance of a faster traverse but couldn’t find an obvious downclimb to the ridge. At that point I backed to the southwestern flank of Mt. Agassiz and enjoyed my lunch out of the wind.
Downclimbing from Mt. Price
It took no time to make it back to Mt. Price. From there, I planned to remedy my mistake from early and climb lower. I started doing so but ran into similar Class 3+ moves. After a bit, I tired of the slow moving and ascended up to the ridge line, figuring it wouldn’t be worse and would better help me scout a relatively snow-free route down from the ridge.
I found one area and started climbing down. However, after a couple dozen feet, I came to an impasse. Continuing north would require edging on a very thin ledge with no obvious holds. South would have been rock climbing over. Down a seven or so foot drop onto a couple square foot area that then dropped to other slopes and snow.
At that point I felt committed to this route down, partly because I couldn’t see a better route further north. Steep snow met the sharp ridge drop. My route had little snow on the first part of the downclimb.
So I dropped my pack and watched it roll off the area, crept forward and started lowering myself before feeling my hands slipping and then jumped, hoping I wouldn’t fall.

Snow shaped my path. I couldn’t avoid it 100%, but didn’t come across anything too steep. At one point, I dropped myself to a none-too-steep snowbank but in a small berg – the snow field was about 3 feet above the boulders but 4 or 5 feet from the next ledge. Again I let my backpack slide and then jumped onto the bank and glissaded into standing.
Winding around the snow meant descending through the Slabs of Insanity took longer than the previous year. I worked with a lot of caution on snowbanks because, though not overly steep, they were slick and had terrible run-outs. I probably played it too safe here but would have felt much more comfortable with microspikes or an ice axe.
By 8,500 feet or so the snow had largely disappeared, and I worked over the boulders. I reached Mosquito Pass at 3:30 and figured I would reach the trailhead by 6. My knee had started hurting, the same pain from an injury on Mt. Shasta in May, and I figured that would slow me down some.
Returning to Fallen Leaf Lake
The hike continued with relative ease – and a decent amount of boredom. Too much hiking on Glen Alpine for it to excite me.
As I reached the last couple miles, I started hearing voices behind. Not used to hikers passing me, I picked up my pace. 1.5 miles from the trailhead one person caught up as I sat eating carrots, so I quickly packed and pushed ahead to keep my lead.
In the last half-mile the group caught me despite my best efforts. Thankfully, they were running – I felt no shame in getting passed by those running at least part of the trail. (It was a long hike and avoiding those coming gave me some task and way to divert myself from the miles and soreness.)
I reached Lily Lake at 6 and returned to camp by 6:10, finishing 18 or 19 miles and 3,600 feet of climbing in 10 hours, 9 of which I spent moving.
What I Learned on the Crystal Range
- Better route scoping
- Carrying an axe doesn’t hurt
- Hydration matters a lot when climbing as the lethargy that can come from dehydration makes everything slower
Aside from those lessons, this was a good opportunity to gain confidence and time on Class 3+ terrain. I will definitely be faster on it going forward and approach with less weariness.
Time Splits
Trailhead: 8:30a
Susie Lake: 9:30
Heather Lake: 10:00
Lake Aloha: 10:30
Slabs of Insanity: 11:05
Mt. Price notch: 11:50
Mt. Price summit: 12:15
Mt. Agassiz summit: 12:45 (I spent 15 minutes or so on Mt. Price)
Turned around: 1:30
Mt. Price ridge: 2:00
Slabs of Insanity: 2:45
Mosquito Pass: 3:15
Fallen Leaf Lake: 6:05
Equipment
More Pictures


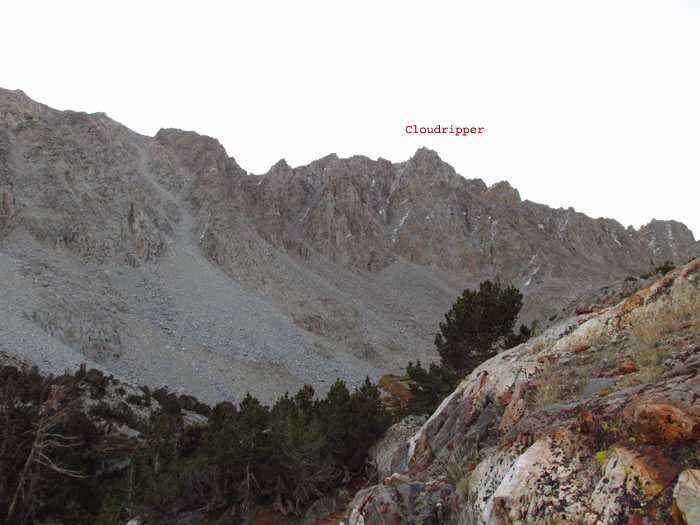
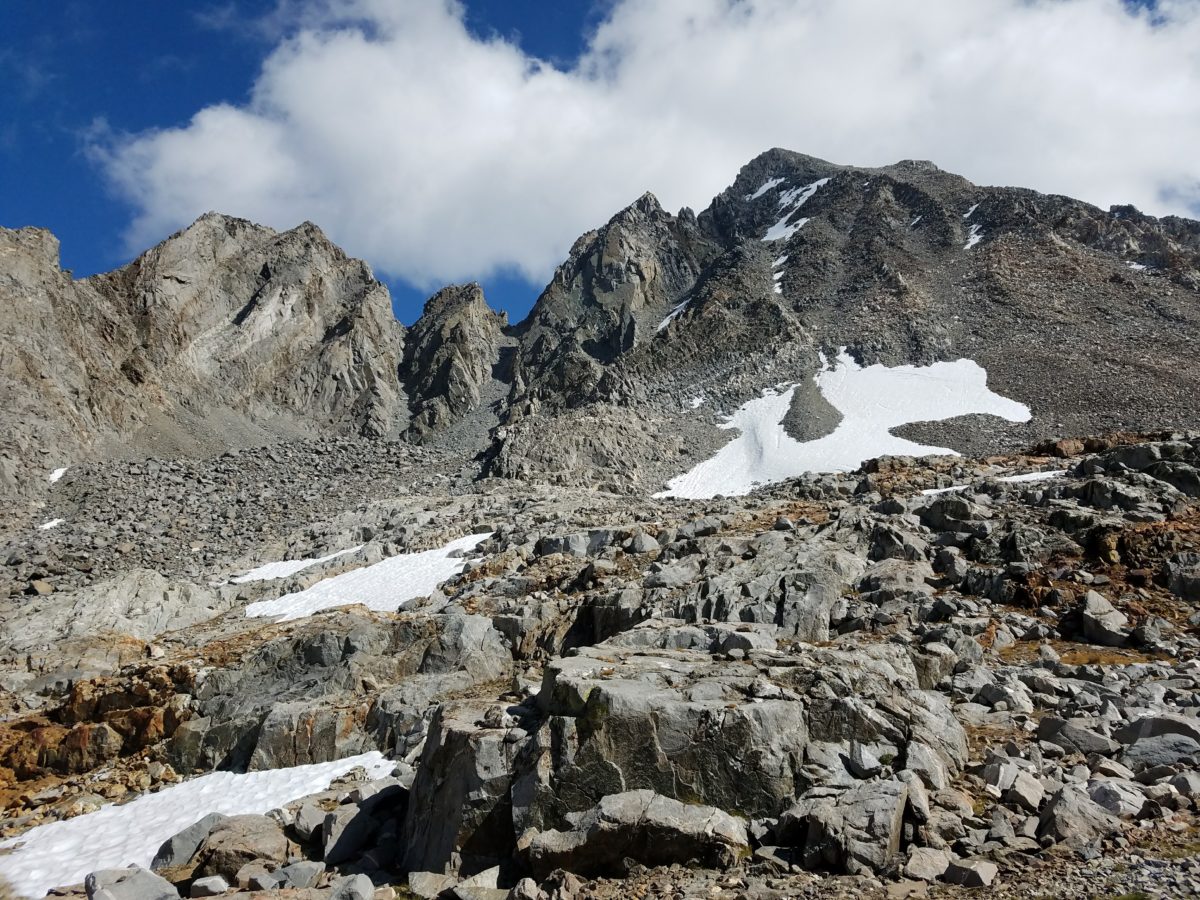
Cloudripper Information Page
Cloudripper Mountain Information
The highest point on the Inconsolable Range, Cloudripper, the 58th tallest mountain in the state, can easily be hiked in a day. Such day hikes do not require a permit, but permits are required for overnights.
Cloudripper can be paired with other Inconsolable peaks and offers stunning views of the Palisades and down to Dusty Basin.
| Mountain | Cloudripper |
|---|---|
| Elevation | 13,531 feet |
| Range | Inconsolable Range |
| Location | Southeastern Sierra |
| Wilderness | John Muir Wilderness |
| Forest | Inyo National Forest |
| Clean Prominence | 845 feet |
| Isolation | 2.08 miles |
| Key Col | Jigsaw Pass |
| Nearest Higher Neighbor | Mt. Agassiz |
How to Climb Cloudripper
| Route | Trail | Class | Total Mileage | Elevation Gain |
|---|---|---|---|---|
| North Slope from Green Lake | South Lake | 2 | 10.0 | 4800 |
| East Ridge via Seventh Lake | Glacier Lodge/Big Pine Creek North Fork | 2 | 17.4 | 6200 |
| East Ridge via Baker Lakes | Baker Lake | 2 | 7.0 | 3200 |
| West Chute via Chocolate Lakes | South Lake | 3 | 7.0 | 3600 |
Nearby Peaks
- Vagabond Peak
- Two Eagle Peak
- Chocolate Peak
- Gendarme Peak
- Picture Puzzle
- Sky Haven
- Mount Robins
- Hurd Peak
- Aperture Peak
- Mt. Agassiz
- Mt. Winchell
- Mt. Goode
- Mt. No Goode
Other information available on PeakBagger and SummitPost.
Maps
500 Feet Short on Mt. Agassiz
Date I attempted Mt. Agassiz: September 28, 2019
Result: Failed to reach peak
Work had brought me out to California and I used the excuse to make one more 2019 trip to the Sierra with hopes of hiking Mt. Agassiz and Middle Palisade.
The plan: Drive to Los Angeles from San Francisco on Thursday, head to Bishop after a quick detour at the Whitney Portal on Friday, hike Mt. Agassiz on Saturday, and then climb Middle Palisade on Sunday before returning to LAX for a red-eye back to Chicago.
Weather
Unseasonable weather kept me from both summits. Though the week had been hot, shifting winds brought a deep chill and snow. Mountain forecasts showed single-digits on Mt. Agassiz’s summit and wind chill more than ten below zero, driven by 35-45 mph gusts.
Snow came, too, in small hail-like pellets. Fortunately during the hike it never shrouded visibility, but it would coat the Palisades with a few inches overnight.
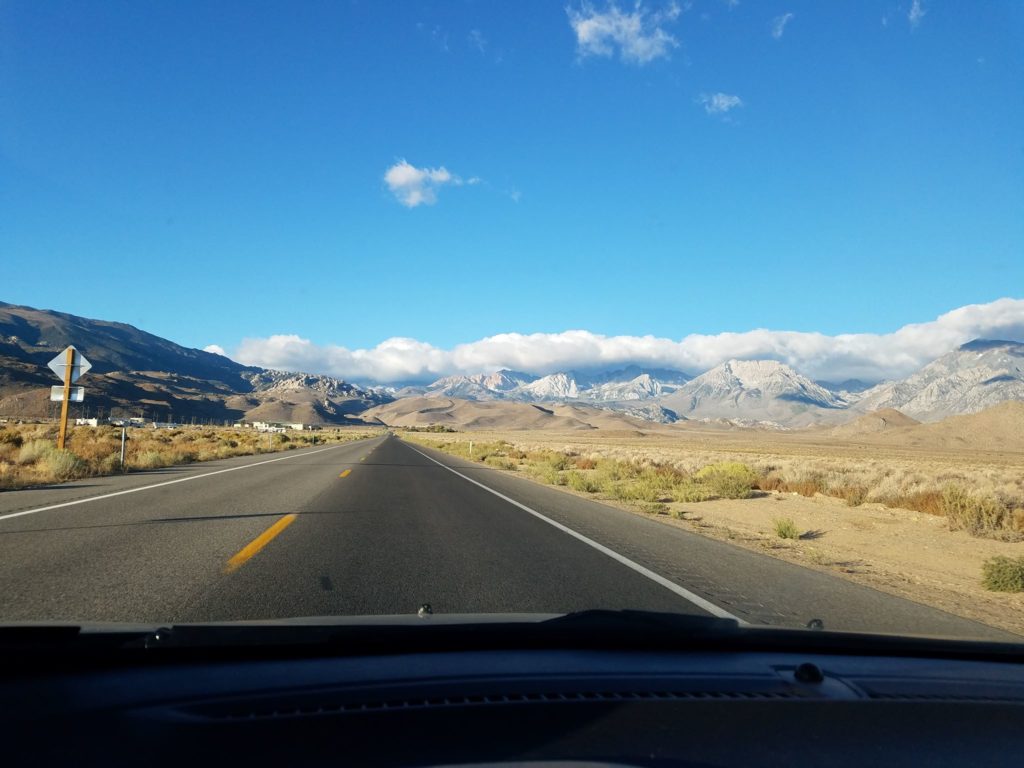
Bishop Pass Trailhead
I reached the Bishop Pass Trailhead at South Lake after a beautiful drive through winding birch forests lit yellow with the season’s turn. A chilly 40 at 8:20a with strong winds and abundant clouds, I quickly prepared and hit the trail.
A group of hikers from MeetUp stood at the trailhead preparing to tackle a peak in the Inconsolable Range. I can’t remember which, though I think it was Chocolate Peak.
The aforementioned snow started just steps into the hike and would flair every 15 or 20 minutes before temporarily blowing through. Despite it, I kept my heavy jacket and pants tied around my waist and scurried through forest and into the John Muir Wilderness.
My first trip to the Eastern Sierra and the Inyo National Forest, the scenery’s transformation from arid valley and dry leeward slopes to lush forest amazed me. Nature is incredible.
Long Lake
Before long, I reached the second lake: Long Lake, nestled between Hurd Peak and Chocolate Peak. True to its name, the lake stretched for a while along the trail, grey in the filtered light. Weather conditions hadn’t improved, but hadn’t worsened. With no snow on the forecast, I hoped the clouds would blow through by mid or late morning.
At this point, I realized I made a rather crucial mistake: I left my food in the AirBnB. I had enough granola bars stashed that I would been fine – or close to fine – on the calorie front, but I sure felt like an idiot after preparing a meal and snack the night before!
Saddlerock Lake and Bishop Lake
Altitude starting hitting me as I reached Saddlerock Lake at 11,000 feet. Nothing bad yet, just a pace slower than desired and the typical need for accelerated breathing.
I continued making decent time to Bishop Lake, where I paused briefly to eat a granola bar. Bishop Pass looked close.
At this point, I still hadn’t actually seen Mt. Agassiz. Clouds shrouded the mountain, as well as the Inconsolable Peaks, including Cloudripper, Picture Puzzle, Gendarme, and Aperture. Ditto the Evolution Crest peaks – Mt. Goode and Mt. No Goode – and the eastern basin of the Kings Canyon National Park.

Obviously disappointed by the lack of views (not to mention the frigid weather), I continued, putting on gloves for the first time as my hands chilled from holding hiking poles.
The coming switchbacks slowed me down incredibly and worsened my budding altitude sickness. They took 30-45 minutes when I initially figured I could reach Bishop Pass in 15.
Bishop Pass
On topping out at 11,800 feet, I felt a strange lethargy descend over me. I wanted nothing more than to take a long nap. Finding a large rock, I nestled myself out of the wind, munched another granola bar, and closed my eyes to rest.
After a dozen minutes I stood up wearily and, still longing to sleep, went back to the trail and scouted a route to Mt. Agassiz.
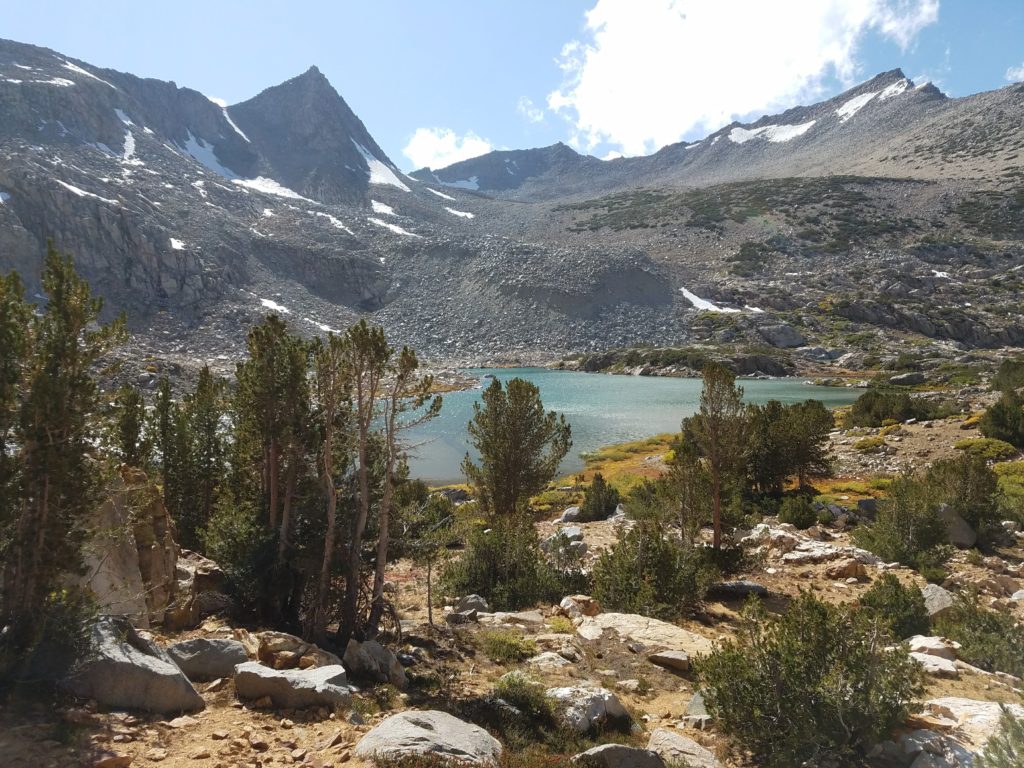
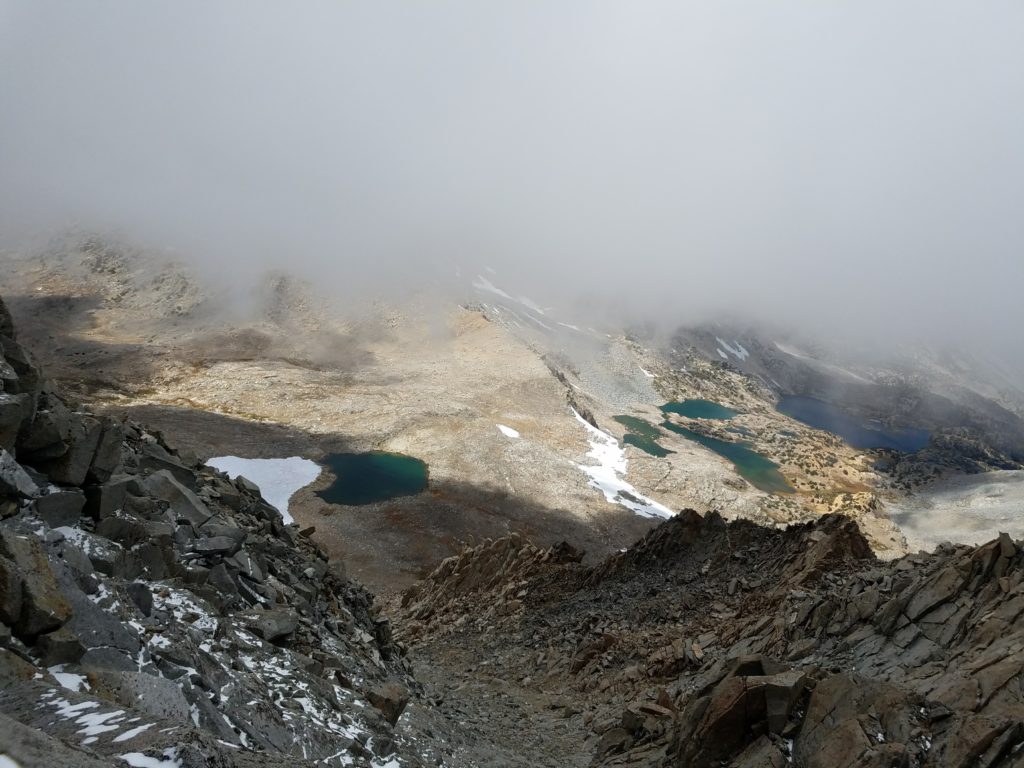
I still couldn’t see its summit or the last few hundred feet. Across a boulder field, a couple of snow patches, and a tarn, I identified two potential chutes. Both led into the clouds, themselves racing through the mountains.
Truly, the clouds flew through the pass and Mt. Agassiz, a relentless sea of incoming grey broken only by fleeting sections of blue. It drove the snow pellets sideways, but there had been little accumulation and no signs of heavier precipitation.
Mt. Agassiz Chutes
I opted for the northern chute (note: This was still a chute on the western face) for reason of proximity. It cut down on cross-country travel and light elevation gain. I wanted to immediately start climbing. And besides, it looked like the two would converge before too long.
This chute stood north of the most commonly used west-face chute. Again, at this point I could only see a few hundred feet up the mountain and couldn’t track how the chutes topped or matured. The one I chose looked easiest.
As I trekked over, the wind worsened as it blew unimpeded through the Dusty Basin and quickly numbed my hands. By the time I reached the chute’s base, I couldn’t feel my hands at all and decided it would be foolish to continue without first warming them. Higher elevation would only make things colder.
Hunched behind a large rock, head throbbing from the altitude, I warmed my hands against my stomach. Some 10-15 minutes later, hands content, I donned my heavy ski gloves and resumed the climb. It was around 11:30.
The climb started with ease. Simple Class 2 scrambling in and out of the clouds. The chute’s ridge blocked most of the wind, keeping me warm enough.
Climbing in the clouds
Intermittent greyout conditions blocked the view below and never let me see Mt. Agassiz’s summit. I frequently could only see 50 feet up. Despite the low visibility, snow had stopped and the worst clouds blew through quickly. Knowing an easy Class 2 scramble stood ahead with very little threat of devolving weather conditions, I continued.
By noon I had climbed to 13,000 feet and reached the top of the chute. The rocks directly above looked difficult to traverse and I couldn’t see what lay immediately thereafter because of the clouds. I opted instead to climb over the ridge to an adjoining chute (the main chute to which all cairns lead. It goes to the summit.
Traversing to the main Mt. Agassiz chute
Unfortunately, this chute’s opening lay directly in the wind’s path. Gusts swept through it to the summit, itself still clouded. Wind-whipped snow pellets again fell and naturally the temperature dropped.
My head had really started hurting from the altitude, but up until this point I thought I would still reach the summit I hadn’t seen. As I climbed, the wind, from time to time, briefly blew away the lowest clouds and I finally viewed the summit sitting less than 800 feet above.
After a hundred feet the rocks grew slick. My feet slipped on black ice. I felt less confident. Couple the deteriorating rock conditions with a realized loss in precise motor movements from the altitude sickness, and my earlier confidence in reaching the peak dissipated.
At 13,300 feet, I reached an impasse. Easy Class 3 moves stood at the chute’s side, but I couldn’t see what lay thereafter. Clouds covered it. A smooth rock face incline lay ahead, something generally easy to climb but this time with the thinnest layer of ice. That ice would make it a difficult scramble and though I could do so going up, I worried about slipping on descent.
I poked around and tested various footholds to avoid ice, but all had enough of it to become dangerously slick. At this point, I retreated. Assuming worse conditions above and a likely further decrease in movement finesse that would make a slippery descent worse, I backtracked and sat behind a boulder outcropping for a drink and to take my first pictures in the chute.

I felt terrible. Climbing to 13,300 – just 500 short of the summit – after acclimating only to 4,000 overnight was not a good idea. Nausea and light-headedness rolled through and I got up to descend as quickly as I safely could.
Turning Around
As mentioned, my fine motor skills had deteriorated. Though I never fell, I definitely stumbled a bit and felt rather faint. By 1 or 1:15 I had exited the chute and descended almost 1,000 feet, but I felt my worst yet.
I stopped just short of the Bishop Pass Trail to rest for a while and eat more granola bars. Sitting helped and I reveled in my first real bout with altitude sickness.

The clouds had finally broken, the wind blowing them over the Palisades and they disappeared with the escarpment. Looking back, Mt. Agassiz started to appear in more glory.
Back to the Trail
Around 1:30 I continued down the trail, moving as fast as I could to lose altitude. Switchbacks past, Bishop Lake reached, soon Saddlerock. I remembered on occasion to see the stunning view that had opened up behind me. With a major headache, I didn’t enjoy it as much as I wanted, but still the jagged peaks backdropped with dark grey clouds were a scene of pristine Sierra beauty.
Finally I could see Mt. Agassiz in its entirety, the sharp Evolution Crest peaks, and the flanking Inconsolable Range.
The rest of the hike went smoothly. In lower altitude and guarded somewhat by the wind, it felt a lot warmer and I started shedding clothes. Soon I reached the forest. Always the last stretch of trail feels like forever, but by 4:00 I could see South Lake and by 4:15 I emerged through a canopy of yellowed birches, a tunnel almost of celebration, and reached the trailhead.
Post script: For the rest of the day, I had a bad headache and felt out of it despite eating plenty of food and drinking lots of water. I retired early for an early morning the next day to attempt Middle Palisade. That morning I felt completely fine and had no issue with elevation during the attempt.
What I Learned on Mt. Agassiz
Acclimate
Unlike hiking Mt. Shasta, where I had a great acclimation plan, I went into this hike with almost no preparation – and did so knowingly. Two hours at the Whitney Portal the day before obviously hadn’t provided any really acclimation. (I hadn’t planned on that being the case.)
This aggressive plan came from want of time. I had already taken a secret day off to drive from Los Angeles to Bishop on Friday. Ordinarily, I would have done so very early in the morning and used the rest of the day to hike. But this time that couldn’t work. I needed some sleep after the 7 or 8 hour drive from San Francisco the night before, and otherwise used Friday morning to tour UCLA, my sister’s school.
I figured I would get altitude sickness, I just didn’t think it would be as bad as it was. Surely forgetting lunch didn’t help matters.
Going forward, I’ll try to structure all my trips to have a day of easy acclimation before going after a moderate peak and then a challenging peak. If that doesn’t work, I’ll tone down the hikes.
Pack lighter
Despite the frigid weather, I didn’t need as many clothes as I brought. This would be a bigger issue on Middle Palisade where I had even more layers in addition to crampon and an ice axe, but I still could have made matters easier for myself.
Double-check food
This should be a no-brainer, but sometimes it takes a bad experience to make something a lasting habit.
Time Splits
Began hike to Mt. Agassiz: 8:30a
Reached Bishop Lake: 10:30a
Reached Bishop Pass: 11:00a
Began hiking in the chute: 11:30a
Traversed to main chute: 12:00p
Turned around: 12:30p
Reached Bishop Pass trail: 1:30p
Returned to trailhead: 4:15p
Equipment
More Pictures


An Autumn Attempt to Hike Middle Palisade
Date I attempted Middle Palisade: September 29, 2019
Result: Failed to reach peak
Hiking Middle Palisade
I had a fortunate work excuse to expense a flight to California and naturally made the most of the opportunity with a late-season trip to the Sierra and attempt to climb my second fourteener, Middle Palisade.
The plan: Drive to Los Angeles from San Francisco on Thursday, head to Bishop after a quick detour at the Whitney Portal on Friday, hike Mt. Agassiz on Saturday, and then climb Middle Palisade on Sunday before returning to LAX for a red-eye back to Chicago.
Unfortunately, weather waylays even the best laid plans. While the week had calm and near balmy weather, shifting and powerful winds drove down the temperature to single-digits with a -10 wind chill on the summit and last thousand feet to it, according to Mountain Forecasts.
Directions to Trailhead
I woke at 3:45a in the comfortable Bishop AirBnB and hurriedly packed my things and drove the 40 minutes to the Big Pine Creek trailhead at the end of Glacier Lodge Road. Reaching that point is easy: Turn onto Crocker Road from US-395 and follow until it dead-ends.
The creek still roared with continued melt from the high snow year. Wind didn’t howl – the trailhead being somewhat protected in a valley – but coursed through the trees. It was 32 degrees at 5:10, not too bad but definitely felt colder.
I began the hike at 5:30, half an hour later than hoped (I would want those 30 minutes back as the day wore on). The hike’s beginning confuses a lot of people, if other trip reports are representative of the community. But it really needn’t be.
Finding the Middle Palisade Trailhead
The day hike parking lot at the road’s end marks the trail’s beginning. Immediately at the end of the lot, by the double outhouse, a gate blocks the road. (It’s possible in the summer months this gate stays open. Regardless of its state, the road narrows and is no longer paved, so it’s clear when you’re on it.). Skirt the gate and begin hiking.
There’s a bridge to the left of the day lot. Don’t take it. You’ll have to ford the creek to regain the trail. Follow the road and then signs for the trail. It leads across a lovely bridge over some small cataracts in the creek and continues through the forest. Soon it deposits hikers into a meadow a bit to the ascender’s right of the Big Pine Creek, replete with high grasses.
An obvious fork splits the trail between South Fork and North Fork. Stay on the South Fork for Middle Palisade.
The only point of potential confusion comes around 0.75 miles in when a road bisects the trail. Don’t turn onto it. The Big Pine Creek South Fork trail continues just past it, though not exactly straight from the intersection.
Through the Meadow
I paused a bit too frequently to enjoy the tapestry of stars woven into the night. With no competing moon, the Milky Way shone beautifully and I reveled in a beautiful sight always hidden by Chicago’s light pollution.
My dying headlamp only cast its beam some 10-15 feet ahead of me. Though I did have extra batteries I felt no need to use them. I could see enough and enjoyed the edge of darkness near me from which the outlines of magnificent pines emerged. High ridges guarded the trail and protected from the worst of the wind.
After meandering through the meadow from whose vantage I could look back at a group of hikers who preceded me to the parking lot but hit the trail after me (though it didn’t initially look like it, they ended up taking the Big Pine Creek North Fork trail), the trail drops back to the creek whose call had never left.
About 1.5-2 miles into the hike, the trail crosses the creek. Other trip reports indicate potential difficulties in early season climbs or lacking infrastructure to make one’s way across. I experienced no such difficulty. A makeshift bridge of three sown together logs spanned the creek and while this bridge looked tenuous, it proved surprisingly stable. This crossing leads to another meadow that soon comes across the first headwall and significant elevation gain.
Up until that point, elevation gains slowly. It’s a great opportunity to crank out 20-23 minute miles and save some time for the harder parts of the climb.
Switchbacks
I reached the switchbacks after an hour or so and still hoped to make Brainerd Lake after two hours of hiking, though I hadn’t been overly satisfied with my pace thus far.
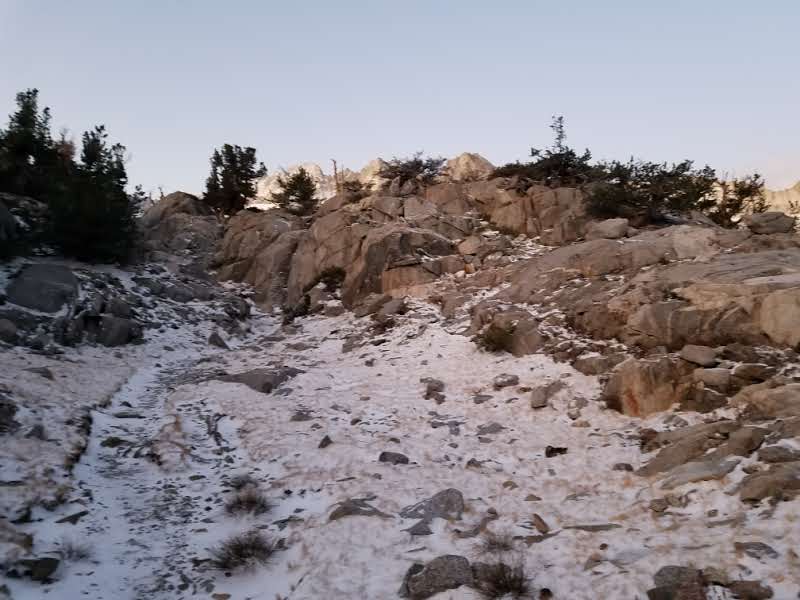
Snow, which had collected just in the ruts on the trail’s side, now dusted and soon coated the path. Though forecast for less than an inch overnight, it had graced the Palisades with 3 inches on their lower flanks, 4-6 inches on the higher approaches, and nearly 12 inches in the chutes. This made the bridge crossing a little more precarious and would present obvious difficulties later.
One lone hiker had succeeded in getting an actual early start and I followed his footsteps through the switchbacks. The sun’s rays rose before it and drove the stars back. I had turned off my headlamp on approach to the switchbacks. Had I made better time – or started earlier – I would have seen remarkable alpenglow on the snow-covered Palisades, but I still enjoyed the sentinels around the valley catch the first beams of light.
The switchbacks took me longer than they should have. Too heavy a pack and inadequate acclimation slowed me, as did the biting wind that channeled through this one gap to the valley floor.
By the time I broke the headwall, passed the turnoff for Willow Lake (no mosquitoes bothered me thanks to the cold), and took time to answer nature’s call, I knew I wouldn’t make Brainerd in two hours.
Brainerd and Finger Lakes
Snow made the trail a bit difficult to follow at times, but overall route finding remained obvious. I reached Brainerd around 8:00, 30 minutes behind a schedule I hoped to beat in the first few miles. Huddling behind a rock to avoid the wind, I rested and ate some breakfast.
Plenty of cairns guide hikers up the 300 or so vertical feet to Finger Lake. They really aren’t needed. Almost any route will do so long as you keep boulders in front of you. This turned out to be the easiest climbing of the day and I reached the plateau to Finger Lake by 8:45.
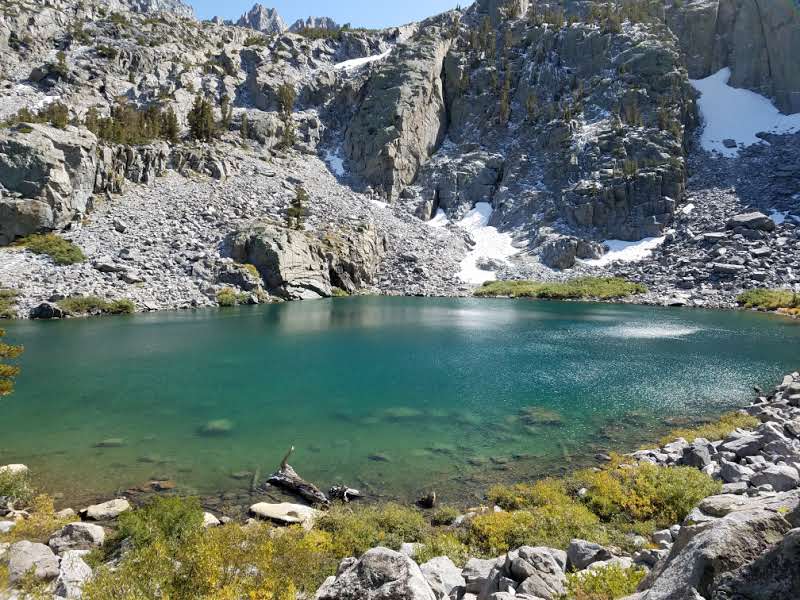
I went down to its shores and, with high expectations for Finger Lake, felt immediate disappointment. It underwhelmed in an early dawn light that muted colors.
Finding its northern terminus, now the most common place to cross and begin the arduous ascent to MidPal, was difficult in the snow. I traced the right and wrong steps of the earlier hiker and found the crossing boulders after only a couple of wrong turns.
To the Middle Palisade Glacier
From that point forth, hikers scramble over boulders en route to the rib that cuts in half the Middle Palisade glacier. The previous night’s snowfall coated the rocks and left many icy underneath the white layer. Tricky and unpleasant climbing ensued.
Boulder scrambling, for me at least, is weird. Time elongates. Each hundred vertical feet – and the many breaks – seem to take hours but clocks say otherwise. It’s reassuring to know what feels like a slow pace isn’t actually horrendous.
I progressed slowly, slipping many times despite using my hiking poles to test for slick surfaces and rock instability. Between the snow/ice and not truly measuring whether a rock would support my weight, I navigated with too much caution – and still managed to fall and bruise my shins on many places.
There’s no obvious route here, at least that I could find. Haphazardly placed cairns lead no where and boulder mounds block good visibility. I think I climbed too high too fast and should have stayed lower and to my left to avoid the biggest boulders and move quicker to the glacier’s base.
Climbing high does open another route. It reaches the glacier above its lower moraine and makes for a straightforward traverse to the rib. Peaks for Freaks followed that route. Given the Middle Palisade glacier has few, if any, crevasses, it is safe to cut across the glacier given the right equipment.
With the snow hardened into smooth ice, I didn’t want to cross the glacier and traversed the boulder field laterally and down a bit to cross to the moraine just below the glacier. Again, I should have stayed lower throughout this scramble and saved the elevation gain for later.
At this point, I paused for much too long, deciding whether to strap on my crampons and make a direct route across the Middle Palisade glacier or continue working across the snow-accumulated boulders. The wind had noticeably picked up and any exposed pause decreased my willingness to continue hiking. Noting the concerns mentioned above, I continued along the base of the glacier to the rib.
Turning Around
I reached the rib at noon and dropped my pack heavily. At this point I knew I wouldn’t make the summit. Weather had slowed me – I couldn’t zip across the boulders as I hoped – and I myself by lugging too heavy a pack. My decision: Continue hiking to the base of the chutes for recon’s sake or backtrack and hope to leave a bit ahead of schedule.
My initial goal had been 7 hours up and 5 hours back. I also had an extra hour in reserve should I need it. It was an audacious goal given Middle Palisade has taken day hikers up to 26 hours, but I figured I could do it (if weather permitted).
I had reached 6.5 hours and figured at very best it would take 90 minutes more to be near the summit – and that was a guess without knowing the chute conditions. It didn’t add to a successful summit day.
Not reaching the summit – or coming particularly close – sucks. A lot. It gave me flashbacks to the failed attempt on Mt. Shasta in May. Feels of obscene disgust and disappointment flowed through me and I kicked myself in anger at everything I could have done better. Should have woken up earlier. Moved faster on the flatter parts of the trail. Taken fewer and faster breaks on boulders. Packed lighter. Better cardio. And so on.
The wind didn’t make me feel any better. I’m guessing the raw temperature had fallen to the teens with a wind chill near 0 when it gusted between 30 and 40 mph. So in the face of bad weather and guessing I wouldn’t make up too much time, I turned around in Middle Palisade’s shadow at the base of the rib.

Hating myself, I began to trudge down the boulders, taking the occasional long snack break as I had no rush to return. Scrambling had long grown old. Streams had frozen with water gurgling under a layer of ice.
Descent to Finger Lake
I made the same mistake coming down to Finger Lake that I made going up. Though I tried to follow cairns, their trail inevitably dried. Rather than downclimbing fast and then staying low and skirting the edge of the boulder field on what looked like relatively flat and smooth rocks, I kept elevation over the field and actually came close to a frozen tarn almost due west of the middle of Finger Lake. I should have been lower.
This led to some awkward downclimbing on steep and icy rocks, naturally further slowing progress. Eventually I regained some cairns and cut across the some other boulders that led to an obvious use trail to the base of Finger Lake.
Cairns led me a bit astray here into some Class 3 maneuvers that could have been easily avoided. Everything to this point had been straightforward Class 2. I backtracked, knocked down the cairn, and plopped to eat some bagel.
Chute beta
At that point, I heard tramping behind me and, startled, looked back as the person whose footsteps I had been chasing burst into the opening.
We stopped and chatted for a bit. He started some 30-40 minutes before I did and, unlike me, had made it to the chute. As with many Middle Palisade climbers, he tried to find the main chute off the glacier’s left but couldn’t identify the rock formations that indicated the ledges that entered the chute.
He then backtracked and cutover to the red rocks, or Secor, chute. He followed that chute to the gendarme before turning around because of dangerous conditions.
Snow piled nearly a foot high – in some places more – throughout the Secor chute. That meant stepping and clinging onto dangerously unstable rock without the benefit of sight. Blind steps and Class 4 maneuvers into a snow and ice bank.
At that point he turned around, recognizing the dangers didn’t outweigh the rewards of a frozen mountaintop. Clearly he made great time coming down.
He was obviously a better climber than me (this was his first 14er where he had to turnaround), so our conversation rejuvenated me and instantly wiped out all negative thoughts. I had made the right decision in turning around and kept myself from a dangerous climb. No reason to feel so much self-hatred 🙂
He left and we would alternately pass each other for the next 30 minutes before I took one long break to enjoy a final view of Middle Palisade and he descended in a hurry.
A Smooth Descent
Finger Lake looked beautiful in the afternoon light. Its turquoise waters glistened and rippled in the wind; the perfect setting to look back on the Palisades. It truly looked like the Sierra gem everyone describes, unlike in the morning.
The remaining climb went smoothly and relatively quickly. After passing Brainerd and before descending the switchbacks I took a long snack break to enjoy the last views of Middle Palisade and Norman Clyde Peak.
After zipping through the meadows – and seeing some dear – I returned to the trailhead at 4:10 for a total trip of nearly 11 hours. I had made up some time on descent and probably could have trudged up the rib, but I didn’t regret the decision. It saves extra adventure for next time.
What I Learned on Middle Palisade
pack lighter
I way overpacked. Knowing the weather would descend to negative wind chill, I crammed my bag full with polyester layers, a windproof jacket, puffer jacket, extra leggings, socks, and gloves. I even carried around my neck heavy snow pants.
Couple that with a hearty lunch, crampons, first aide equipment, a helmet, and ice axe, my pack burdened me beyond reason.
In the future, even when hiking in cold weather, I will cut down on the extra layers knowing that so long as I have a fleece windproof outer layer, I’ll likely be fine. One extra layer would have been enough.
Same thing with the snow pants. I didn’t need them. An extra legging layer was all that would have been necessary.
use water purifiers/filters
I carried 3 water bottles and only worked through 2 of them. I probably can cut out one – especially as 2 our 32+ fluid ounce hydroflasks. Given the cold, though, I didn’t want to refill freezing water, hence the extra bottle.
Next time, I will also start an hour earlier. With longer daylight, that should easily give me 15 hours to hike Middle Palisade. A lighter pack and better weather should make that sufficient.
acclimate
Lastly, I needed a better acclimation plan. My lungs definitely hadn’t fully adjusted to the elevation.
Unlike Mt. Shasta, where I acclimated by going to Shastarama Point and Shastina on the two preceding days, I had only hiked the previous day when I attempted Mt. Agassiz.
That hike, up to 13,300 (short of the summit) from around 4,000 in Bishop, resulted in bad altitude sickness. One extra day to hike to 12,000 feet before Mt. Agassiz would have solved this issue.
Time Splits
Began hike: 5:30a
Switchbacks: 6:30a
Split to Willow Lake: 7:30a
Brainerd Lake: 8:00a
Finger Lake: 8:45a
Base of Rib: 12:00p
Finger Lake: 1:30p
Brainerd Lake: 2:00p
Switchbacks: 3:30p
Trailhead: 4:10p
Equipment
I’ll be back to reach the peak! 🙂
More Pictures

Thoughts or comments? Leave ’em below!